

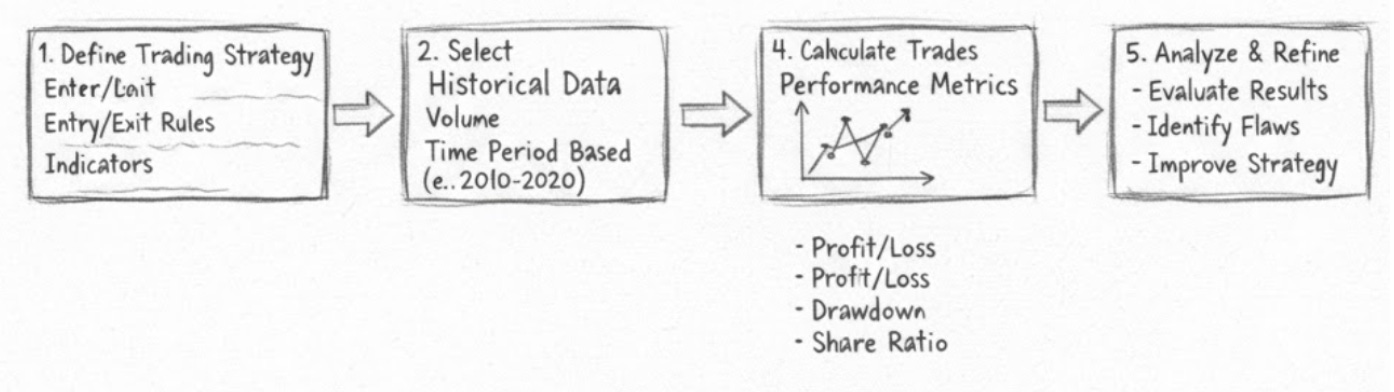
Building a robust Financial Machine Learning Pipeline
Hyperparameter Tuning, Signal Generation, and Event-Driven Backtesting using Zipline

Download source code using the button at the end of the article!
In the domain of quantitative finance, the chasm between a theoretical machine learning model and a profitable trading strategy is vast. While finding predictive signal in noisy financial data is difficult, building an infrastructure that can rigorously test that signal without succumbing to look-ahead bias or overfitting is an even greater challenge. Since it is rarely possible to know in advance which network architecture will best suit dynamic market regimes, a systematic approach to optimization and validation is required.
This article outlines a comprehensive, end-to-end workflow for developing a Deep Neural Network (DNN) capable of predicting asset price returns. We move beyond simple model fitting to explore the complexities of financial feature engineering, custom cross-validation, and the architectural “plumbing” required to integrate modern Machine Learning predictions into the Zipline backtesting engine.
We will explore the creation of a simple feedforward neural network, utilizing Grid Search to optimize hyperparameters such as layer depth and dropout rates. Crucially, we shift the evaluation metric from standard loss functions to the Information Coefficient (IC), prioritizing the model’s ability to rank assets effectively. Finally, we demonstrate how to bridge the gap between research and execution by injecting these custom ML signals into a Zipline pipeline, allowing us to simulate realistic trading constraints, transaction costs, and portfolio rebalancing logic. This is not just about predicting stock prices; it is about engineering a reproducible system for verifiable alpha.
Since it is rarely possible to know in advance which network architecture will best suit the data, we must examine variations of the design options outlined above. In this section, we explore options for building a simple feedforward neural network to predict one-day asset price returns.
Imports and Settings
import warnings
warnings.filterwarnings(’ignore’)
This single call changes Python’s global warnings policy so that any warnings emitted via the warnings module are suppressed and do not appear on stdout/stderr for the rest of the process. Practically, that means deprecation notices, runtime warnings (like overflows or invalid value operations), user-defined warnings from libraries, and other non-fatal alerts that would normally be printed will be silently dropped after this line executes.
Why someone might do this in a deep learning workflow is straightforward: training loops, third-party libraries, and data preprocessing steps frequently emit many benign-looking warnings that can clutter logs and obscure the core training metrics and progress bars. In an exploratory notebook or a quick prototype for model architectures, suppressing warnings can make outputs easier to read and reduce distractions when you’re iterating rapidly on model topology, hyperparameters, or visualization.
However, in the context of financial prediction models the decision to ignore warnings has important trade-offs. Warnings often carry actionable signals about numerical instability (NaNs, overflows, underflows), mismatched shapes, deprecated APIs whose behavior may change in future library versions, or potential data quality issues. Silencing them risks letting critical problems go unnoticed during experimentation and into production — an especially serious concern for financial systems where model correctness, reproducibility, and auditability are required.
A better practice is to be selective rather than global: suppress only the non-actionable warnings (for example, cosmetic warnings from plotting libraries) or limit suppression to a narrow scope using a context manager when printing must be clean. For robustness, capture warnings to a log file or elevate them to errors in test/CI environments so that regressions and potential instabilities fail fast. Also configure library-specific loggers (TensorFlow/PyTorch) for noise you genuinely want to reduce; note that some backend or C++ logs are not controlled by Python’s warnings module and need separate handling.
In short, the line reduces noise by hiding all warnings, which can be helpful during quick iterations, but it also removes important guardrails. For prototyping you can use it sparingly, but for production-ready financial prediction pipelines you should prefer targeted suppression, structured logging of warnings, and CI policies that surface or fail on warnings so numerical or API issues cannot silently slip through.
%matplotlib inline

import os, sys
from ast import literal_eval as make_tuple
from time import time
from pathlib import Path
from itertools import product
import numpy as np
import pandas as pd
import matplotlib.pyplot as plt
import statsmodels.api as sm
from scipy.stats import spearmanr
import seaborn as sns

from sklearn.preprocessing import StandardScaler

import tensorflow as tf
from tensorflow.keras.models import Sequential
from tensorflow.keras.layers import Dense, Dropout, Activation
This block of imports sets up a reproducible, experiment-driven workflow for building and evaluating deep neural networks on financial time-series or cross-sectional data. At the top, the notebook display is prepared by the inline magic so figures render directly in the notebook; this is purely a presentation choice that keeps visual diagnostics (loss curves, feature distributions, heatmaps) next to the code that produced them and speeds iterative model development.
Next come small utilities that control how data and experiments are discovered and measured. Pathlib and os provide robust, platform-independent handling of file paths for datasets, model artifacts and logs; literal_eval (make_tuple) is a common, safe way to parse configuration tuples that may be stored as strings (for example, layer-size tuples or hyperparameter specs loaded from a CSV or config file). time.time is included so we can timestamp runs or measure elapsed training/validation durations, which is important for comparing model complexity vs. runtime. itertools.product is typically used to generate combinatorial hyperparameter grids — for example, iterating over learning rates, layer sizes and dropout rates — so you can run controlled experiments.
Numpy and pandas are the core numerical and tabular tools you will use to load, clean and shape financial inputs: numpy for efficient vectorized operations and linear algebra, and pandas for time-indexed series, resampling, shifting (lags), and merging features with labels. Financial prediction workflows often require careful alignment of timestamps, calculation of returns, rolling statistics and windowed features; pandas is the right tool for those tasks before moving data into machine-learning pipelines.
Exploratory analysis and diagnostics are handled by matplotlib, seaborn and statsmodels. Matplotlib/seaborn are used for plotting distributions, correlation matrices and prediction diagnostics; those visuals guide feature selection and reveal nonstationarity, regime shifts or outliers. statsmodels provides econometric tools and classical baselines — e.g., OLS, ARIMA-type modeling and rich diagnostic tests — which are useful both as benchmarks for neural models and to test assumptions (heteroskedasticity, autocorrelation) that could impact how you construct input features or targets. scipy.stats.spearmanr is included because rank-based correlation is often more appropriate for financial features that have heavy tails or monotonic but nonlinear relations with the target; using Spearman helps identify predictive monotonic relationships that Pearson might miss.
Before feeding features into a neural network, the code imports StandardScaler from scikit‑learn to normalize inputs. Scaling to zero mean and unit variance is critical for deep networks: it keeps gradients well-conditioned, prevents early saturation of activation functions, and ensures different features contribute comparably during optimization. In practice you should fit the scaler on the training set only and apply it to validation/test splits to avoid leakage; that decision is why we prefer a dedicated transformer rather than ad hoc normalization.
Finally, the TensorFlow/Keras imports set up the model-building and regularization primitives you’ll use. The Sequential API gives a straightforward way to stack fully connected layers (Dense) which are a common starting architecture for tabular financial prediction. Dense layers capture linear combinations of learned features; Activation layers inject nonlinearity (ReLU, tanh, sigmoid) and their choice affects gradient flow and output behavior — for example, ReLU avoids vanishing gradients in deep nets, while tanh/sigmoid may be useful for adversarial or bounded targets. Dropout is included as a standard regularizer to reduce overfitting to noisy financial signals by randomly zeroing activations during training. More broadly, these Keras objects allow you to experiment quickly with architectures, layer widths, activation functions and regularization, while the rest of the stack (scaler, diagnostics, plotting, experiment utilities) supports responsible preprocessing, comparison to baselines, and measurement of model performance and cost.
Taken together, these imports represent an end-to-end toolkit: discover and parse experiments, load and engineer financial features, explore and validate relationships, normalize inputs to stabilize training, and construct/regularize neural architectures — all with tools to visualize results and measure runtime so you can iterate toward robust predictive models.
gpu_devices = tf.config.experimental.list_physical_devices(’GPU’)
if gpu_devices:
    print(’Using GPU’)
    tf.config.experimental.set_memory_growth(gpu_devices[0], True)
else:
    print(’Using CPU’)
This block first queries TensorFlow for available physical GPU devices and branches based on whether any GPUs are present. The branch is there because, for deep neural networks in financial prediction, we want to preferentially use GPU acceleration when available (matrix ops and convolutions run orders of magnitude faster on modern GPUs), but we must fall back to CPU if no GPU exists. The log messages (“Using GPU” / “Using CPU”) are simple runtime signals so downstream experiment logs clearly show what hardware the run used.
If a GPU is found, the code enables “memory growth” on the first GPU device. The reason this matters is that TensorFlow’s default behavior on many builds is to pre-allocate (or greedily reserve) most or all of a GPU’s memory at process start. That aggressive allocation can cause two practical problems in an experimental or production environment common to financial-modeling workflows: (1) it prevents running multiple experiments or other processes on the same GPU because memory is already claimed, and (2) it can cause surprising out-of-memory failures if other libraries or prior allocations exist. Enabling memory growth makes TensorFlow allocate GPU memory incrementally as tensors and model state are created, which is more robust when batch sizes, model sizes, or the number of concurrent jobs vary during model development and hyperparameter search.
A couple of important operational details follow from how this is written. The call to set memory growth must happen before any GPU memory is actually allocated by TensorFlow — i.e., before building models or creating tensors — otherwise TensorFlow will raise an error. The code only sets growth on the first discovered GPU (gpu_devices[0]), which is a pragmatic default for single-GPU training but is a limitation if you plan to use multiple GPUs or a distributed strategy; in those cases you would explicitly set growth on each device and typically use a distribution API (e.g., MirroredStrategy) or explicitly select visible devices. Finally, note that this uses the experimental tf.config API variant; newer TensorFlow releases expose stable equivalents, so you should align this snippet with your project’s TensorFlow version for long-term maintainability.
In short: the block detects whether GPU acceleration is available and, when it is, switches TensorFlow into a conservative GPU-memory allocation mode so that training financial prediction models is both faster (when GPU is used) and more robust/controllable in multi-job or variable-workload environments.
sys.path.insert(1, os.path.join(sys.path[0], ‘..’))
from utils import MultipleTimeSeriesCV, format_time
The first line is a deliberate, minimal hack to make a local sibling module discoverable to this script: it inserts the parent directory of the running script into Python’s import search path so that the subsequent from utils import … can succeed. Practically this means the codebase is organized with utility modules (e.g., a utils package) one directory level above the script, and rather than installing the package or using a package-relative import, the script temporarily extends sys.path so those utilities are importable. This choice trades packaging/installation complexity for convenience in development, but it also carries important caveats — it can be fragile (breaks if the script is executed from a different working directory or as part of a packaged test run), and it can unintentionally shadow similarly named installed packages. For long-term stability and reproducibility I recommend converting the codebase into an importable package (pip install -e . or proper package-relative imports) or guarding the insertion with clearer path resolution and error handling.
The import itself brings two helpers into the script: MultipleTimeSeriesCV and format_time. MultipleTimeSeriesCV encapsulates the time-series-aware cross-validation logic needed for financial prediction. Its role is to produce train/validation splits that respect temporal order and avoid lookahead leakage across multiple assets or instruments: instead of random k-fold shuffles that assume IID data, this splitter generates rolling or expanding windows (or grouped splits per instrument) so that each validation set lies strictly after its corresponding training set. That behavior is critical in a finance context because market dynamics change over time and because any forward-looking information leaking into training will produce optimistic, non-deployable performance estimates. MultipleTimeSeriesCV also typically handles multi-series edge cases — different series lengths, gaps, alignment across timestamps, and ensuring that when you tune hyperparameters or evaluate architectures you’re measuring generalization across time regimes and across instruments rather than overfitting to a particular window.
format_time is a small utility for converting elapsed seconds into a human-readable duration string for logging and experiment reporting. In practice we use it to annotate the training loop, per-fold CV timings, dataset preparation, and hyperparameter search iterations so we can track compute cost, identify slow stages (data I/O, model compilation, or batch processing), and make informed decisions about early stopping or parallelization. Having readable timing in logs also helps correlate performance regressions with code or data changes when iterating on neural architectures.
Taken together, these two imports are about bringing in the project-specific machinery that enforces safe evaluation of deep learning models on temporal financial data and about making experiment logging intelligible. The surrounding decisions — modifying sys.path versus packaging properly, and the exact behavior of MultipleTimeSeriesCV (rolling vs expanding windows, gap handling, grouping strategy) — directly affect the fidelity of your model validation and thus the credibility of any performance claims you derive from your experiments.
np.random.seed(42)
sns.set_style(’whitegrid’)
idx = pd.IndexSlice
These three lines are small but deliberate pieces of experimental hygiene that you run once at the top of a notebook or script so everything that follows is easier to interpret, reproduce and reason about.
First, np.random.seed(42) fixes NumPy’s pseudo‑random number generator to a reproducible state. In a pipeline for financial prediction you rely on random processes for things like shuffling data, bootstrap sampling, random feature dropout in preprocessing, or any NumPy‑based weight initialization or augmentation code. Setting the seed makes those operations deterministic across runs so that model training, validation splits, and baseline comparisons are stable. Note the limitation: this only controls NumPy’s RNG; if you use other libraries (PyTorch, TensorFlow, Python’s random, CUDA kernels) you should set their seeds and, if strict reproducibility is required, enable framework-specific deterministic modes and document the seed value used. Choosing 42 is arbitrary but consistent — the important thing is that the seed is fixed and recorded so experiments are repeatable and results can be audited in a financial context.
Second, sns.set_style(‘whitegrid’) is a global plotting configuration that standardizes the look of diagnostic figures (training/validation loss curves, feature distributions, residuals over time, heatmaps of attention/weights, etc.). The whitegrid style gives a light background with subtle grid lines which improves readability for time‑series plots and makes it easier to align visual cues (e.g., where a loss curve crosses a threshold or where an anomaly occurs in a price series). This line does not affect model computation; its purpose is consistency and clarity in visuals so comparisons across experiments — presentations, notebooks, or reports to stakeholders — are unambiguous.
Finally, idx = pd.IndexSlice creates a convenient alias for pandas.IndexSlice to simplify slicing MultiIndex DataFrames and Series. In financial DNN workflows we often represent panel data with MultiIndex axes (for example level 0 = asset, level 1 = date, level 2 = feature), and IndexSlice lets you write expressive, readable loc selections across those levels (e.g., df.loc[idx[:, ‘2020–01–01’:’2020–12–31’], :]). Assigning idx once at the top keeps the later code concise and makes complex selections easier to scan and maintain.
Together these lines set up deterministic, readable, and maintainable experiments: reproducible randomness for reproducible model comparisons, consistent plotting for clear diagnostics, and a slicing helper for working with structured financial panels.
DATA_STORE = ‘../data/assets.h5’This single line is declaring the canonical data source for the training and inference pipelines: it points to an HDF5 file named assets.h5 in a data directory one level up from the current working directory. Conceptually, this constant is the single authoritative reference to the serialized dataset our models consume, which makes it the natural choke point for concerns like data layout, performance characteristics, access patterns, and governance.
We choose HDF5 here because it is well-suited to large, columnar time-series and multi-asset datasets: it provides hierarchical grouping (so you can store separate groups for raw prices, normalized inputs, labels, and asset metadata), chunked storage and compression (so reads for contiguous time windows are efficient), and partial I/O (so we can stream minibatches rather than loading the entire corpus into memory). Those properties directly affect model training performance and memory footprint — using HDF5 lets the data loader request only the slices needed for each minibatch and aligns I/O throughput with GPU/CPU processing, which is important for financial models that operate on long lookbacks or many instruments.
Because this is a relative path, it has operational implications: the process’s current working directory will determine which file is opened. For reproducibility and for running experiments on different machines (local dev, CI, cloud instances, or Kubernetes pods), make this path configurable (environment variable or config file) rather than hard-coded. Also validate the path at startup and fail fast with a clear error if the file is missing or inaccessible — silent fallbacks to empty datasets are a common source of hard-to-debug training discrepancies.
Performance tuning of the HDF5 file itself matters to downstream model convergence and training throughput. When the dataset is generated or updated, set chunk sizes that align with our minibatch and time-window shapes so that each read pulls contiguous chunks; avoid tiny chunks (high overhead) or huge chunks (excessive memory). If multiple workers will read concurrently (multi-process dataloaders or distributed trainers), consider file locking, a read-only sharded layout, or using a parallel filesystem because concurrent writes or many small reads can become a bottleneck. For very large-scale training, consider sharding the HDF5 into per-worker files or serving data through a performant data service rather than a single file.
From a data integrity and governance perspective, this file should be treated as an immutable artifact for a given experiment run: record the file path plus a checksum, creation timestamp, and dataset schema/version in your experiment metadata so results are traceable and reproducible. Financial prediction models are sensitive to even small changes in feature construction and labeling, so preserving the exact assets.h5 used for a run (or embedding its version identifier in model artifacts) is crucial for debugging model drift or regulatory review.
Security and privacy also matter: this file will likely contain sensitive price histories or proprietary feature engineering. Keep it outside the repository, restrict filesystem permissions, and ensure any CI or cloud pipelines that access it use appropriate credentials and auditing. If the workflow requires sharing data between team members or compute clusters, prefer a controlled object store or dataset registry with access controls rather than copying raw HDF5 files to arbitrary machines.
In short, assets.h5 is not just a filename constant — it’s the single entry point to our training data and thus a focal point for performance tuning, reproducibility, concurrency handling, and security. Treat it as a configurable, versioned artifact, tune the HDF5 layout to match minibatch and lookback patterns, and surface clear validation and provenance checks at startup so the downstream DNN training behaves predictably.
results_path = Path(’results’)
if not results_path.exists():
    results_path.mkdir()

checkpoint_path = results_path / ‘logs’
This snippet’s purpose is to establish a predictable place on disk where training artifacts and runtime metadata can be written, then to derive a specific subpath for checkpointing and logs. First it constructs a Path object referring to a top-level “results” directory and only creates that directory if it does not already exist. This guarantees that subsequent filesystem operations that persist outputs (models, metrics, training curves, serialized scalers, etc.) have a container to live in rather than failing with a “no such file or directory” error. After that the code computes a child path named “logs” under “results” and assigns it to checkpoint_path; that path is intended as the canonical location to deposit checkpoints and logging output during training runs.
Why this matters for deep neural networks in financial prediction: models must be reproducible, auditable and available for backtesting and validation, so having a single, stable place for artifacts helps organize experiment outputs, supports later comparisons between architectures or hyperparameter settings, and makes it straightforward to wire persistence into training loops and checkpoint callbacks. Creating the parent “results” directory up front reduces unexpected runtime failures when the training loop or logging handler attempts to write files.
A few practical implementation considerations follow from how this is written. The code only creates the “results” directory — it does not create the “logs” subdirectory, so callers that write into checkpoint_path must either create it later or write in a mode that creates intermediate directories. Also, the exist-check-then-mkdir pattern has a small race condition in concurrent runs (another process could create the directory between the exists check and mkdir); using mkdir(…, parents=True, exist_ok=True) is a more robust pattern. For experiment management, consider creating uniquely named run subdirectories (timestamp, git commit hash, or incremental run IDs) under results/logs to avoid accidental overwrites and to make it easier to trace model artifacts back to specific training configurations — a critical detail when models influence financial decisions and require auditing.
Construct a stock return series to predict asset price movements
To develop our trading strategy, we use daily returns for approximately 995 U.S. stocks over the eight-year period 2010–2017, together with the features developed in Chapter 12: volatility and momentum factors, and lagged returns ranked cross-sectionally and by sector.
data = pd.read_hdf(’../12_gradient_boosting_machines/data.h5’, ‘model_data’).dropna().sort_index()This single line pulls a prebuilt dataset out of HDF5 storage, cleans it, and guarantees a deterministic temporal ordering so downstream model code can safely build sequences and splits. Concretely, we read the table keyed by ‘model_data’ from an HDF5 file (an efficient on-disk container for large tabular blobs), producing a DataFrame containing whatever prejoined features and targets were persisted there. We immediately call dropna() because neural networks (and most supervised-training pipelines) cannot accept rows with missing feature or label values without explicit handling; dropping here is a simple, fast way to avoid NaNs propagating into batches and corrupting loss/gradient computation. Finally, we sort by the DataFrame index so that rows are in a consistent chronological order — this is critical for financial prediction where the index is typically time; sorting ensures that sequence construction, rolling-window feature generation, and time-based train/validation/test splits do not accidentally use future information or produce nondeterministic orderings between runs.
A couple of practical cautions tied to why this happens the way it does: dropna() without arguments removes any row that has any missing cell, which is safe when those rows are sparse and dropping them won’t bias the target distribution, but it can introduce survivorship or sampling bias in financial data if missingness is systematic; consider targeted imputation (forward/backward fill, model-based imputation) when missingness correlates with labels or instruments. Also, sorting by index assumes the index encodes the correct time ordering (DatetimeIndex and timezone handling should be confirmed), because later stages will rely on sequentiality to avoid lookahead leakage. Finally, note that this reads the entire key into memory — for very large histories, consider querying subsets from the HDF5 store or streaming in chunks before cleaning to keep memory usage predictable.
data.info(show_counts=True)This single call is a lightweight, non-destructive inspection of the in-memory DataFrame: it prints the index range, each column name, the data type for that column, and — because show_counts=True — the count of non-null entries for every column along with (usually) an estimate of memory usage. Think of it as a quick diagnostic that tells you “what lives in this table” and “how complete it is” before any preprocessing or modeling.
Why this matters for deep-learning models in financial prediction: the dtype information tells you which features are numeric, which are object/strings, which are datetimes, etc., and the non-null counts immediately reveal missing-data patterns and columns that are mostly empty. Those two pieces of information drive concrete architectural and preprocessing choices: heavy missingness may require imputation strategies or dropping a column altogether; object/string columns typically need categorical encoding or embeddings (and you must check cardinality because very high-cardinality categories imply large embedding tables); datetime columns need parsing and feature extraction; and many numeric columns reported as float64 can usually be downcast to float32 to save memory and match GPU precision. Memory usage reported here helps size batches and decide whether to downcast dtypes or stream data from disk rather than load everything into GPU memory.
How you should use the output in the pipeline: read the non-null counts to compute missing fractions (missing_fraction = 1 — count/len(df)) and decide imputation/masking strategies; inspect dtypes and plan casts (object→category, float64→float32) and datetime parsing; flag columns with extreme sparsity or infinite values for closer cleaning; and identify potential target/label columns and index/date columns to exclude from feature tensors. In short, data.info(show_counts=True) is the first diagnostic step that informs downstream preprocessing, memory optimization, and model architecture decisions (e.g., whether you need embeddings, masking layers, or special handling for time features) before you build and train the deep neural network for financial prediction.
outcomes = data.filter(like=’fwd’).columns.tolist()This single line is isolating the model’s target columns from the full DataFrame so downstream training code can treat them as the labels (y) rather than inputs (X). Practically, it picks every column whose name contains the substring “fwd” — in our conventions that typically denotes forward-looking targets such as forward returns or event labels computed over different horizons — then converts that column index into a plain Python list. The result is an ordered list of target column names that you can use to build the target matrix, wire up a multi-output DNN (one output per horizon), map loss weights to specific horizons, or ensure consistent column ordering between training, validation and inference pipelines.
Why this matters: separating and explicitly naming target columns prevents accidental leakage of label information into feature sets and makes the model’s input/output contract explicit. Using a naming convention like “fwd” lets the pipeline programmatically find all prediction horizons without hard-coding them, which is helpful when experimenting with different label constructions or when training multi-head architectures where the correspondence between column position and network output must be stable.
A few practical caveats to keep in mind: filter(like=’fwd’) performs a substring match and is case-sensitive, so it will also pick up any unrelated columns that include “fwd” in their names; if you need stricter matching use startswith or a regex (e.g., ‘^fwd’) to avoid accidental matches. Also validate that the resulting list is non-empty and that the selected columns have the expected dtypes and alignments with your feature DataFrame before converting them into model targets — otherwise you can introduce subtle bugs or shape mismatches in training.
lookahead = 1
outcome= f’r{lookahead:02}_fwd’
This code sets a prediction horizon and builds a canonical name for the target column that downstream code will use to pick the training label. The first line assigns lookahead = 1, which decides how many time steps ahead we want the model to predict. The second line constructs a string outcome equal to ‘r01_fwd’ by embedding the lookahead value into a fixed-format token; in our data schema that token denotes the forward return after the specified number of periods (the “r” prefix stands for return, the zero-padded number is the horizon, and “fwd” signals a forward-looking target).
We use this explicit, zero-padded naming convention so the rest of the pipeline can reliably select the correct label column from feature tables, logging, model artifacts, or experiment dashboards. The padding (02) is intentional: it enforces a stable lexical ordering and consistent filenames when you compare multiple horizons (r01_fwd, r02_fwd, …, r10_fwd) and prevents ambiguity between single- and multi-digit horizons in joins, column matching, or automated model selection loops.
From a modeling perspective the lookahead value directly changes what the network is learning — a one-step-ahead label typically has higher signal-to-noise and different statistical properties than longer horizons, which affects loss behavior, required model capacity, and evaluation metrics. Because the code isolates the horizon into a single parameter and a reproducible label name, it makes it straightforward to run grid searches over horizons, train multi-horizon models by assembling multiple such labels, and ensure that training, validation, and production inference all reference the same target definition.
A couple of practical notes: any downstream code that consumes outcome must expect that corresponding columns exist in the dataset with the exact naming convention, and if you plan to support larger horizons you should adjust the padding width accordingly. This simple pattern is a small but important piece of reproducibility and clarity in a financial prediction pipeline where target definition is as critical as the model itself.
X_cv = data.loc[idx[:, :’2017’], :].drop(outcomes, axis=1)
y_cv = data.loc[idx[:, :’2017’], outcome]
Here the code is constructing a time-based cross‑validation slice from a panel-style DataFrame and splitting it into features and labels in a way that avoids temporal leakage. The DataFrame (data) is indexed with a MultiIndex where the second level is the date; idx is the pandas IndexSlice helper used for label-based slicing. The expression data.loc[idx[:, :’2017’], :] selects every entity (first index level) but only rows whose date label is less than or equal to ‘2017’ — in other words, the historical window up to and including 2017. That label-based slice enforces chronology, which is critical for financial prediction so that training never sees future information.
For the feature matrix X_cv, the code starts from that same time-limited subset (all columns) and then immediately drops any columns listed in outcomes. Dropping outcomes as columns removes the target column(s) and any other outcome-related fields so they cannot be used as inputs; this prevents target leakage and keeps the model from learning spurious correlations that arise from including realized outcomes as predictors. The axis=1 argument makes it explicit that those names are column labels, not row indices.
For the target y_cv, the code takes the identical row slice but selects only the outcome column (the specific target variable). Because both X_cv and y_cv are derived from the same loc slice, they retain the same index ordering and alignment (entity × date), which is important when feeding data into training routines or when later reassembling predictions back onto the original index.
In short: this block creates a chronologically consistent training (or CV) split up to 2017, removes outcome columns from the features to avoid leakage, and extracts the target vector — preparing aligned feature and label arrays suitable for time-aware model training (e.g., fitting a deep neural network for financial prediction).
len(X_cv.index.get_level_values(’symbol’).unique())This expression counts how many distinct financial instruments (symbols) are present in the cross‑validation DataFrame X_cv by reading the DataFrame’s index. Concretely, get_level_values(‘symbol’) extracts the sequence of symbol identifiers aligned to each row (we use the index because symbols are stored as an index level rather than a column), unique() reduces that sequence to the set of unique identifiers (preserving the order of first occurrence), and len(…) returns the cardinality of that set. We do this because the number of unique symbols in the validation split directly affects several architecture and evaluation decisions in a DNN for financial prediction: it determines how many distinct embedding vectors or per-asset normalization parameters you may need, informs group-aware cross‑validation and batching strategies to avoid leakage across assets, and verifies that the held-out set has the expected instrument coverage. A couple of practical notes: if the index has no level named ‘symbol’ you’ll get an error; unique() will include NaN as a distinct entry if present (which may or may not be desirable); and using .nunique() on the Index is a more direct and slightly more efficient alternative if you only care about the count.
X_cv.info(null_counts=True)This single call is a quick, low-cost inspection step that tells you whether the cross-validation feature matrix (X_cv) is structurally ready for the neural network pipeline. When you run X_cv.info(null_counts=True) pandas prints a compact table showing the index range, each column name, the non-null count for each column, the inferred dtype, and the total memory footprint of the DataFrame. Concretely, you read it top-to-bottom to answer three practical questions: which columns contain missing values and how extensive those gaps are (non-null count vs. expected row count), which columns are non-numeric or have unexpectedly wide dtypes (object, int64, float64) that will require conversion or encoding, and whether the overall memory usage warrants dtype downcasting or chunked loading for training.
Why this matters for deep financial models: missing or non-numeric fields must be resolved before batching data into the network (imputation, encoding, or dropping), and large memory usage or unnecessarily high-precision dtypes (float64) can slow training and increase GPU/CPU memory pressure — so the info summary directly informs actions like converting integers to smaller widths, casting floats to float32, parsing timestamps, or switching categorical strings to codes/embeddings. Note also that null_counts=True historically forces display of non-null counts; in recent pandas versions that argument is deprecated in favor of show_counts, so check your pandas version if you don’t see the counts. In short, this line is a fast sanity and readiness check that guides the next preprocessing decisions before you normalize, encode, and feed X_cv into your deep learning workflow.
Automating model generation
The following `make_model` function demonstrates a flexible way to define architectural elements for the search process. The `dense_layers` argument specifies both the network depth and width as a list of integers. Dropout is used for regularization and is given as a float in the range [0, 1], representing the probability that a unit will be excluded during a training iteration.
def make_model(dense_layers, activation, dropout):
    ‘’‘Creates a multi-layer perceptron model

    dense_layers: List of layer sizes; one number per layer
    ‘’‘

    model = Sequential()
    for i, layer_size in enumerate(dense_layers, 1):
        if i == 1:
            model.add(Dense(layer_size, input_dim=X_cv.shape[1]))
            model.add(Activation(activation))
        else:
            model.add(Dense(layer_size))
            model.add(Activation(activation))
    model.add(Dropout(dropout))
    model.add(Dense(1))

    model.compile(loss=’mean_squared_error’,
                  optimizer=’Adam’)

    return model
This function builds a simple feedforward neural network (an MLP) configured for scalar regression, which is exactly the typical shape we use when predicting a continuous financial target (e.g., next-day return, price, or risk score). The model is created by iterating over the list dense_layers to add one hidden Dense layer per entry: the first Dense explicitly receives the input dimensionality (X_cv.shape[1]) so the network knows how many features each sample has, and each Dense is followed by an Activation layer using the activation function passed in. Treating activation as a separate layer is equivalent to specifying activation in the Dense constructor, but makes the ordering explicit: linear projection → nonlinearity.
Data flows through the network left to right: an input vector enters the first Dense layer where a learned linear combination produces hidden activations; those activations are transformed by the chosen nonlinearity; the transformed vector then progresses through any subsequent Dense+Activation blocks, growing or shrinking to the sizes specified in dense_layers. After the final hidden activation the code applies a single Dropout layer, which randomly zeroes a fraction of the hidden units during training. That dropout acts as regularization to reduce co-adaptation of hidden units and to help prevent overfitting to noisy, low-signal financial data where patterns can be spurious and sample sizes small. Finally a Dense(1) layer maps the final (possibly thinned) hidden representation to a single scalar output; there is no activation on this final unit, which makes the network output a linear value appropriate for mean-squared regression.
The model is compiled with mean_squared_error loss and the Adam optimizer. Choosing MSE aligns with the goal of minimizing squared prediction error for continuous targets; Adam is a robust, adaptive-gradient optimizer that works well out of the box on many financial prediction problems where the objective surface can be noisy. Because the final layer is linear and the loss is MSE, training directly optimizes for squared error rather than a classification objective.
A few implications and improvement opportunities to keep in mind for production-quality financial models: placing a single Dropout only after the last hidden layer regularizes the final representation but does not penalize co-adaptation between earlier hidden layers as strongly as inserting Dropout between every hidden layer would. Likewise, because the activation function is supplied externally, choose it with care — ReLU (or variants) tends to be preferable for deeper nets to avoid vanishing gradients, while tanh/sigmoid can be useful in shallow architectures but may slow convergence. Financial targets are often heavy-tailed or contain outliers, so you may want to evaluate robust loss functions (Huber, MAE) or add explicit regularizers (L1/L2 kernel_regularizer, or BatchNormalization) and early stopping to control overfitting. Finally, the function depends on X_cv being in scope for input_dim; for clarity and testability it’s usually better to pass input_dim as an explicit parameter rather than relying on a global variable.
Cross-validate multiple configurations using TensorFlow
n_splits = 12
train_period_length=21 * 12 * 4
test_period_length=21 * 3
These three lines establish a time-series cross-validation scheme tailored to financial data and to the sample-size needs of deep neural networks. n_splits = 12 defines how many sequential train/test cycles you will run (commonly implemented as a walk‑forward or rolling-window evaluation). train_period_length = 21 * 12 * 4 computes the training window in trading days: 21 trading days per month × 12 months × 4 years = 1,008 days. test_period_length = 21 * 3 computes a test (out‑of‑sample) window of roughly 63 trading days, i.e., about a three‑month evaluation horizon.
The rationale behind these choices is practical and statistical. Using trading days (≈21/month) aligns the windows with market activity and avoids counting non‑trading calendar days. A four‑year training window gives the DNN enough data to learn complex, high‑dimensional patterns and to observe multiple market regimes, which helps stabilize gradient descent and reduce overfitting to short‑term noise. A three‑month test window reflects a realistic rebalancing or business‑reporting cadence for many quantitative strategies and provides frequent out‑of‑sample assessments without being so short that noise dominates performance metrics.
How the data typically flows: for each of the 12 splits you select the last 1,008 trading days before the split as the model’s training set, train the network (including any normalization, early stopping, etc.), then evaluate on the subsequent 63 trading days. You then advance the window (usually by the test_period_length) and repeat, producing a sequence of temporally ordered performance estimates that mimic a live walk‑forward deployment. This approach helps you measure generalization across time and detect regime‑dependent performance, which is especially important in financial prediction where stationarity assumptions break down.
A few practical cautions and trade‑offs: fixed four‑year windows can include stale data that hurts responsiveness to new regimes, whereas shorter windows increase variance and may starve a DNN of examples. Twelve splits × 3 months covers roughly three years of out‑of‑sample history — decide if that horizon is sufficient for your business objectives. Also ensure you prevent lookahead and leakage (no peeking into future features, use embargoes where necessary) and apply the same normalization pipeline learned from training data only. Finally, these numbers are knobs: if your assets, frequency, or model capacity differ (e.g., higher‑frequency intraday data or a very deep model), adjust the training length and number of splits to balance sample size, regime coverage, and evaluation granularity.
cv = MultipleTimeSeriesCV(n_splits=n_splits,
                          train_period_length=train_period_length,
                          test_period_length=test_period_length,
                          lookahead=lookahead)
This single line constructs a time-aware cross-validation object whose job is to turn your panel of historical asset series into a sequence of realistic train/test windows for model development and evaluation. Instead of producing random folds, MultipleTimeSeriesCV encodes a rolling (or sliding) time-based splitting policy: when you later call its split method against your dataset it will emit n_splits pairs of train and test index sets that respect chronology, so every training set precedes its corresponding test set in time and the model is never evaluated on data it could have seen in the future.
The three parameters determine how those windows are shaped. train_period_length controls how much historical data is available to train the model in each fold — a longer period increases the amount of past information (reducing estimator variance but increasing exposure to regime changes), while a shorter period emphasizes recency and adaptability. test_period_length sets how long each out‑of‑sample evaluation window is; it should be long enough to produce stable performance statistics but short enough to reflect the current market regime you care about. lookahead is the forecast horizon: it shifts the target relative to the feature window so that the labels you try to predict lie lookahead steps after the end of the training window. This explicit horizon prevents label leakage (the model seeing information that would not be available at prediction time) and makes the CV emulate the production forecasting cadence.
Because this is a multiple‑time‑series CV, the object also incorporates logic to handle panel structure — multiple assets with different start/end dates and possibly irregular observations. The splitter will typically construct windows per series (or align windows on shared timestamps) so that indices returned for training and testing respect each asset’s timeline; this avoids the unrealistic situation where data from asset A in 2020 leaks into a training split that is meant to be earlier than the evaluation period for asset B. It also means any per‑asset preprocessing (scaling, normalization, feature generation) must be fit only on the training indices yielded by each fold to avoid contaminating the test set.
The reason we use this pattern in deep neural network architecture work for financial prediction is twofold: it produces evaluation folds that mirror how a model will be used in production (learn on past data, predict the future), and it provides multiple independent out‑of‑sample windows for hyperparameter tuning and architecture selection without introducing temporal leakage. Choosing the three parameters is thus a modeling decision: train_period_length trades bias/variance and robustness to non‑stationarity; test_period_length trades statistical confidence in metrics versus topicality of results; lookahead must match the business forecasting objective and the label construction used by the network.
A couple of practical notes: if your dataset is shorter than the sum of the configured windows you’ll get fewer (or zero) usable splits, and if series have different sampling frequencies you should align timestamps or resample before splitting. Also, ensure any data transformations (scaling, target encoding) are performed inside each fold using training indices only. The MultipleTimeSeriesCV object encapsulates the splitting complexity so downstream training and cross‑validation code can rely on a scikit‑learn–style splitter that enforces temporal and panel consistency.
Defining CV Parameters
Now we define the Keras classifier using the make_model function, configure cross-validation (see Chapter 6, “The Machine Learning Process”, and the following section on OneStepTimeSeriesSplit), and specify the hyperparameters we want to explore.
We choose several one- and two-layer architectures, both ReLU and tanh activation functions, and a range of dropout rates. We could also experiment with different optimizers, but we did not run those experiments to limit the already computationally intensive workload.
dense_layer_opts = [(16, 8), (32, 16), (32, 32), (64, 32)]
activation_opts = [’tanh’]
dropout_opts = [0, .1, .2]
This small block defines a compact hyperparameter grid used when assembling candidate dense-only networks for the financial prediction task. dense_layer_opts enumerates pairs of integers that represent two-layer dense topologies: the first number is the unit count in the first hidden layer and the second is the unit count in the second hidden layer. In practice each tuple will be turned into the sequence: input → Dense(units=first) → activation → (optional) Dropout(rate) → Dense(units=second) → activation → (optional) Dropout(rate) → … → output head. Treating these as paired sizes lets the training loop quickly instantiate a set of small, interpretable architectures ranging from narrow bottlenecks (16→8) to moderately wider representations (64→32), so you can probe model capacity versus overfitting without changing the model-building code.
The specific size choices reflect a deliberate bias toward modest-capacity networks appropriate for financial time-series: markets are noisy and datasets are often limited, so very large fully connected layers tend to overfit quickly. The (16,8) and (32,16) options enforce a funnel/bottleneck that encourages compression and extraction of compact predictive factors; the (32,32) option tests a balanced, non-compressing representation; and (64,32) provides a bit more capacity to capture slightly richer interactions. These sizes also keep computational cost and training variance low, which matters when running lots of cross-validation or walk-forward experiments.
activation_opts contains only ‘tanh’, which is an intentional choice because tanh is zero-centered and bounded. In financial prediction tasks where target signals (e.g., returns, log-returns, or normalized residuals) are often signed and centered around zero, a zero-centered activation helps gradients and weight updates behave more symmetrically compared with non‑zero-centered activations. The bounding property reduces extreme activations and can stabilize training on noisy signals; the tradeoff is potential saturation for large inputs, so this choice pairs with small networks and conservative learning rates to avoid dead zones.
dropout_opts lists three regularization strengths: 0 (no dropout), 0.1, and 0.2. Including 0 provides a baseline to measure the effect of dropout; the small positive rates are conservative regularizers appropriate for limited, noisy financial data where aggressive dropout would remove too much signal. During model construction the chosen dropout rate is typically applied after activations on each hidden layer to reduce co-adaptation of neurons and improve generalization across nonstationary market regimes. Combined, these three arrays form a compact hyperparameter grid you can sweep to identify the best tradeoff between bias and variance for your financial prediction pipeline.
param_grid = list(product(dense_layer_opts, activation_opts, dropout_opts))
np.random.shuffle(param_grid)
This block builds and randomizes the set of hyperparameter combinations you will try when searching for a good network architecture. product(dense_layer_opts, activation_opts, dropout_opts) generates the Cartesian product of the three option lists, so each element is a tuple describing one concrete configuration — for example (num_dense_layers, activation_fn, dropout_rate). Converting that iterator to a list materializes every combination so you can shuffle and iterate through them multiple times or index into them as needed.
We then call np.random.shuffle on that list to permute the order in-place. The reason for shuffling is practical: when you have a large but finite search budget (common in financial prediction workflows), running experiments in a randomized order gives better early coverage of the search space than a deterministic, structured ordering (which might evaluate many similar configurations back-to-back). Randomizing also helps when experiments are parallelized or checkpointed across runs, because it reduces correlated failures or pathological sequences (e.g., trying all large networks first) that could bias your conclusions. Two important operational notes: (1) shuffling requires the list form — the product iterator cannot be shuffled directly; (2) np.random.shuffle uses NumPy’s global RNG state, so if you need reproducible experiments prefer seeding that RNG beforehand or use the new Generator API (default_rng().shuffle). Finally, be mindful of combinatorial explosion: materializing the full Cartesian product can consume a lot of memory and lead to an impractically large search space; for very large option sets consider randomized sampling, stratified sampling, or incremental generation instead of building the entire list.
len(param_grid)This single-expression check is being used as a lightweight, programmatic sanity and planning step: it returns how many items are present in param_grid so the training/tuning code can reason about the size of the hyperparameter search it is about to run. In the typical DNN hyperparameter workflow for financial prediction we either pass param_grid as an explicit list of parameter dictionaries (one dictionary per distinct combination) or as a structure that will be expanded into combinations; len(param_grid) will give the number of elements in the outer container. That number is important because it directly informs downstream decisions — how many model trainings will be launched, how long the whole grid search will take, how to size batches for parallel workers, and what to show on a progress bar.
Be careful about what param_grid actually is: if it’s a dict mapping hyperparameter names to lists of values, len(param_grid) returns the number of hyperparameter keys (e.g., “learning_rate”, “dropout”) which is not the same as the number of combinations; in that case you should first expand it (for example with sklearn.model_selection.ParameterGrid or itertools.product) and call len on the expanded object to get the true count of combinations. Use that count to calculate total experiment cost (for example: total_runs = n_combinations * n_cv_splits * n_random_restarts * n_replicates) so you can decide to switch to RandomizedSearch, Bayesian optimization, or early stopping when the grid is too large. Finally, treat this check as a defensive programming step — assert that len(param_grid) > 0 and log the value so you don’t inadvertently run zero experiments or massively underestimate compute needs when tuning deep networks for sensitive financial predictions.
To start the parameter search, instantiate a GridSearchCV object, define the fit_params to pass to the Keras model’s fit() method, and provide the training data to GridSearchCV.fit().
def get_train_valid_data(X, y, train_idx, test_idx):
    x_train, y_train = X.iloc[train_idx, :], y.iloc[train_idx]
    x_val, y_val = X.iloc[test_idx, :], y.iloc[test_idx]
    return x_train, y_train, x_val, y_val
This small function is the plumbing that takes a global feature matrix X and target vector y and extracts the training and validation subsets identified by two index arrays. Conceptually, the data flows in like a table and a set of row selectors: train_idx and test_idx are positional selectors (lists, arrays, or index objects) that tell the function which rows belong to the training fold and which rows belong to the validation fold. Using positional indexing (iloc) it slices X and y in lockstep so that each feature row remains correctly paired with its corresponding label; this alignment is critical for supervised learning and, in financial prediction, for avoiding label-feature mismatch that would silently corrupt model training.
The function returns four objects — x_train, y_train, x_val, y_val — so downstream code can run preprocessing, fit the model on x_train/y_train, and evaluate on x_val/y_val without further bookkeeping. Keeping splitting separate from preprocessing is deliberate: you should fit scalers, imputers, and any leakage-prone transformations only on x_train and then apply them to x_val. That discipline prevents information from the validation set leaking into the trained model, which is especially important in financial time series where lookahead bias can produce over-optimistic performance.
A couple of practical reasons for the specific choices here: positional iloc is used instead of label-based loc to avoid accidental misalignment when the DataFrame index contains timestamps or non-consecutive labels — common in financial datasets — so the split is strictly by row position rather than index value. Also, the function assumes the caller supplies sensible train/test indices (for example, from a TimeSeriesSplit or a custom temporal split) so the function stays simple and side-effect free; it does not shuffle, scale, or validate index non-overlap — those responsibilities belong to the caller to preserve temporal ordering and prevent data leakage. If you need different behavior (resetting indices, returning numpy arrays or tensors for a specific framework, or validating empty/overlapping indices), extend this helper, but keep the core idea: deterministic, aligned extraction of train and validation subsets to maintain correct supervised learning for financial prediction.
ic = []
scaler = StandardScaler()
for params in param_grid:
    dense_layers, activation, dropout = params
    for batch_size in [64, 256]:
        print(dense_layers, activation, dropout, batch_size)
        checkpoint_dir = checkpoint_path / str(dense_layers) / activation / str(dropout) / str(batch_size)
        if not checkpoint_dir.exists():
            checkpoint_dir.mkdir(parents=True, exist_ok=True)
        start = time()
        for fold, (train_idx, test_idx) in enumerate(cv.split(X_cv)):
            # get train & validation data
            x_train, y_train, x_val, y_val = get_train_valid_data(X_cv, y_cv, train_idx, test_idx)

            # scale features
            x_train = scaler.fit_transform(x_train)
            x_val = scaler.transform(x_val)

            # set up dataframes to log results
            preds = y_val.to_frame(’actual’)
            r = pd.DataFrame(index=y_val.groupby(level=’date’).size().index)

            # create model based on validation parameters
            model = make_model(dense_layers, activation, dropout)

            # cross-validate for 20 epochs
            for epoch in range(20):
                model.fit(x_train,
                          y_train,
                          batch_size=batch_size,
                          epochs=1,
                          verbose=0,
                          shuffle=True,
                          validation_data=(x_val, y_val))
                model.save_weights((checkpoint_dir / f’ckpt_{fold}_{epoch}’).as_posix())
                preds[epoch] = model.predict(x_val).squeeze()
                r[epoch] = preds.groupby(level=’date’).apply(lambda x: spearmanr(x.actual, x[epoch])[0]).to_frame(epoch)
                print(format_time(time()-start), f’{fold + 1:02d} | {epoch + 1:02d} | {r[epoch].mean():7.4f} | {r[epoch].median():7.4f}’)
            ic.append(r.assign(dense_layers=str(dense_layers),
                               activation=activation,
                               dropout=dropout,
                               batch_size=batch_size,
                               fold=fold))

        t = time()-start
        pd.concat(ic).to_hdf(results_path / ‘scores.h5’, ‘ic_by_day’)
This block is orchestrating a grid search over small neural‑network architecture choices and batch sizes, training each configuration with cross‑validation and logging day‑level information coefficients (ICs) as the primary evaluation metric. At the outermost level we iterate through each tuple of hyperparameters (number of dense layers, activation function, dropout) and then try two batch sizes. For each configuration we create a dedicated checkpoint directory (nested by the param values) so that model weights saved during training are organized per configuration; this makes it easy later to restore a specific experiment or inspect intermediate weights.
Inside the cross‑validation loop we take the training and validation indices from cv.split(X_cv) and materialize the corresponding x/y slices using get_train_valid_data. Crucially, we fit the StandardScaler on the training features only and then transform the validation features with that fitted scaler. Fitting on training data only avoids data leakage from the validation set into the feature scaling step, which is essential for reliable out‑of‑sample performance estimates in finance where tiny information leaks can artificially inflate performance.
Before training we build logging structures that match the business objective: preds starts with the actual validation labels (y_val) and will accumulate model predictions per epoch, and r is an index keyed by unique validation dates so we can compute a single IC value per calendar day. Grouping by date is intentional because the target is a cross‑sectional financial prediction (many instruments per date); the model’s economic usefulness is measured by its day‑by‑day rank correlation with returns/targets rather than by a single scalar over the whole validation set.
For each fold we instantiate a fresh model with make_model(dense_layers, activation, dropout). The code then trains for 20 epochs, but instead of asking Keras to run all epochs at once it runs fit for a single epoch inside a loop. This pattern lets the script evaluate and checkpoint after each epoch: after each one‑epoch fit we call model.save_weights to persist weights for that particular fold/epoch, then predict on the validation set and store those predictions as a new column in preds. Storing per‑epoch weights makes it straightforward to retrieve the model state that produced the best IC later, and collecting predictions per epoch lets you trace how information content evolves during training (e.g., overfitting or underfitting dynamics).
The evaluation per epoch is done by computing the Spearman rank correlation between actuals and predictions for each date and storing the resulting daily correlations in r[epoch]. Spearman is used intentionally: in many financial applications we care about the rank ordering of assets (who to long/short) more than precise value forecasts, and rank correlation is robust to monotonic scalings the model might apply. After computing the daily ICs we print a concise line with elapsed time, fold/epoch counters, and the mean and median IC across days — these aggregate summaries help monitor training and cross‑fold stability in real time.
Finally, after each fold the code appends the per‑day ICs with metadata (architecture, activation, dropout, batch_size, fold) to the accumulating list ic, and once all folds for the current hyperparameter/batch configuration are finished it concatenates the collected records and writes them to an HDF5 file. This yields a persistent record of daily ICs across architectures, epochs, and folds that you can use to compare models, select epochs or checkpoints, and perform further analysis (ensemble weighting, risk‑adjusted performance, etc.). A couple of operational notes: the scaler is re‑fitted per fold (so the single scaler object is reused but refitted, which is fine), and doing one‑epoch fits in a loop is slightly more I/O intensive but is deliberate to allow epochwise evaluation and checkpointing — both important when assessing training behavior on financial cross‑sections.
Evaluating Predictive Performance
params = [’dense_layers’, ‘dropout’, ‘batch_size’]That single list is acting as the declarative contract between your hyperparameter-tuning machinery and the model builder: it tells the tuner “these are the knobs we will vary when constructing candidate neural nets for financial prediction.” The runtime flow is: the search driver iterates over combinations (or samples) of values for these keys, passes each chosen value set into the model-construction function, which uses dense_layers to assemble the network topology, inserts dropout layers where indicated, and then hands the built model and the batch_size to the training loop and data loader. In other words, data flows from disk into mini-batches (shaped by batch_size), through a stack of dense layers (the capacity/representational path defined by dense_layers), and at each training step units are randomly de-activated according to dropout during forward/backward passes to reduce co-adaptation.
Each chosen key is purposeful for financial time-series problems. dense_layers encodes model capacity and depth: increasing the number or width of dense layers lets the network fit more complex, nonlinear relationships present in market features (cross-asset interactions, nonstationary signals), but also raises the risk of overfitting to noisy, regime-dependent patterns. dropout is a regularizer applied during training to improve generalization on noisy financial data — by preventing reliance on specific co-adapted neurons it reduces variance and helps the model resist short-lived market artefacts that don’t generalize; you should tune it more aggressively if your dataset is small or highly noisy. batch_size influences optimization dynamics and generalization: smaller batches give higher-variance gradient estimates that can help escape sharp minima (sometimes beneficial on nonconvex financial objectives) and are more memory-efficient, but hurt throughput and make training noisier; larger batches stabilize gradients and speed up wall-clock time per epoch but can lead to poorer generalization and require learning-rate adjustments.
It’s important to consider interactions and evaluation strategy rather than treating these keys independently. For example, large dense_layers with little dropout will overfit unless you use smaller batches, stronger regularization, or better cross-validation; conversely, increasing batch_size often requires adjusting learning rate schedules. Because financial data is nonstationary, the tuner should use time-aware validation (walk-forward or purged k-fold) and evaluate stability across market regimes, not only average validation loss. Also recognize practical constraints: batch_size is bounded by GPU memory, and dense_layers choices affect latency if the model will run in production for near-real-time signals.
Finally, the absence of other knobs (learning rate, optimizer, weight decay, activation, recurrent/convolutional blocks) is itself a design decision: this list focuses tuning on structural capacity and regularization plus training granularity, which is a reasonable first pass for tabular or feed-forward architectures. If you need better control over optimization dynamics or want to capture temporal structure explicitly, expand the parameter list to include learning_rate, optimizer type, L2 weight_decay, batch_norm, or alternative layer types, and ensure the tuner uses time-aware splits and monitors metrics meaningful for trading (e.g., Sharpe, drawdown) in addition to generic loss.
ic = pd.read_hdf(results_path / ‘scores.h5’, ‘ic_by_day’).drop(’activation’, axis=1)
ic.info()
First, the code reads a precomputed table named “ic_by_day” out of an HDF5 results file into a DataFrame. In this pipeline the HDF5 store is used because the results are a potentially large, tabular time-series of model evaluation metrics (daily Information Coefficients, or ICs) from many experiments and architectures; loading that specific key gives you the daily IC series for each experiment/configuration without re-running expensive computations.
Once loaded, the code immediately drops the column named “activation”. The practical reason for this is that “activation” is a categorical/hyperparameter label (e.g., “relu”, “tanh”) rather than a numeric performance metric; keeping it in the same DataFrame can force mixed dtypes (object/string columns) and will interfere with numeric summarization, aggregation, plotting, or vectorized statistical operations that follow. Removing it here signals that the next steps are focused on pure numeric time-series analysis of IC (averages, rolling statistics, correlation, significance tests, visualizations) rather than exploration of that particular hyperparameter. Note the drop returns a new DataFrame assigned to ic, so the original HDF contents remain unchanged; also be deliberate about dropping metadata permanently — if you later need to analyze performance by activation type you should retain that information separately.
Finally, calling .info() is an inspection step to verify what you just loaded and removed: it reports the index/column structure, dtypes, non-null counts, and memory usage. In the context of model-evaluation pipelines this check answers important operational questions before heavy downstream processing: are all expected days present (non-null counts), are ICs stored as numeric floats (not strings), do any columns have lots of NaNs that require imputation or filtering, and is the memory footprint acceptable for in-memory analysis. Those answers drive the next decisions — casting dtypes, downcasting floats to save RAM, filling or dropping missing days, or converting/validating the index as a proper DateTimeIndex — all of which are important to ensure correct and efficient aggregate comparisons of deep neural network architectures for financial prediction.
ic.groupby(params).size()This single line partitions the rows of the DataFrame or Series ic by the key(s) in params and returns the number of rows in each partition. Concretely, pandas builds a GroupBy keyed on whatever params refers to (a single column name, a list of column names, or a mapper/function), iterates over ic to collect rows that share the same key values, and then size() emits the cardinality of each group as an integer series indexed by the grouping keys. The result is typically a Series (a MultiIndex Series if params contains multiple columns) whose values are the counts for each unique parameter combination.
We do this because, in the context of deep neural network architectures for financial prediction, understanding sample counts per parameter configuration is essential for reliable evaluation and model selection. Counting rows per params lets you spot groups with too few observations (high variance / unreliable IC estimates), imbalanced representation across architectures or hyperparameter settings, or unexpected sparsity caused by missing or continuous keys. With that knowledge you can decide to aggregate/bucket continuous hyperparameters, drop or merge rare configurations, apply stratified sampling, or require a minimum group size before comparing performance metrics like mean IC or Sharpe ratios.
A few important behavioral details to keep in mind: size() counts rows including those with NaNs in other columns and therefore differs from count(), which counts non-null values of a specific column; if params contains NaNs themselves those NaN keys will form a group; the result is not a DataFrame unless you call .reset_index(name=’count’) to convert the Series into a tabular form; and groupby sorts keys by default (which affects output ordering). For large datasets, grouping by many high-cardinality float columns can produce essentially unique groups (most counts = 1) and be expensive — convert repeating keys to categorical or bin continuous values first to make group-level statistics meaningful and efficient.
Practically, follow this line with operations that enforce your statistical requirements: e.g., .reset_index(name=’n’).query(‘n >= 30’) to keep only adequately populated configurations, or merge these counts back into your results table to weight or filter architectures during selection. This simple count is a diagnostic and gating step to ensure downstream IC estimates and model comparisons are based on sufficiently supported samples.
ic_long = pd.melt(ic, id_vars=params + [’fold’], var_name=’epoch’, value_name=’ic’)
ic_long.info()
This block reshapes an evaluation table of information coefficients (ICs) from a wide, epoch-per-column layout into a tidy long format so downstream analysis and plotting are straightforward. Concretely, the original DataFrame ic apparently records model-run identifiers (the parameters listed in params and a cross-validation ‘fold’) plus a set of columns where each column holds the IC for a particular training epoch. pd.melt() iterates over those epoch columns and produces one row per (params, fold, epoch) combination, copying the identifier columns unchanged and collapsing the per-epoch columns into two new columns: one named “epoch” that contains the original column names, and one named “ic” that contains the corresponding IC values. Naming the melted fields explicitly (var_name=’epoch’, value_name=’ic’) makes later code and visualizations clearer and less error-prone.
We do this because longitudinal analysis of model behavior — monitoring mean IC across folds per epoch, computing confidence intervals, or drawing learning curves — requires each epoch to be a value in a single column rather than a separate column. The long format enables simple groupby operations (for example groupby([‘epoch’]).ic.mean() or groupby([‘epoch’,’param’]).ic.aggregate(…)), faceted plots by parameter set, and straightforward aggregation across folds. After melting, calling ic_long.info() is a quick sanity check: it verifies that the expected number of rows exists, shows dtypes (helpful because the new “epoch” column will often be object/string and may need conversion to int), and reveals any missing IC values that would affect aggregates. Practically, follow-ups usually include converting epoch to a numeric type, sorting by epoch, and then computing fold-aggregated statistics (mean, std, percentiles) or feeding the tidy table into visualization libraries to compare architectures and training dynamics for financial prediction.
ic_long = ic_long.groupby(params+ [’epoch’, ‘fold’]).ic.mean().to_frame(’ic’).reset_index()This line takes a long-form table of information-coefficient (IC) observations and collapses it down to a single representative IC value per hyperparameter configuration, epoch, and cross-validation fold. Concretely, ic_long initially contains many IC measurements that differ by asset, time-slice, or minibatch for the same combination of model parameters, epoch and fold. The groupby call uses the hyperparameter columns (params) plus ‘epoch’ and ‘fold’ as the grouping key so that every unique (params, epoch, fold) tuple becomes one group. Within each group the code computes the mean of the ‘ic’ column to produce a single central-value IC; that averaged value replaces the noisy, per-observation ICs and is what you keep for downstream analysis.
Why this matters for our financial DNN work: IC is a noisy signal in finance (assets behave idiosyncratically and labels are noisy), so averaging IC across the observations that share the same model state gives a more stable measure of model predictive power at that epoch and fold. Grouping by params ensures we keep these aggregated curves separate for different architectures or hyperparameter settings so we can compare them directly, while grouping by fold preserves cross-validation granularity for later assessment of variance and robustness. Choosing the mean emphasizes central tendency; if outliers are a concern we might instead aggregate with median or report both mean and standard deviation, but here the mean is a convenient, commonly used summary for tracking learning dynamics.
The to_frame(‘ic’) and reset_index() steps are about shape and usability: after grouping and selecting a single column, pandas would give you a Series indexed by the grouping keys; to_frame ensures the result is a DataFrame with a named ‘ic’ column, and reset_index turns the grouping keys back into regular columns. That makes the output easier to merge, pivot, plot (e.g., epoch-vs-IC curves per param/fold), or to further aggregate (for example, averaging IC across folds to produce a single learning curve per hyperparameter configuration).
g = sns.relplot(x=’epoch’, y=’ic’, col=’dense_layers’, row=’dropout’,
                data=ic_long[ic_long.dropout>0], kind=’line’)
g.map(plt.axhline, y=0, ls=’--’, c=’k’, lw=1)
g.savefig(results_path / ‘ic_lineplot’, dpi=300);
This block is constructing a small multiples line-plot that tracks model Information Coefficient (IC) across training epochs and uses faceting to compare architecture and regularization choices. First, the code filters the long-form results table to only include runs where dropout > 0; the practical intent is to focus the visualization on models that used dropout (i.e., that include that form of regularization) so we can compare how varying dropout rates and the number of dense layers affect IC dynamics without clutter from the non-dropout baseline.
The filtered data is passed into seaborn.relplot with x=’epoch’ and y=’ic’, and faceted by dense_layers (columns) and dropout (rows). Because kind=’line’ is specified, relplot delegates to seaborn.lineplot, which visualizes the trend of IC over epochs. In typical usage with repeated experiments or cross-validation folds, lineplot will aggregate multiple observations at the same epoch (for example averaging across seeds or folds) and draw an estimate of uncertainty (a confidence band) around that mean. That aggregation is useful here because we care about the average learning dynamics of a given architecture/regularization configuration rather than individual noisy runs.
After the grid is created, g.map(plt.axhline, y=0, ls=’ — ‘, c=’k’, lw=1) draws a dashed horizontal line at IC = 0 in every facet. This is an intentional visual baseline: IC values above zero indicate positive predictive signal, values below zero indicate harmful or reversed signal. Including that line makes it immediately obvious which configurations produce reliable positive signal and at what stage of training. Finally, the plot is written to disk with a high-resolution save (dpi=300) at results_path / ‘ic_lineplot’ so the figure is suitable for reports or publication. Note that g is a FacetGrid-like object, so the axhline mapping affects each subplot individually and the saved figure captures the grid of comparisons that help us evaluate how dense layer count and dropout interact in producing or degrading predictive IC over training.
def run_ols(ic):
    ic.dense_layers = ic.dense_layers.str.replace(’, ‘, ‘-’).str.replace(’(’, ‘’).str.replace(’)’, ‘’)
    data = pd.melt(ic, id_vars=params, var_name=’epoch’, value_name=’ic’)
    data.epoch = data.epoch.astype(int).astype(str).apply(lambda x: f’{int(x):02.0f}’)
    model_data = pd.get_dummies(data.sort_values(params + [’epoch’]), columns=[’epoch’] + params, drop_first=True).sort_index(1)
    model_data.columns = [s.split(’_’)[-1] for s in model_data.columns]
    model = sm.OLS(endog=model_data.ic, exog=sm.add_constant(model_data.drop(’ic’, axis=1)))
    return model.fit()
The function begins by normalizing one of the configuration fields — dense_layers — so that categorical labels are consistent before any encoding. It removes parentheses and replaces the comma-plus-space with a single dash, producing deterministic tokens like “64–32” instead of variants that would otherwise produce duplicate or misaligned dummy columns. That normalization is important because downstream one‑hot encoding treats each unique string as a distinct level; inconsistent formatting would create spurious levels and leak noise into the regression.
Next, the code reshapes the input table from wide to long using pd.melt so that each row becomes a single observation of information coefficient (ic) tied to a particular combination of the categorical parameters and an epoch. Converting epochs to zero‑padded two‑digit strings (e.g., “01”, “02”) is a deliberate step to ensure epochs sort lexicographically in chronological order and produce consistent column names when turned into dummies. The goal of this reshape and formatting is to produce a tidy dataset where the dependent variable (ic) is modeled as a function of discrete configuration choices and epoch, rather than having separate columns per epoch which would complicate estimation.
With that long-form data, the function one‑hot encodes the categorical predictors (the epoch column plus whatever is in params) via get_dummies. It uses drop_first=True to omit one level per categorical variable and thereby avoid the dummy‑variable trap (perfect multicollinearity with the intercept). The subsequent sort_index(axis=1) call enforces a stable column ordering for reproducibility of model design matrices. Immediately after, the code strips the auto‑generated prefixes that pd.get_dummies attaches (like “epoch_”) by keeping only the final token after the underscore; this makes column names shorter and more directly reflect the level names, but it also risks collapsing names when different variables share the same suffix, so the renaming is a convenient but somewhat brittle sanitization step.
Finally, the function constructs an OLS model with statsmodels, using ic as the endogenous variable and all the dummy predictors (minus the reserved ic column) plus an explicit intercept. Returning model.fit() yields estimated coefficients that quantify the marginal effect of each architecture choice and epoch level relative to the omitted baselines. In the context of evaluating deep neural network architectures for financial prediction, those coefficients let you attribute differences in predictive information (IC) to specific architecture choices and to training epoch in a simple linear, fixed‑effects sense.
A few practical caveats follow from this design: the linear OLS specification assumes independent, homoskedastic errors, which are often violated in time‑series or panel settings common in finance — consider clustered or robust standard errors, mixed‑effects models, or panel regressions if observations are correlated within architecture runs. Also, heavy use of one‑hot encoding can explode dimensionality if there are many levels; if that becomes an issue, consider regularization (ridge/lasso) or hierarchical modeling to pool information across levels. Finally, be mindful that the renaming step can create ambiguous column names; if preserving provenance of each dummy is important, use more explicit naming or store a mapping from dummy column back to (variable, level).
model = run_ols(ic.drop(’fold’, axis=1))This line takes the DataFrame ic, removes the column named “fold” so that the fold index is not treated as a predictor, and passes the resulting DataFrame into an OLS-fitting helper called run_ols; the fitted model object is then assigned to model. In terms of data flow, the input ic likely contains your engineered features, the target variable for the financial prediction task, and a “fold” column that marks cross‑validation partitions. We explicitly drop “fold” because it is a bookkeeping column used to control evaluation splits and would introduce label leakage or spurious structure if fed into a regression as a feature. run_ols then performs an ordinary least squares fit on the remaining columns (typically adding a constant term, solving for coefficients that minimize squared residuals, and returning a fitted model and diagnostics such as coefficients, standard errors, R², residuals, and condition/collinearity metrics).
Why we do this here: OLS is used as a lightweight, interpretable baseline and diagnostic tool before committing to a deep neural network. The coefficient estimates and their significance give quick insight into which engineered signals carry linear predictive power, the R² quantifies how much variance a purely linear model can explain, and residual diagnostics reveal heteroskedasticity or structured, non‑linear error that a neural net might be able to capture. Practically, results from run_ols should inform model design choices for the DNN — if OLS already explains most variance, a high‑capacity network is unnecessary; if residuals show strong nonlinearity or interaction effects, that motivates adding depth, non‑linear activations, or interaction-aware feature transformations. Also be mindful that OLS can fail or give unstable coefficients when predictors are highly collinear or not properly scaled; run_ols’ diagnostics (condition number, VIFs, p‑values) should guide preprocessing (scaling, regularization, or dimensionality reduction) before training a deep model. Finally, ensure the call is performed on the appropriate split (train only) to avoid leakage: dropping “fold” prevents accidental use of the CV index as a feature, but you still need to make sure run_ols only sees training rows when assessing fit for model selection.
print(model.summary())Calling model.summary() triggers Keras to walk the model graph from inputs to outputs and print a compact, layer-by-layer report that helps you verify the architecture before training. Internally Keras iterates through each layer in topological order, determines the layer type and its output shape (given the model’s input shape or after building the model), and computes the number of parameters that layer will allocate. The printed table shows each layer’s name and class, the output tensor shapes at that stage, and the parameter count for that layer; at the bottom it aggregates totals for all parameters, trainable parameters, and non-trainable parameters. This sequential view is effectively a narrative of how data will flow through the network: you can see how intermediate tensor shapes change (e.g., time steps or feature dimensions shrink or expand), where dimensionality reductions happen (Flatten, GlobalPool, Dense), and which layers contribute most of the parameter capacity.
Why you run this in the context of deep learning for financial prediction: model.summary() is a quick sanity check that the architecture matches the modeling intent and the data. It lets you confirm that the final output dimension matches your prediction target (single scalar for regression, probability vector for classification), that intermediate shapes are compatible with upstream feature pipelines, and that you haven’t accidentally introduced a huge parameter bottleneck or explosion that would cause overfitting or excessive memory use. The trainable vs non-trainable split draws attention to layers that are frozen (useful in transfer learning) or to BatchNormalization layers whose moving statistics are non-trainable parameters — both of which affect optimization dynamics and generalization in noisy financial datasets.
A couple of practical notes and gotchas to keep in mind: model.summary() may implicitly build the model if it hasn’t been built yet by supplying input shapes, which will cause layer weights to be created and initializers to run — that’s sometimes relevant for reproducibility. Also, model.summary() itself prints directly to stdout and returns None, so wrapping it with print(model.summary()) will print the summary and then print “None”; prefer calling model.summary() by itself or use the print_fn argument to redirect output. For very large or nested models you can use options like expand_nested=True or tf.keras.utils.plot_model to get a graphical view. Use the information from the summary to balance model capacity against available labeled financial data, and to guide choices about regularization, early stopping, and whether to simplify or deepen the architecture before training.
fig, ax = plt.subplots(figsize=(14, 4))

ci = model.conf_int()
errors = ci[1].sub(ci[0]).div(2)

coefs = (model.params.to_frame(’coef’).assign(error=errors)
         .reset_index().rename(columns={’index’: ‘variable’}))
coefs = coefs[~coefs[’variable’].str.startswith(’date’) & (coefs.variable != ‘const’)]

coefs.plot(x=’variable’, y=’coef’, kind=’bar’,
           ax=ax, color=’none’, capsize=3,
           yerr=’error’, legend=False, rot=0, title=’Impact of Architecture and Training Parameters on Out-of-Sample Performance’)
ax.set_ylabel(’IC’)
ax.set_xlabel(’‘)
ax.scatter(x=pd.np.arange(len(coefs)), marker=’_’, s=120, y=coefs[’coef’], color=’black’)
ax.axhline(y=0, linestyle=’--’, color=’black’, linewidth=1)
ax.xaxis.set_ticks_position(’none’)

ax.annotate(’Batch Size’, xy=(.02, -0.1), xytext=(.02, -0.2),
            xycoords=’axes fraction’,
            textcoords=’axes fraction’,
            fontsize=11, ha=’center’, va=’bottom’,
            bbox=dict(boxstyle=’square’, fc=’white’, ec=’black’),
            arrowprops=dict(arrowstyle=’-[, widthB=1.3, lengthB=0.8’, lw=1.0, color=’black’))

ax.annotate(’Layers’, xy=(.1, -0.1), xytext=(.1, -0.2),
            xycoords=’axes fraction’,
            textcoords=’axes fraction’,
            fontsize=11, ha=’center’, va=’bottom’,
            bbox=dict(boxstyle=’square’, fc=’white’, ec=’black’),
            arrowprops=dict(arrowstyle=’-[, widthB=4.8, lengthB=0.8’, lw=1.0, color=’black’))

ax.annotate(’Dropout’, xy=(.2, -0.1), xytext=(.2, -0.2),
            xycoords=’axes fraction’,
            textcoords=’axes fraction’,
            fontsize=11, ha=’center’, va=’bottom’,
            bbox=dict(boxstyle=’square’, fc=’white’, ec=’black’),
            arrowprops=dict(arrowstyle=’-[, widthB=2.8, lengthB=0.8’, lw=1.0, color=’black’))

ax.annotate(’Epochs’, xy=(.62, -0.1), xytext=(.62, -0.2),
            xycoords=’axes fraction’,
            textcoords=’axes fraction’,
            fontsize=11, ha=’center’, va=’bottom’,
            bbox=dict(boxstyle=’square’, fc=’white’, ec=’black’),
            arrowprops=dict(arrowstyle=’-[, widthB=30.5, lengthB=1.0’, lw=1.0, color=’black’))

sns.despine()
fig.tight_layout()
fig.savefig(results_path / ‘ols_coef’, dpi=300)
This block takes the fitted linear model (an OLS that regresses out-of-sample performance — labeled here as IC — on a set of architecture and training hyperparameters) and produces a concise visual summary showing each parameter’s coefficient and its uncertainty, grouped and annotated by hyperparameter type so stakeholders can quickly see which design choices move performance.
First, the code extracts the model’s two-sided confidence intervals and converts them into an “error” expressed as the half-width of each interval. This half-width is the amount you should plot above and below the point estimate to show the confidence range; using half-widths yields symmetric error bars around each coefficient and makes it visually straightforward to compare uncertainty across parameters. Next, the parameter vector and those computed errors are combined into a tidy DataFrame with columns [‘variable’, ‘coef’, ‘error’] so we can filter and plot easily. The code deliberately removes any variables that start with ‘date’ and the intercept (‘const’) because those are not actionable hyperparameters: they are nuisance/time controls and a baseline shift, respectively, and would clutter interpretation when the goal is to evaluate architecture/training effects.
For presentation, the script draws a horizontal bar-style figure where each variable is a bar with error caps. The bars are intentionally drawn with color=’none’ and an overplotted black underscore marker for the coefficient point — this emphasizes the point estimate while keeping the error region visually primary; the capsize parameter clarifies the confidence interval endpoints. A horizontal dashed line at y=0 is drawn so viewers can immediately see which coefficients are positive or negative relative to zero (an important check for statistical and economic significance in financial prediction tasks). The x-axis tick marks are hidden to reduce visual clutter because the annotations below and the variable labels on the bars are the primary navigational cues.
To help interpret groups of related hyperparameters (batch size, number of layers, dropout, number of epochs) the code adds bracket-style annotations spanning contiguous ranges of the x axis. These annotations are not about individual coefficient values but about grouping variables so a reader can judge, at a glance, whether an entire class of design choices tends to increase or decrease IC or carry large uncertainty. Finally, minor aesthetic cleanups (removing spines, tight layout) make the figure publication-ready, and the figure is saved to disk. One small technical note: the code uses pd.np to obtain an arange for plotting positions, which works but is deprecated — swapping in numpy.arange with an explicit numpy import would be more robust going forward.
Generate Predictions
def get_best_params(n=5):
    “”“Get the best parameters across all folds by daily median IC”“”
    params = [’dense_layers’, ‘activation’, ‘dropout’, ‘batch_size’]
    ic = pd.read_hdf(results_path / ‘scores.h5’, ‘ic_by_day’).drop(’fold’, axis=1)
    dates = sorted(ic.index.unique())
    train_period = 24 * 21
    train_dates = dates[:train_period]
    ic = ic.loc[train_dates]
    return (ic.groupby(params)
            .median()
            .stack()
            .to_frame(’ic’)
            .reset_index()
            .rename(columns={’level_4’: ‘epoch’})
            .nlargest(n=n, columns=’ic’)
            .drop(’ic’, axis=1)
            .to_dict(’records’))
This small function’s goal is to pick the best model hyperparameter combinations (including the epoch) by ranking them on the median daily Information Coefficient (IC) over a fixed historical training window. The IC is a common metric in predictive finance because it measures the rank-correlation between model scores and future returns; using it here focuses selection on predictive signal rather than on raw loss values.
First, the function loads the per-day IC table produced by earlier experiments. It immediately drops a ‘fold’ column because the selection logic operates across days (time) rather than across cross-validation folds; in practice the fold dimension is not needed for choosing robust, time-based hyperparameters and may already have been folded into the stored metrics. Next it determines a contiguous training window: 24 * 21 days (typically interpreted as 24 months × ~21 trading days/month → ~504 trading days). The function restricts the IC table to that initial block of dates so that ranking reflects performance over a fixed, historically relevant period rather than leakage from later evaluation periods.
The core aggregation groups the data by the hyperparameters of interest — dense_layers, activation, dropout, batch_size — so that each unique architecture/hyperparameter combination is considered as a unit. Within each group the code takes the median IC across the selected days for each epoch column. Choosing the median (instead of mean) is deliberate: median IC is robust to extreme daily noise and occasional market shocks that can otherwise inflate or deflate mean performance; in financial prediction, robustness to outliers helps avoid picking models that benefited from a transient anomaly.
After computing per-group medians across epochs, the code reshapes the resulting table so that each row corresponds to a particular (hyperparameter combination, epoch) pair with its median IC. It then picks the n rows with the largest median IC, which yields the top-performing combinations and the epoch at which each combination performed best on median IC. Finally, it strips the numeric IC from the returned results and emits a list of dictionaries, each containing the hyperparameters and the corresponding epoch for a top candidate. In short, this function returns the n most robust hyperparameter+epoch choices as judged by median daily IC over a predefined training window — a practical, outlier-resistant way to select DNN architecture and timing for financial prediction.
def generate_predictions(dense_layers, activation, dropout, batch_size, epoch):
    data = pd.read_hdf(’../12_gradient_boosting_machines/data.h5’, ‘model_data’).dropna().sort_index()
    outcomes = data.filter(like=’fwd’).columns.tolist()
    X_cv = data.loc[idx[:, :’2017’], :].drop(outcomes, axis=1)
    input_dim = X_cv.shape[1]
    y_cv = data.loc[idx[:, :’2017’], ‘r01_fwd’]

    scaler = StandardScaler()
    predictions = []

    do = ‘0’ if str(dropout) == ‘0.0’ else str(dropout)
    checkpoint_dir = checkpoint_path / str(dense_layers) / activation / str(do) / str(batch_size)

    for fold, (train_idx, test_idx) in enumerate(cv.split(X_cv)):
        x_train, y_train, x_val, y_val = get_train_valid_data(X_cv, y_cv, train_idx, test_idx)
        x_val = scaler.fit(x_train).transform(x_val)
        model = make_model(make_tuple(dense_layers), activation, dropout)
        status = model.load_weights((checkpoint_dir / f’ckpt_{fold}_{epoch}’).as_posix())
        status.expect_partial()
        predictions.append(pd.Series(model.predict(x_val).squeeze(), index=y_val.index))
    return pd.concat(predictions)
This function assembles out-of-fold predictions from previously trained neural nets so we can evaluate or ensemble models for financial prediction. It starts by loading a precomputed table of features and target columns from disk, drops rows with missing values and sorts the index to ensure deterministic, time-ordered slicing (important in finance to prevent look‑ahead leakage). It then identifies all columns that look like forward returns (filter(like=’fwd’)) and removes those from the feature set so we do not leak target information into X. The features and the specific target used for these evaluations (r01_fwd) are then restricted to observations up to and including 2017 — a deliberate temporal split so that cross-validation and later inference happen only on historical data.
Next the function prepares a StandardScaler instance and an empty list to accumulate predictions. There is a small normalization of the dropout string used to build a checkpoint path: dropout values of 0.0 are mapped to ‘0’ to keep directory names tidy and consistent. The checkpoint_dir is constructed from the model hyperparameters (dense layer configuration, activation, dropout, batch size) so that each trained model variant has its own location. This explicit directory structure is important for reproducibility and for loading the exact weights that correspond to a specific architecture and training run.
The core loop iterates over cross-validation folds produced by an external cv splitter. For each fold, get_train_valid_data (an external helper) maps the train/test index arrays into x_train, y_train and the validation (x_val, y_val) set. To avoid data leakage when scaling, the scaler is fit only on x_train and then used to transform x_val. That per-fold fitting is intentional: it preserves the invariants of out-of-fold prediction where information from the validation partition must not influence the scaling parameters. Note that we never retrain the model here — this routine is strictly for loading saved weights and producing predictions on validation slices.
A model instance is created for the requested architecture by calling make_model with the dense layer specification, activation and dropout. The function then loads weights from the checkpoint file corresponding to the current fold and epoch. The call to status.expect_partial() is a pragmatic choice: it avoids throwing an error if the saved weights are a subset of the model’s attributes (for example, if the saved checkpoint does not contain optimizer state or some auxiliary variables). That makes the loading robust when you only care about inference weights and not the full training state.
Predictions for the validation fold are computed with model.predict(x_val).squeeze() and captured as a pandas Series indexed by the original y_val index so they align cleanly with timestamps/identifiers. Each fold’s Series is appended to the predictions list and finally concatenated into a single Series covering all validation rows across folds. This returned Series therefore represents out‑of‑fold model outputs for the r01_fwd target, ready for ensemble construction, calibration, or evaluation without contaminating the holdout periods.
A couple of implementation notes to watch for: input_dim is computed early but not used anywhere in this function (it’s probably a leftover or intended for use inside make_model elsewhere). Also, the code assumes external definitions for cv, idx, make_tuple, make_model and get_train_valid_data and that the models were trained using compatible per-fold scaling; if training used a different scaling strategy you must mirror that here to ensure consistent inputs at inference time.
Backtesting with Zipline — Pipeline API and Custom Data
from pathlib import Path
from time import time

import numpy as np
import pandas as pd
import pandas_datareader.data as web
from logbook import Logger, StderrHandler, INFO, WARNING

from zipline import run_algorithm
from zipline.api import (attach_pipeline, pipeline_output,
                         date_rules, time_rules, record,
                         schedule_function, commission, slippage,
                         set_slippage, set_commission, set_max_leverage,
                         order_target, order_target_percent,
                         get_open_orders, cancel_order)
from zipline.data import bundles
from zipline.utils.run_algo import load_extensions
from zipline.pipeline import Pipeline, CustomFactor
from zipline.pipeline.data import Column, DataSet
from zipline.pipeline.domain import US_EQUITIES
from zipline.pipeline.filters import StaticAssets
from zipline.pipeline.loaders import USEquityPricingLoader
from zipline.pipeline.loaders.frame import DataFrameLoader
from trading_calendars import get_calendar

import pyfolio as pf
from pyfolio.plotting import plot_rolling_returns, plot_rolling_sharpe
from pyfolio.timeseries import forecast_cone_bootstrap

from alphalens.tears import (create_returns_tear_sheet,
                             create_summary_tear_sheet,
                             create_full_tear_sheet)

from alphalens.performance import mean_return_by_quantile
from alphalens.plotting import plot_quantile_returns_bar
from alphalens.utils import get_clean_factor_and_forward_returns, rate_of_return

import matplotlib.pyplot as plt
import seaborn as sns
At a high level this import block assembles the toolkit you need to turn historical market data into features and labels, feed those into a model-driven trading strategy, simulate execution with realistic costs, and then evaluate model and strategy performance. The narrative below follows the path data will take through the system and explains why each piece is included.
First, numpy and pandas are the foundation for numeric and tabular manipulation; pandas_datareader is included so you can pull external benchmark or auxiliary datasets (indices, macro series or vendor data) to align, normalize, or use as extra features or labels. The logbook logger gives a centralized, configurable way to capture runtime diagnostics and warnings during long backtests — useful because backtests often run for many assets and days and you need robust logging for debugging data issues or strategy actions.
Zipline is the core backtest engine: run_algorithm is the orchestration entrypoint that runs the event loop across the historical trading calendar. The zipline.api symbols you import (attach_pipeline, pipeline_output, schedule_function, date_rules, time_rules, record, order_target, order_target_percent, get_open_orders, cancel_order, set_commission, set_slippage, set_max_leverage, commission, slippage) are the primitives you use to (a) attach a feature-extraction pipeline to the algo, (b) schedule periodic rebalancing or maintenance tasks, © place and manage orders, (d) record runtime metrics for later analysis, and (e) configure execution assumptions (commissions, slippage, leverage caps). Configuring commission/slippage and limiting leverage is critical to prevent unrealistic simulated returns and reduce overfitting: we want model improvements that survive plausible transaction cost conditions.
The pipeline-related imports (Pipeline, CustomFactor, Column, DataSet, StaticAssets, USEquityPricingLoader, DataFrameLoader, US_EQUITIES) are how you build transformable, reusable feature engineering inside Zipline. CustomFactor lets you express rolling-window computations (e.g., n-day returns, rolling volatility, momentum statistics) at the pipeline level so calculations are executed efficiently across the universe. Column and DataSet let you define custom structured inputs (for example, to inject model predictions or external signals as first-class pipeline columns). USEquityPricingLoader and DataFrameLoader are how the pipeline gets its raw inputs — the former connects to Zipline’s standard pricing fields, the latter lets you feed precomputed DataFrames (e.g., engineered features or outputs from a DNN) into the pipeline so those signals can be used in the same unified pipeline-based workflow. Using the trading calendar and US_EQUITIES domain + StaticAssets shape the universe and align everything to the correct market sessions, preventing lookahead and chronologically inconsistent features.
The code imports load_extensions and bundles because real backtests usually rely on historical data bundles or custom extensions; these let you register and load the exact dataset slice you’ll use for both training and evaluation so experiments are reproducible. In short: ingest a stable history (bundle), attach feature loaders (DataFrameLoader or built-in pricing), and have the pipeline supply consistent features into the algo.
Order management primitives (order_target, order_target_percent, get_open_orders, cancel_order) are part of the trade execution story: the model will emit signals or target weights, and these functions implement position sizing and prevent double-ordering or orphaned orders. schedule_function combined with date_rules/time_rules gives you a deterministic cadence for rebalancing or for when to compute labels and perform training or inference in an online setup. record is used to persist internal metrics (scores, exposures, risk statistics) into Zipline’s simulation results for downstream analysis.
For evaluation you import alphalens and pyfolio. Alphalens is focused on factor-level analysis: get_clean_factor_and_forward_returns and mean_return_by_quantile let you transform a continuous signal (e.g., model score or predicted return) into labeled forward returns, clean the dataset to avoid lookahead, and compute how performance differs by quantile — this is invaluable when you want to verify that a DNN-produced score correlates monotonically with future returns and isn’t just overfitting noise. The alphalens tear sheets (create_returns_tear_sheet, create_summary_tear_sheet, create_full_tear_sheet) produce standardized diagnostics (information coefficients, factor returns, turnover) that help validate signals before you commit them to trading. Pyfolio provides portfolio-level diagnostics (rolling returns, rolling Sharpe, bootstrap forecast cones via forecast_cone_bootstrap) so you can compare the strategy-level P&L and risk characteristics to realistic expectations. Using both libraries lets you evaluate a model at the factor (signal) level and at the portfolio (execution) level.
Finally, matplotlib and seaborn are for plotting and visual exploration of features, model outputs, and the evaluation reports generated by alphalens/pyfolio. Visual diagnostics are essential to detect regime-dependent behavior, lookahead bias, or unstable model performance over time.
Putting it together: you ingest and align raw market and auxiliary data, register them into Zipline bundles or load them with DataFrameLoader, compute features via pipeline constructs and CustomFactors (ensuring proper lookback windows and alignment), optionally inject DNN predictions as pipeline columns, use get_clean_factor_and_forward_returns to label supervised targets and to validate predictive power across quantiles, drive a backtest through run_algorithm with scheduled rebalancing and realistic execution settings (commissions, slippage, leverage caps), manage orders safely with Zipline order primitives, and finally evaluate both factor and portfolio results with alphalens and pyfolio, producing plots and tear sheets to guide model iteration. Each imported module is chosen to enforce data integrity, prevent lookahead, simulate realistic trading frictions, and supply rigorous diagnostics — all necessary controls when developing deep neural network architectures for financial prediction so that improvements generalize beyond in-sample backtests.
Alphalens — Analysis
DATA_STORE = Path(’..’, ‘data’, ‘assets.h5’)This single line centralizes where the pipeline expects to find the canonical asset-level dataset: it constructs a pathlib.Path pointing at the HDF5 file assets.h5 in the repository’s ../data directory. In the larger DNN-for-financial-prediction workflow this Path acts as the single source-of-truth for preprocessed time series, labels, and metadata that training, validation, backtesting and feature-engineering steps will open and stream from. Using a Path object (rather than a plain string) is deliberate: it gives cross-platform path handling and convenient methods (resolve(), exists(), open()) so downstream code can reliably check and manipulate the location without needing OS-specific logic.
Choosing an HDF5 file here reflects performance and I/O considerations typical for deep learning on financial time series: HDF5 supports chunked reads, compression, and random access to subsets of large arrays so generators or tf.data pipelines can read mini-batches without loading everything into memory. The line therefore signals that subsequent code will not be loading CSVs into RAM but will likely use h5py / pandas.read_hdf or a custom reader to stream windows, handle sharding, and maintain reproducible train/validation splits. That design reduces startup latency and memory pressure and supports efficient epoch-level iteration during model training.
There are operational implications embedded in this choice that matter to reliability and reproducibility. Because the path is relative, the code’s behavior depends on the current working directory — useful for consistent relative-project layouts but brittle if processes are started from unexpected locations or in containers. Also, HDF5 is not safe for concurrent writes, so any multi-process feature-generation or distributed training that writes to this file must serialize writes or use alternative storage. For maintainability and reproducibility I recommend treating this Path as a configurable asset (via an environment variable or config file), validating its existence early (DATA_STORE.exists()), and documenting the expected schema and chunking strategy so feature pipelines and model training align on how data is read and split.
def get_trade_prices(tickers):
    prices = (pd.read_hdf(DATA_STORE, ‘quandl/wiki/prices’).swaplevel().sort_index())
    prices.index.names = [’symbol’, ‘date’]
    prices = prices.loc[idx[tickers, ‘2015’:’2018’], ‘adj_open’]
    return (prices
            .unstack(’symbol’)
            .sort_index()
            .shift(-1)
            .tz_localize(’UTC’))
This function’s job is to produce a clean, aligned table of tradeable prices for a set of tickers over a fixed historical window so downstream models can be trained or evaluated. It starts by pulling a large precomputed table of historical prices from an on-disk HDF store; that table is organized as a MultiIndex of symbol and date, but the index levels may be in the “wrong” order for the slicing we need. swaplevel() flips those two index levels so we can conveniently slice by (symbol, date) pairs, and sort_index() ensures the MultiIndex is ordered so subsequent loc-based slicing behaves deterministically.
Next, the code restricts the data both by the requested tickers and by the date range ‘2015’:’2018’, and it immediately selects the adj_open field. Choosing adjusted open is a deliberate business/quant choice: adjusted prices account for dividends and splits so the series reflects the true economic price history, and using the open price models a realistic execution price for intraday or next-day entry. The result of this selection is a Series indexed by (symbol, date) containing the adjusted open values for the specified span.
unstack(‘symbol’) then pivots that Series into a 2D DataFrame with dates as the row index and each ticker as a column. That layout is more convenient for vectorized operations, batch creation, and for feeding into a DNN (each row is a time slice across all tickers). sort_index() on the resulting DataFrame guarantees chronological ordering of the date index so time-shifts are meaningful; the next operation, shift(-1), moves every row’s values up one step in time, so the value on date t becomes the value that will be realized at t+1. Semantically this aligns features measured at time t with the trade price at the next available open — a standard technique to avoid look-ahead bias when creating supervised labels for next-day prediction.
Finally, tz_localize(‘UTC’) tags the date index as timezone-aware (UTC), which is important when merging with other time-indexed datasets, when computing returns or resampling, and when ensuring reproducible temporal alignment across systems. A couple of practical caveats: shift(-1) will produce NaNs for the final timestamp (no next-day price), so downstream code must drop or mask that row; tz_localize will fail if the index is already timezone-aware; and reading the full HDF can be heavy, so you should ensure the HDF key and store are appropriate for your environment. Overall, the function transforms raw stored price records into a tidy, model-ready matrix of next-day adjusted-open prices that the DNN can use as labels or as target-implied features for financial prediction.
predictions = (pd.read_hdf(results_path / ‘test_preds.h5’, ‘predictions’)
               .iloc[:, :3]
               .mean(1)
               .to_frame(’prediction’))
This block loads stored model outputs and collapses them into a single ensembled prediction column by averaging the first three prediction columns. Concretely, it opens the HDF5 results file and reads the dataset keyed by ‘predictions’, then takes the first three columns (positional selection), computes a row-wise arithmetic mean across those columns, and finally converts the resulting Series into a one-column DataFrame named “prediction”. The original DataFrame index is preserved, so any timestamp or instrument identifier remains attached to the ensemble values for downstream joins or evaluation.
Why this flow: we persist per-model or per-fold predictions to an HDF store as part of the training/evaluation pipeline; reading that store here gives a reproducible set of candidate predictions. Selecting .iloc[:, :3] indicates the intent to ensemble three outputs (for example, three models, three folds, or three output heads) — using positional selection is fast but brittle if column ordering can change. Taking the mean across axis=1 produces a simple unweighted ensemble, which reduces variance and smooths model-specific noise; that stability is often desirable in financial prediction where individual model outputs can be noisy and overfit to non-stationary regimes.
Important behavioral details to be aware of: pandas.mean(axis=1) defaults to skipna=True, so rows with some missing predictions will be averaged over the available values (which can unintentionally bias results if models are missing systematically). The arithmetic mean assumes the columns are directly comparable (same scale and semantics — e.g., probabilities rather than logits); if they are not, you must transform them first or use a different combiner (weighted mean, median, rank average, or stacking). Converting to a DataFrame with to_frame(‘prediction’) standardizes the output shape and column name for downstream code (evaluation, calibration, or submission pipelines) that expects a single-column DataFrame.
Recommendations for production: prefer selecting columns by explicit names rather than iloc to avoid order-dependent bugs; consider weighting or a more robust aggregator if some models dominate error metrics; verify that you are averaging the appropriate space (probabilities vs. logits vs. normalized scores); and handle NaNs explicitly if missing predictions are expected. This simple averaging step is a pragmatic ensemble baseline that improves stability and generalization in many financial prediction workflows, but it should be validated against alternatives given the domain’s sensitivity to small signal shifts.
factor = (predictions
          .unstack(’symbol’)
          .asfreq(’D’)
          .dropna(how=’all’)
          .stack()
          .tz_localize(’UTC’, level=’date’)
          .sort_index())
tickers = factor.index.get_level_values(’symbol’).unique()
Start-to-finish, this block is taking a time-series of per-symbol predictions that lives in a MultiIndex (date, symbol) Series and coercing it into a clean, consistently-indexed Series suitable for sequence models and downstream alignment operations.
First, unstack(‘symbol’) pivots the Series into a DataFrame with one column per ticker and the date as the row index. The purpose here is not just to reshape data but to treat all symbols together on the same time axis so we can impose a uniform frequency across them. asfreq(‘D’) then reindexes that DataFrame to a daily cadence. This creates explicit rows for every calendar day in the covered interval (filling any newly created cells with NaN). Doing this gives us a regular time grid, which matters for DNN architectures that consume fixed-length contiguous sequences or when you need to compute lagged features consistently across symbols.
dropna(how=’all’) removes any days where every symbol is NaN — effectively throwing away calendar days for which we have no observations at all. Crucially, we keep days where at least one symbol has data, so we do not throw away partially-populated days that could still contain useful signal for cross-sectional models or multi-symbol batches. After that, stack() collapses the DataFrame back into a Series with the original two-level index. Because stack drops NaNs by default, the result contains only the actual observed symbol/date pairs, but now those observations are aligned to the uniform daily grid we established and any fully-empty calendar days are gone.
tz_localize(‘UTC’, level=’date’) makes the date level timezone-aware by assigning UTC. That normalization is important for reproducible time-based windowing, for correct joins with other time-stamped financial datasets (market calendars, macro series, exchange timestamps), and for avoiding subtle bugs when converting between timezones or when generating time delta features for the model. Note: this assumes the date level is currently timezone-naive; if it’s already tz-aware you would use tz_convert instead.
Finally, sort_index() ensures a stable, deterministic ordering (chronological by date, then by symbol) which is essential for reproducible train/validation splits and for feeding sequences into batch generators. The subsequent line extracts the distinct ticker identifiers from the symbol index level; you’ll use that list to iterate over symbols, to build symbol-to-column mappings, or to construct per-symbol feature/target matrices.
Practical trade-offs and checks: using ‘D’ produces calendar days (including weekends/holidays). If you want only trading days you might prefer a business-day frequency or an exchange-specific calendar. Unstacking many tickers can be memory-heavy, so for very large universes consider an on-disk approach or processing in chunks. Also ensure the date level is naive before tz_localize or handle tz-aware dates with tz_convert to avoid exceptions. Overall, this sequence gives you a timezone-normalized, regularly-indexed, and ordered series of predictions that is easier and safer to feed into temporal DNN pipelines.
trade_prices = get_trade_prices(tickers)This single call is the gateway between raw market data and everything the model will learn from: get_trade_prices(tickers) pulls the series of executed trade prices for the requested asset universe and returns them in a structured, analysis-ready form. Conceptually, the function should do more than “hit an API and hand you numbers”; it must deliver a consistent time-indexed price matrix (typically a pandas DataFrame keyed by timestamp with columns for each ticker or a multi-index if multiple price fields are requested) so downstream feature engineering and batching can be deterministic and free of alignment issues.
Why this matters: deep sequence models require regularly sampled, aligned inputs and must not be exposed to look-ahead or inconsistent timestamps. get_trade_prices is where we enforce those guarantees — it typically normalizes timezones, resamples to the chosen frequency (e.g., 1-min, 1-day), and aligns all tickers to the same index. It also handles corporate actions (adjusting for splits/dividends if we want total-return style series vs raw last trade), fills or flags missing intervals (forward-fill when appropriate, or mark NaNs so downstream logic can drop or impute), and optionally filters out market microstructure noise or outliers that would destabilize training.
Operationally, the function should also encapsulate robustness: rate-limit-aware retrieval, retries for transient API failures, caching of historical pulls to avoid repeated network calls during experiments, and clear provenance metadata (source, pull time, symbol mapping). From the returned object you should expect a numeric dtype suitable for vectorized operations, consistent index frequency, and metadata about any adjustments or imputations applied — all of which are essential for reproducibility and correct target construction (e.g., computing future returns for supervised learning without leakage).
Finally, think of this call as the contract between data ingestion and model logic: everything we do next — log returns, scaling/normalization, windowing into sequences, computing volatility or technical features — assumes the price matrix is aligned, adjusted according to our modeling choices, and annotated for any missing or imputed values. If you change how get_trade_prices behaves (frequency, adjustment policy, fill strategy), it will directly affect feature distributions and model performance, so keep those policies explicit and versioned.
factor_data = get_clean_factor_and_forward_returns(factor=factor,
                                                   prices=trade_prices,
                                                   quantiles=5,
                                                   max_loss=0.3,
                                                   periods=(1, 5, 10, 21)).sort_index()
factor_data.info()
This block of code is performing the standard Alphalens-style preprocessing step that turns a raw factor series and a matrix of trade prices into an analysis-ready table of targets and metadata for model training or evaluation. At a high level, get_clean_factor_and_forward_returns does three things in sequence: (1) aligns the factor values with the price history so each factor observation is paired with the correct asset and timestamp, (2) computes forward returns for the specified horizons, and (3) cleans and annotates the dataset (quantile assignment and outlier removal). The result is a DataFrame indexed by (date, asset) where every row represents a single factor observation and its future return outcomes for the horizons you care about.
Why we align and compute forward returns here: the DNN needs targets (labels) that represent realized future performance after the factor signal is observed. The function calculates forward returns over the periods tuple (1, 5, 10, 21), i.e., short- through medium-term horizons, by using the trade_prices series forward-looking from each factor timestamp. Doing this centrally avoids subtle look-ahead or misalignment errors that come from ad-hoc joins; the library explicitly aligns timestamps and assets so the factor always precedes the return window used as the label.
Quantiles=5 transforms the continuous factor into cross-sectional buckets for each date. This is useful for two reasons. First, it normalizes the factor across the cross-section so that signals with different scales become comparable day-to-day; second, quantile labels are directly useful for performance analysis (e.g., average return by bucket) and for framing classification or ordinal tasks for the network if you prefer a categorical target instead of raw returns. Choosing 5 quantiles is a design choice reflecting the trade-off between resolution and robustness to noise.
max_loss=0.3 is a pragmatic data hygiene step: it filters extreme negative future returns (e.g., returns worse than −30%) that are likely caused by corporate events, delistings, or data issues and would otherwise dominate loss functions and metrics. Removing these outliers prevents the DNN from learning spurious patterns driven by rare catastrophic moves and stabilizes gradient-based training. Note that this is an application-level decision — you should tune that threshold according to the asset universe and your tolerance for extreme events.
Sorting the resulting DataFrame index with sort_index() ensures deterministic, time-ordered grouping by date and asset. This ordering matters for downstream steps such as time-based train/validation splits, batch construction, or any operation that assumes chronological order to avoid leakage. Finally, factor_data.info() is a quick sanity check: it reports row/column counts and non-null counts so you can see how much data was dropped during alignment and cleaning and whether any forward-return columns are mostly NaN (which would indicate insufficient price history for a horizon).
In the context of building deep neural network architectures for financial prediction, this preprocessing produces the aligned feature-target pairs (and optional quantile labels) that you’ll feed into training. The multi-horizon forward returns let you train multi-task models or compare horizon-dependent signal strength; the quantile mapping provides an easy cross-sectional normalization or classification target; and the outlier filtering reduces label noise that would otherwise hurt generalization. Before training, validate the output of this step (via info and by inspecting group sizes and return distributions) to ensure you have sufficient, clean examples for each time horizon and quantile.
create_summary_tear_sheet(factor_data)This single call is the entry point for translating a model’s raw forward-looking scores into a compact, business‑oriented diagnostic of predictive quality and tradability. At a high level, the function ingests your factor_data (which, in this workflow, is the DNN’s per‑asset, per‑date output joined with the corresponding forward returns and any grouping/weight columns) and runs a fixed sequence of validation, cross‑sectional aggregation, performance measurement, and visualization so you can decide whether the network’s signal is meaningful and usable in a trading process.
First the routine validates and aligns the inputs: it ensures factor values are time‑stamped earlier than their forward returns (to avoid look‑ahead), removes or marks missing entries, and usually applies basic cleaning such as winsorization or Z‑score normalization. This step matters because neural net outputs can have heavy tails or occasional extreme outliers; normalizing and trimming those extremes prevents a few anomalous predictions from dominating summary statistics and gives you a realistic sense of typical signal behavior rather than noise artifacts.
Next the code organizes the cross‑section into buckets (quantiles) or groups, and optionally neutralizes the factor against selected exposures (market cap, sector, etc.). Binning into quantiles converts a continuous model score into ordered portfolios so the function can measure monotonicity — i.e., whether higher predicted scores consistently map to higher realized returns — while neutralization helps reveal whether the learned signal is genuinely predictive or simply proxying for known risk factors. This is crucial when comparing architectures: an apparent performance improvement that disappears after neutralization indicates a model that’s overfitting to common exposures rather than extracting new predictive content.
With cleaned and grouped data, the function computes the core metrics: per‑quantile forward returns (and their time series), long‑short returns (top quantile minus bottom quantile), cumulative return trajectories, and Information Coefficients (ICs) — typically rank and/or Pearson correlations between the factor and forward returns. It also produces time‑series summaries of IC (mean, standard deviation, IR) and statistical significance tests (t‑statistics) so you can assess whether the signal is stable and persistent over time versus being a short‑lived fluke. The IC is particularly useful for neural nets because it captures rank order predictive power even when the network’s raw output scale varies with architecture or calibration.
The function also reports practical tradability diagnostics: turnover of quantile portfolios, exposure concentration, and sometimes capacity‑related measures (how returns change when weighting by market capitalization or when limiting position sizes). Turnover matters because many DNN outputs are noisy day‑to‑day; a high turnover signal may have attractive backtest returns but will be expensive to implement once realistic transaction costs are applied. Seeing turnover alongside long‑short performance lets you judge whether an architecture’s apparent edge survives realistic execution constraints.
Finally, create_summary_tear_sheet typically produces a set of plots and tables — cumulative P&L for long/short portfolios, quantile return heatmaps, IC time series and distribution, and summary statistics — so you can quickly eyeball robustness and regime behavior. The visual diagnostics help you catch problems that pure numbers can miss: intermittent spikes of performance, regime dependence (e.g., the model only works in high volatility periods), or sector concentration.
In terms of how you use the output to iterate on DNN architectures: treat the tear sheet as a compact scorecard. Look for consistent positive ICs, monotonic quantile returns, acceptable turnover, and robustness after neutralization. If an architecture has good in‑sample numbers but high turnover, consider adding temporal smoothing or regularization; if its signal collapses after sector neutralization, incorporate sector features or modify the loss to penalize exposure leakage; if performance is unstable over time, investigate overfitting, data leakage, or change the training target (longer horizons, different return windows). The tear sheet doesn’t replace careful backtesting, but it gives the targeted diagnostics you need to decide whether to promote a model into more detailed portfolio simulations or to go back and adjust the architecture, features, or training regimen.
Loading Zipline extensions
Required only in the notebook to locate the bundle.
load_extensions(default=True,
                extensions=[],
                strict=True,
                environ=None)
This single call is an initialization gate for runtime extensions that the training and inference pipeline expects: with default=True the function will first load a curated set of built-in extensions that provide essential runtime behavior (things like logging/metrics hooks, safe numerical helpers, device/accelerator adapters, or framework-specific integrations). The function then attempts to load any additional extension modules listed in extensions — here an empty list, so no extra plugins are requested — and it uses strict=True to adopt a fail-fast policy: any missing or incompatible extension will raise an error immediately rather than being silently ignored. environ=None means the loader does not inject or override environment variables; it will inherit whatever OS-level environment is already present.
Why this matters for deep neural networks in financial prediction: reproducibility, stability and auditability of model runs hinge on having a predictable runtime surface. Loading default extensions ensures core instrumentation and compatibility shims are present so data preprocessing, gradient computations, or hardware acceleration behave as expected across experiments. Choosing an empty extensions list deliberately avoids bringing in third‑party or experimental plugins that could change numerical behavior or introduce non‑determinism — an important control when you are comparing architectures or doing backtests. The strict=True setting enforces correctness early: if a required extension (for example, a GPU adapter or a custom feature‑store connector) is not available or incompatible, the process fails immediately, preventing downstream training on an incorrect environment or with missing telemetry.
Operationally, the function will typically perform these steps in order: decide which default modules to enable, iterate and attempt to import/configure each requested extension, validate version/compatibility constraints, apply any environment overrides if environ were provided, and register the loaded extensions’ hooks and side effects into the global runtime. Side effects can include registering callbacks for dataset transforms, enabling mixed‑precision, binding profilers, or adding metrics exporters; because those are global changes, keeping extensions minimal and explicit reduces unexpected interactions between components such as data pipelines, optimizers, and evaluation code.
A few practical recommendations: keep strict=True during development and evaluation to catch environment mismatches early, but consider controlled relaxation only when you intentionally want to tolerate optional plugins. If you need reproducible hardware or library behavior (GPU visibility, MKL settings, deterministic CuDNN flags), pass a concrete environ mapping rather than None so the loader establishes the exact runtime variables for the job. Finally, when augmenting this call with additional extensions for profiling, quantization, or alternative data connectors, pin extension versions and document their purpose — changes to these modules can subtly affect numerical results and therefore financial performance comparisons across model architectures.
log_handler = StderrHandler(format_string=’[{record.time:%Y-%m-%d %H:%M:%S.%f}]: ‘ +
                            ‘{record.level_name}: {record.func_name}: {record.message}’,
                            level=WARNING)
log_handler.push_application()
log = Logger(’Algorithm’)
This block is setting up the application-wide logging behavior that the rest of the neural‑network code will use to report important runtime events, errors, and warnings. First, a stderr handler is constructed with a custom format string that embeds a high‑precision timestamp, the record’s severity name, the function that emitted the message, and the message text itself. The choice of a microsecond‑precision timestamp and the function name is deliberate: in financial prediction and model training you often need fine‑grained ordering and latency information (for example, to correlate model updates with market ticks or to measure how long forward/backward passes take), and including the emitting function makes it easier to trace which component (data loader, training loop, evaluation routine) produced each event.
The handler is created with level=WARNING, which means only events of severity WARNING and above will be emitted through this handler. That is a pragmatic default for production runs of computationally heavy DNN workflows: it suppresses informational and debug noise from tight loops (reducing I/O and CPU overhead) while ensuring you still see important problems like failed data reads, gradient explosions reported as warnings, or runtime exceptions. During debugging or development you would normally lower this to INFO or DEBUG to get more visibility into intermediate steps (but beware the performance and log volume impact).
push_application() registers this handler at the application scope so it becomes the active, global handler for log records. In practice that means any logger created after this point (including the Logger(‘Algorithm’) instantiated on the last line) will have its records handled by this stderr handler unless other handlers are explicitly added. Using an application‑level handler is useful because it centralizes formatting and routing decisions for all modules of the neural‑network stack, but it also means you should configure it once at program bootstrap (not inside library modules) and be mindful of pushing/popping handlers if you need to change behavior in tests or subprocesses.
Instantiating Logger(‘Algorithm’) produces a named logger that the rest of the Algorithm code will call to emit messages. The name provides another dimension of context in larger systems (it will show up as the logger name in records or let you target configuration at specific components). When log.warning or log.error is called, the logger creates a record, the registered handler formats it using the provided template, and the formatted line is written to stderr. Sending log output to stderr is intentional: it keeps diagnostic output separate from program stdout (so model outputs or metrics can still be piped elsewhere) and ensures container runtimes and process supervisors typically capture the logs.
Operational considerations and best practices: because stderr writes can become a bottleneck under high logging volume, use WARNING+ in production and switch to INFO/DEBUG only during controlled debugging sessions; prefer non‑blocking or rotating/file handlers if you need persistent logs; avoid pushing application handlers inside libraries (do it in the application entrypoint); scrub or avoid logging sensitive market or user data; and for distributed training, integrate with a centralized aggregator (or use process‑ranked logging) so logs from multiple workers are identifiable and do not interleave confusingly.
Algorithm Parameters
N_LONGS = 25
N_SHORTS = 25
MIN_POSITIONS = 10
These three constants encode downstream trading and portfolio-construction constraints rather than model parameters: N_LONGS and N_SHORTS specify the maximum number of long and short positions the system will hold at any decision step, and MIN_POSITIONS enforces a lower bound on how many positions the portfolio must contain. In a typical DNN-based financial predictor the network produces a score or weight per asset (for example a scalar “long/short propensity” for each ticker). After the network emits those scores, a deterministic selection stage uses N_LONGS and N_SHORTS to turn scores into an actionable portfolio — usually by taking the top N_LONGS highest scores for long exposure and the bottom N_SHORTS lowest scores for short exposure (or their soft/differentiable approximations). Those constants therefore determine the dimensionality and semantics of the model’s output layer (you need at least N_LONGS+N_SHORTS candidate outputs, often implemented as a single vector of length equal to the asset universe).
The reason we cap longs and shorts separately is both business- and risk-driven. Separating long and short capacity lets us impose asymmetric constraints (for example, different limits or transaction-cost profiles in long vs short instruments), and it prevents one side from overwhelming the portfolio if the network outputs skewed scores. Setting both values to 25 here gives symmetric capacity — the architecture assumes equal opportunity to place up to 25 longs and 25 shorts, which simplifies downstream risk calculations (gross exposure, net exposure) and keeps the optimization problem bounded.
MIN_POSITIONS exists to avoid pathological or low-information portfolios. Allowing the model to return zero or a tiny number of positions can produce noisy high-variance returns, wildly variable transaction costs, and weak training signals (gradients coming only from a few assets). By forcing at least 10 active positions we encourage diversification: the portfolio is less sensitive to single-asset idiosyncrasies, the loss surface during training is smoother because more assets contribute to the objective, and backtests become more robust to outliers. In practice the selection logic will either expand the chosen set to meet MIN_POSITIONS (e.g., if top-k long/short picks produce fewer than 10 unique assets, include the next-ranked assets irrespective of sign) or adjust weights to spread exposure across more names.
There are important implications for architecture and optimization. Hard top-k selection is non-differentiable, so in training you’ll normally use a continuous relaxation (soft top-k, Gumbel-softmax, or a smooth thresholding) so gradients flow to the network. The chosen N_LONGS/N_SHORTS influence how strong the supervision signal is: small caps (small N) produce sparse gradients that can slow learning and increase overfitting; large caps dilute the signal per asset and may encourage the network to learn coarse patterns. MIN_POSITIONS moderates this trade-off by guaranteeing a minimum amount of participation in the loss, which usually improves gradient availability and generalization.
Finally, these values reflect practical constraints beyond pure prediction accuracy: transaction costs, liquidity, operational limits, and risk appetite. Increasing N_LONGS/N_SHORTS improves diversification but raises turnover and execution complexity; decreasing them supports concentrated bets but increases variance. The symmetric 25/25 with a minimum of 10 is a middle-ground choice that aims to balance pickiness (letting the model concentrate on high-conviction names) with robustness (ensuring enough active positions to stabilize returns and gradients). When applying these constants, also validate against the actual tradable universe size (the code should handle cases where the universe contains fewer than N_LONGS+N_SHORTS assets) and consider making them tunable hyperparameters or conditioning them on liquidity and volatility metrics if you need dynamic capacity.
bundle_data = bundles.load(’quandl’)This single line invokes our data-bundle loader to retrieve the pre-ingested dataset registered under the name “quandl”. Conceptually, the bundle is not a single CSV but a packaged, versioned collection: time-series price and volume panels, corporate-action adjustment tables (splits/dividends), and asset metadata (identifier ↔ ticker mappings, start/end lifetimes, exchange/calendar info). We load the bundle here to obtain a canonical, reproducible source of historical market data that downstream code will turn into model inputs and labels. Practically, after this call the code typically extracts aligned price series, applies the bundle’s adjustments so prices and returns are continuous across corporate actions, and uses the metadata to filter assets and enforce a consistent trading calendar — all of which are critical for avoiding label leakage, survivorship bias, and mismatched timestamps when training deep neural networks for financial prediction. Loading a registered bundle also saves repeated network calls and guarantees the same preprocessed snapshot for experiments; if the named bundle is missing or stale you must re-ingest the source (for example, re-run the bundle ingestion for Quandl) or update the registry. Finally, be mindful of memory and performance: bundles can be large, so downstream logic should filter by date/asset, stream or chunk data where possible, and perform normalization and windowing (scaling, return computation, volatility normalization) after loading to produce stable inputs for the DNN.
Machine Learning Predictions
def load_predictions(bundle):
    predictions = (pd.read_hdf(results_path / ‘test_preds.h5’, ‘predictions’)
                   .iloc[:, :3]
                   .mean(1)
                   .to_frame(’prediction’))
    tickers = predictions.index.get_level_values(’symbol’).unique().tolist()

    assets = bundle.asset_finder.lookup_symbols(tickers, as_of_date=None)
    predicted_sids = pd.Int64Index([asset.sid for asset in assets])
    ticker_map = dict(zip(tickers, predicted_sids))

    return (predictions
            .unstack(’symbol’)
            .rename(columns=ticker_map)
            .prediction
            .tz_localize(’UTC’)), assets
This function pulls model outputs from disk, aggregates them into a single time-series prediction per instrument, and converts symbol-based labels into the trading-system’s numeric asset identifiers so downstream components can consume them directly.
We start by loading the previously saved predictions table and immediately reduce it to the first three prediction columns and compute a row-wise mean. In the context of DNN architectures for financial prediction, those three columns are effectively an ensemble (e.g., multiple heads, CV folds, or MC-dropout draws); averaging them here produces a single, lower-variance prediction per timestamp-and-symbol. Converting the resulting Series into a one-column DataFrame named “prediction” preserves that label for later column-level manipulation.
Next we extract the unique ticker strings from the MultiIndex (the index contains a level named ‘symbol’). Those tickers are resolved to the platform’s Asset objects using the bundle.asset_finder.lookup_symbols call. Using as_of_date=None asks the finder for the current/latest mapping for each symbol; that produces Asset instances whose .sid values are the stable integer identifiers used throughout the execution/backtest stack. We then build a mapping from ticker string to sid by iterating the returned assets in the same order as the tickers input (lookup_symbols preserves that order), so we can reliably rename columns.
The DataFrame is then reshaped from long to wide with .unstack(‘symbol’), moving the symbol level into columns so each column corresponds to one instrument’s prediction time-series. Because the DataFrame’s column axis is a two-level index (top level ‘prediction’, second level the symbol), we apply .rename(columns=ticker_map) to replace symbol strings with their integer sids; this produces column labels that the trading system expects. Accessing .prediction selects the top-level column, yielding a regular DataFrame whose columns are the integer sids.
Finally, we tz_localize(‘UTC’) the time index so timestamps are timezone-aware and compatible with the rest of the pipeline (uniform UTC timestamps avoid subtle alignment bugs when mixing data sources). The function returns that sid-indexed, UTC-localized predictions DataFrame along with the list of Asset objects so callers can access additional metadata if needed.
A couple of practical notes: the code assumes lookup_symbols returns Asset objects in the same order as the tickers and that all tickers resolve successfully; if a ticker fails to resolve you’d get a None or an exception when accessing .sid, so you might want to add explicit validation or filtering in production. Also, averaging the first three columns is a simple ensemble aggregation; if you later want weighted blending or more robust combining rules, that’s the place to change.
predictions, assets = load_predictions(bundle_data)This single line is the handoff point between raw bundle data and the structured model outputs we use downstream: load_predictions(bundle_data) ingests whatever packaged results or artifacts you collected (model outputs, pickled result files, or a combined CSV/Parquet) and returns two things — a numeric array/table of predictions and a parallel list/array of asset identifiers. Conceptually, the function is responsible for pulling predictions out of the bundle, projecting them into a consistent, machine-readable form, and exposing a stable mapping from each prediction vector to the asset it corresponds to so every downstream consumer can unambiguously align signals with securities.
Internally load_predictions should do more than simple extraction: it validates and normalizes. It will align timestamps and shapes (for example: time × assets, or sample × horizon), coerce numeric types, fill or mark missing values, and enforce a deterministic ordering for the asset axis. These steps are necessary because downstream training, ensemble stacking, backtests and portfolio construction all assume consistent alignment — an off-by-one in ordering or a shuffled asset list can silently destroy model evaluation or cause misattribution of returns. The function often also handles multi-horizon or multi-output predictions by standardizing the output shape (e.g., flattening or returning a 3-D tensor) and may convert probabilistic outputs to the canonical form your stack expects (logits vs. probabilities vs. ranked scores).
Why return assets separately? Keeping the predictions and asset identifiers distinct preserves separation of concerns: the numeric array is optimized for matrix operations (loss computation, normalization, tensor batching), while the assets list provides the mapping needed for joins with market features, labels, or portfolio constraints. This separation makes it straightforward to re-order, slice, or aggregate predictions without losing the referential mapping back to instrument metadata (sector, exchange, liquidity bucket), which is essential for risk-aware architectures and transaction-cost-aware execution.
From a robustness and reproducibility perspective, load_predictions is the place to enforce invariants: assert len(assets) matches the asset dimension of predictions, confirm timestamps align with ground-truth label windows, and ensure data types and value ranges are sane (no NaNs where your pipeline can’t handle them). For financial DNNs, it’s also where you’d apply any calibration or scaling required before feeding these signals into another model or a portfolio optimizer — for example, z-scoring cross-sectionally or clipping extreme values to prevent exploding gradients or an outsized influence in a linear optimizer.
Finally, be mindful of practical pitfalls and performance trade-offs. If the bundle contains large historical predictions, the function should stream or memory-map data rather than materialize huge in-memory arrays. Keep ordering deterministic (sort by asset id or enforce a canonical index) to avoid non-deterministic model evaluation. And instrument load_predictions with checks and logging — when debugging model performance or backtests, the most common root cause is misaligned predictions-to-assets mapping, so explicit assertions and a clear contract from this function make the rest of the DNN architecture and financial evaluation reliable.
predictions.info()Calling predictions.info() is a quick structural checkpoint: it prints the DataFrame’s index range, number of rows, each column name, its non-null count and dtype, and a summary of memory usage. We invoke this immediately after assembling model outputs or feature-label merges to get a compact, human-readable snapshot that reveals shape, completeness, and type information before any downstream processing or model training/inference. The purpose is not only to confirm that the pipeline ran without blowing up, but to surface issues that would silently sabotage a deep model — for example missing target values, string/object columns left in feature slots, unexpected NaNs introduced by joins, or a much larger row count than expected from a data leakage or merge bug.
Read the output with an eye toward three practical decisions. First, non-null counts tell you where to impute, drop, or mask values: sparse columns may need engineered missingness flags or be discarded if they contain little signal. Second, dtypes guide preprocessing choices — object/string columns typically indicate categorical data that requires encoding (category dtype + embeddings or one-hot depending on cardinality), datetime types need extraction of temporal features or conversion to an index for time-based splits, and numeric types should usually be downcasted or converted to float32 for neural network training to save memory and match GPU expectations. Third, memory usage and row count influence operational decisions such as downsampling, batching, and whether to pipeline data with on-disk formats or use in-memory tensors; very large memory footprints push you to compress categories, drop irrelevant ID columns, or use more compact dtypes.
Finally, use this snapshot to detect modeling-specific risks: confirm that your target column exists and has the expected dtype (integer labels for classification, float for regression, or probability columns for calibration), check for duplicated or sentinel index ranges that might indicate duplicate rows or improper shuffling, and verify that time-series indices or date columns are present to avoid lookahead bias in splits. In short, predictions.info() is a low-cost, high-value diagnostic that informs concrete next steps in preprocessing, feature engineering, memory optimization, and data-splitting strategies for robust financial DNN modeling.
Defining a Custom Dataset
class SignalData(DataSet):
    predictions = Column(dtype=float)
    domain = US_EQUITIES
This small class is a schema declaration that tells our data/storage/processing framework how to represent model outputs (the “signals”) and which asset universe they belong to. By inheriting from DataSet we get the framework’s behavior for persistence, validation, and join logic; by declaring predictions = Column(dtype=float) we create a typed column specifically for the numeric model output, and by setting domain = US_EQUITIES we bind this dataset to the U.S. equity universe so downstream components know how to align it with price data, calendars, and the correct ticker set.
Narratively, the flow is: a trained deep model or an online inference service computes a numeric score per asset and writes that score into SignalData.predictions. Because predictions is a Column with dtype=float, the framework will validate that the values are numeric, choose an appropriate storage/serialization format, and let other pipeline pieces (batch loaders, backtesters, aggregators) pull those floats without additional parsing. That validation and typing exist to prevent subtle bugs later — e.g., accidental string outputs or JSON-wrapped numbers — that would corrupt metric calculations or backtests.
Setting domain = US_EQUITIES is a deliberate, cross-cutting design choice. The domain drives how we align these predictions with feature windows, market calendars, liquidity filters, and the universe used by our backtest and execution layers. It ensures predictions are interpreted against the same asset set that produced the features the model was trained on, avoiding mismatches (for example, using a model’s outputs intended for U.S. large caps against non-U.S. tickers or illiquid small-caps).
From the perspective of deep neural networks for financial prediction, this class occupies the boundary between model output and downstream evaluation/execution: it isolates the raw numeric signal, enforces numeric typing, and attaches the signal to the correct market context. Practical implications: decide and document the semantic of the float (probability, score, expected return), choose precision (float32 vs float64) consistent with training/inference, and ensure any required keys for alignment — timestamp, asset identifier — are present either here or in the DataSet base so joins to prices and labels are unambiguous. If signals must be bounded (e.g., probabilities), add validation; if multiple signal variants are needed (calibrated vs raw), consider additional columns or separate datasets to keep responsibilities clear.
Defining pipeline loaders
signal_loader = {SignalData.predictions:
                     DataFrameLoader(SignalData.predictions, predictions)}
This single line builds a small, explicit registry that maps a logical signal type — here the predictions produced by a model — to a loader object that standardizes how that signal is presented to the rest of the pipeline. Conceptually the data (predictions), which is already materialized as a pandas DataFrame, is handed to a DataFrameLoader that becomes the canonical accessor for that signal. The reason we do this is practical and architectural: downstream code (feature assemblers, backtesters, stacking layers, evaluation logic) should not need to know whether the predictions came from a live model, a CSV, or an in-memory DataFrame; it should only ask the loader for a validated, normalized view of the predictions. Using the SignalData.predictions key (an enum or well-known symbol) makes the registry explicit and self-documenting so callers request signals by semantic name rather than by ad-hoc strings.
From a data-flow perspective, the sequence is: the model produces a DataFrame of predictions; that DataFrame is wrapped by DataFrameLoader, which is responsible for enforcing the expected contract (schema, index alignment, dtype conversions, sorting, timezone normalization, missing-value handling, caching, etc. — implemented inside the loader). The registry then exposes this wrapped object under the semantic key; later stages of the DNN training, ensembling, or backtesting pipeline iterate the registry, pull the loader for SignalData.predictions, and call its load/access methods to retrieve a clean, pipeline-ready table. This decoupling is important in financial prediction systems because small differences in timestamp alignment, asset identifiers, or missing-value semantics can silently break training or evaluation; the loader centralizes those validations so the model and downstream consumers can remain small and focused.
Finally, this design keeps the code extensible and testable: adding additional signal types (features, labels, market data) is a simple matter of adding more key->loader entries, unit tests can replace loaders with fixtures, and the consistent loader interface makes it easy to reason about where normalization and schema enforcement occur. As a practical note, ensure the DataFrameLoader enforces the expected columns and index semantics for predictions (timestamp, asset id, score/probability) so consumers of SignalData.predictions do not have to perform ad-hoc checks later in the pipeline.
Setting up the pipeline
class MLSignal(CustomFactor):
    “”“Converting signals to Factor
        so we can rank and filter in Pipeline”“”
    inputs = [SignalData.predictions]
    window_length = 1

    def compute(self, today, assets, out, predictions):
        out[:] = predictions
This small class is an adapter that surfaces model outputs as a Pipeline factor so the rest of the pipeline machinery (ranking, screening, and filters) can act on them. The overall flow is: your deep neural network produces per-asset predictions and those predictions are made available to the Pipeline via SignalData.predictions; MLSignal is a CustomFactor wrapper that reads those predictions for the current bar and writes them into the factor output array so other Pipeline components can consume them. We set window_length = 1 because we only need the most recent model output for each asset — the factor is not computing any time-series feature itself, it is simply projecting the model’s current score into Pipeline space.
In compute, the framework hands you the inputs aligned to assets for the requested window. The predictions argument contains the model outputs for the requested lookback (here a single row because window_length is 1). The code assigns those values directly into out so the factor value for each asset equals the corresponding model prediction. That direct pass-through is intentional: downstream Pipeline operations (rank, top, quantiles, custom filters) will decide how to interpret those scores — for example, ranking by predicted return, filtering by top-k predicted probabilities, or converting scores into trade signals.
A few practical considerations behind this minimal design: by leaving transformations out of MLSignal we keep the factor generic and avoid double-handling of normalization or threshold logic that should be controlled close to the model or in higher-level strategy code. However, because the compute method is only relaying values, you must ensure the predictions are aligned with the Pipeline’s asset ordering, contain the expected shape and dtype, and have reasonable handling for NaNs or extreme values before they are wrapped. Also, although numpy broadcasting lets the assignment work with a (1, N) predictions array, it’s clearer and safer to use the most recent row explicitly (e.g., predictions[-1]) when you extend this pattern, and to normalize or clip scores if you expect to use them for ranking or risk-limited trade sizing.
Create a Pipeline
def compute_signals():
    signals = MLSignal()
    return Pipeline(columns={
        ‘longs’ : signals.top(N_LONGS, mask=signals > 0),
        ‘shorts’: signals.bottom(N_SHORTS, mask=signals < 0)},
            screen=StaticAssets(assets))
This small function wires a model-produced score stream into a Pipeline that yields two concrete selection columns: which assets to long and which to short. The code first instantiates MLSignal — that object represents the model’s per-asset prediction (a continuous score or confidence produced by your DNN architecture). Rather than returning raw scores, the Pipeline is constructed to produce discrete selection lists: ‘longs’ is the set of top N_LONGS assets among those with positive model scores, and ‘shorts’ is the set of bottom N_SHORTS assets among those with negative scores. The top(…) and bottom(…) helpers perform a cross-sectional ranking at each date and pick the highest- or lowest-ranked members; the mask argument (signals > 0 for longs, signals < 0 for shorts) restricts the candidate pool so we only consider assets whose model output has the intended sign. This enforces directional consistency — we won’t go long on assets the model predicts to underperform or short assets it predicts to outperform.
The Pipeline also receives a screen=StaticAssets(assets) argument, which narrows the universe up front to a fixed asset list. That keeps selection consistent with trading constraints (listed instruments, liquidity bounds, compliance lists) and reduces noise for the cross-sectional ranking by excluding irrelevant instruments before top/bottom operate. Taken together, the data flow is: evaluate MLSignal for the screened universe → apply elementwise sign masks to exclude candidates with the wrong predicted direction → rank the remaining candidates cross-sectionally → emit the top/bottom N as the longs and shorts columns. The function returns a Pipeline object (not immediate selections); the backtest or live execution system will evaluate this pipeline over time to produce time-series of long and short candidate sets.
Design rationale: choosing top/bottom and masks makes the system robust to score calibration — ranking is invariant to score scale and the sign mask enforces directional intent coming from the DNN. Fixing N_LONGS/N_SHORTS gives explicit control of position counts and portfolio breadth, which is often simpler and more stable than threshold-based sizing when model outputs vary in magnitude. Practical caveats: top/bottom typically drop NaNs and may handle ties arbitrarily, so ensure your MLSignal handles missing outputs and that you understand tie-breaking behavior. You may also consider augmenting the mask with a magnitude threshold (e.g., abs(signal) > min_confidence) if you want to avoid marginal bets, or tuning N_LONGS/N_SHORTS as hyperparameters. Finally, downstream components (position sizing, risk limits, rebalancing cadence) will consume these columns to build the final long-short portfolio.
Algorithm Initialization
def initialize(context):
    “”“
    Called once at the start of the algorithm.
    “”“
    context.longs = context.shorts = None
    set_slippage(slippage.FixedSlippage(spread=0.00))
#     set_commission(commission.PerShare(cost=0.001, min_trade_cost=0))

    schedule_function(rebalance,
                      date_rules.every_day(),
                      time_rules.market_open(hours=1, minutes=30))

    schedule_function(record_vars,
                      date_rules.every_day(),
                      time_rules.market_close())

    pipeline = compute_signals()
    attach_pipeline(pipeline, ‘signals’)
This initialize function wires the trading environment and the daily control flow so the model’s predictions become actionable and measurable in a reproducible way. First, it creates two context-level placeholders, context.longs and context.shorts, and sets them to None. Those placeholders are the algorithm’s persistent memory for the current target long and short sets; we leave them None on startup so the first rebalance can treat the portfolio as uninitialized and build the baseline target positions explicitly (this avoids carrying stale lists across runs and makes the first reconciliation deterministic).
Next, execution-model settings are tightened down: slippage is set to FixedSlippage(spread=0.00) and the commission line is left commented out. The practical reason for using zero slippage (and deferring commission modeling) here is experimental control: when comparing different deep neural network architectures for financial prediction, you want to isolate prediction quality from market microstructure noise. By removing simulated spread and commission effects during algorithm development or model comparison, we get a cleaner signal about how architecture choices affect returns. When moving to production or realistic backtests, you’d re-enable realistic slippage/commission to capture execution costs.
The core behavioral scheduling is next: we register two scheduled callbacks. The rebalance() function is scheduled every trading day at market_open + 1 hour 30 minutes. That specific timing matters: it keeps us clear of the market open auction and the initial burst of volatility/liquidity imbalance, so fills and price signals are more stable when we execute model-driven portfolio changes. It also aligns with the pipeline lifecycle (the pipeline runs before market open), so waiting until 1h30 gives any additional pre-market data consumers time to settle and ensures that using pipeline outputs to form trades is robust. The second callback, record_vars(), is scheduled every day at market_close; this is the end-of-day bookkeeping hook used to record metrics, diagnostics, and any variables you want persisted for training/analysis (for example daily returns, prediction confidence, realized vs. predicted moves, or features for an offline training set). Recording at close ensures labels that depend on close prices are available and that you capture a full trading-day outcome for training/validation.
Finally, the code builds and registers the signal pipeline: pipeline = compute_signals() and attach_pipeline(pipeline, ‘signals’). compute_signals() should assemble the feature transformations, factor calculations, and possibly a wrapper that injects the DNN’s outputs into the pipeline structure. Attaching the pipeline registers it with the backtest engine so its output (identified here as ‘signals’) is computed on each trading day and made available to scheduled functions like rebalance. Conceptually, the pipeline is the feature/score factory for the DNN-driven decisions, the scheduled rebalance is the actuator that converts those scores into trades at a controlled time, and record_vars is the telemetry that closes the loop for evaluation and offline model training. Together, these pieces enforce a clean separation of concerns — feature computation, decision execution, and logging — so you can iterate on neural architectures and hyperparameters without conflating prediction behavior with timing or execution artifacts.
Retrieve daily Pipeline results
def before_trading_start(context, data):
    “”“
    Called every day before market open.
    “”“
    output = pipeline_output(’signals’)
    longs = pipeline_output(’signals’).longs.astype(int)
    shorts = pipeline_output(’signals’).shorts.astype(int)
    holdings = context.portfolio.positions.keys()

    if longs.sum() > MIN_POSITIONS and shorts.sum() > MIN_POSITIONS:
        context.longs = longs[longs!=0].index
        context.shorts = shorts[shorts!=0].index
        context.divest = holdings - set(context.longs) - set(context.shorts)
    else:
        context.longs = context.shorts = pd.Index([])
        context.divest = set(holdings)
This function runs every morning to translate the model’s daily “signals” into three pieces of state the trading system will act on for the rest of the day: a set of longs to hold, a set of shorts to hold, and a set of existing holdings to divest. First it pulls the pipeline output named ‘signals’ (the full output is stored in output but the code then pulls the longs and shorts Series again and casts them to int). Casting to int is deliberate so the subsequent .sum() checks operate on integer counts rather than floats or boolean-like values — we want a reliable numeric count of active signals before we act. It also reads the current portfolio holdings (the tickers we currently own) so we can compare the new signal set against what’s already held.
Next the function enforces a minimum-signal requirement: it only accepts the pipeline’s recommendations if both the long side and the short side have more than MIN_POSITIONS active signals. This threshold is a risk-control/robustness check tied to the modelling choices: for our DNN-based predictor we require a minimum breadth of confident outputs before constructing a book, which reduces sensitivity to noisy or sparse model outputs and helps preserve the intended market-neutral or diversified structure of the portfolio. If both sides meet the threshold, the code extracts the tickers that have non-zero signal values (longs[longs != 0].index and similarly for shorts) and assigns them to context.longs and context.shorts; these indices are the assets the rest of the algo will try to allocate to. It then computes context.divest by subtracting the new long and short sets from the set of current holdings — that difference is the explicit list of positions we intend to close because they are no longer signalled.
If the threshold test fails (i.e., the model did not return enough signals on either side), the function takes a conservative route: it clears both context.longs and context.shorts to empty Index objects and sets context.divest to all current holdings so the portfolio will be fully unwound. This conservatism prevents trading on weak model outputs and limits unintended exposures when the DNN predictions aren’t sufficiently comprehensive or confident.
A couple of practical notes to keep in mind: the code assumes the pipeline encodes active long/short signals as non-zero integers (positive 1 for selection, for example); if shorts are encoded as negative values the current sum>MIN_POSITIONS test would fail, so ensure the signal encoding matches this logic (or change the condition to count non-zero entries explicitly). Also, the function calls pipeline_output(‘signals’) multiple times unnecessarily — reusing the initially stored output would be cleaner and cheaper. Finally, these context variables are designed to be consumed later in the trading day by the order/portfolio management logic, so keeping this step deterministic and conservative is important for stable execution of DNN-driven financial predictions.
Defining the Rebalancing Logic
def rebalance(context, data):
    “”“
    Execute orders according to schedule_function() date & time rules.
    “”“

    for symbol, open_orders in get_open_orders().items():
        for open_order in open_orders:
            cancel_order(open_order)

    for stock in context.divest:
        order_target(stock, target=0)

#     log.warning(’{} {:,.0f}’.format(len(context.portfolio.positions), context.portfolio.portfolio_value))
    if not (context.longs.empty and context.shorts.empty):
        for stock in context.shorts:
            order_target_percent(stock, -1 / len(context.shorts))
        for stock in context.longs:
            order_target_percent(stock, 1 / len(context.longs))
This rebalance function is the place where model-generated signals and portfolio management rules are translated into actual exchange orders. It runs on a schedule (via schedule_function) and performs three ordered tasks so the executed portfolio state aligns with the latest signals while avoiding conflicting or stale instructions.
First, it cancels any outstanding open orders. This is deliberate: we want a clean slate before placing a new set of orders to avoid duplicate or contradictory instructions (partial fills from prior orders can otherwise produce unintended position sizes). Canceling outstanding orders reduces race conditions between prior scheduling cycles and the new target allocation, and prevents layering multiple consecutive orders that inflate transaction costs or produce execution confusion.
Next, any symbols listed in context.divest are actively liquidated by calling order_target(…, target=0). This is the explicit “remove from portfolio” step — typically used for assets the model or risk rules flagged for removal (delist risk, deteriorated signal, compliance constraints, etc.). Using a target-zero order ensures the final position is closed regardless of current size or direction, rather than issuing a blind size-based trade that could under- or overshoot.
Finally, the function applies the long/short allocations. It checks that not both context.longs and context.shorts are empty to avoid dividing by zero; if there are signals, it loops through shorts and longs separately and issues order_target_percent calls with equal-weight sizing: each short receives -1/len(context.shorts) and each long receives +1/len(context.longs). The intent here is explicit — treat the model outputs as directional signals only and impose a simple, deterministic portfolio construction rule: equal-weight across all active names in each book. This yields a straightforward, low-variance implementation that isolates the predictive model’s directional skill from sizing complexity and keeps net exposure controlled (shorts use negative percentages). The code’s structure also implicitly enforces portfolio neutrality in sizing logic (each side is normalized independently), which is useful when evaluating a DNN architecture’s outperformance without introducing position-weighting biases.
A few important behavioral notes tied to these choices: canceling orders and then reissuing avoids order conflicts but increases turnover — be mindful of transaction costs and potential slippage. Equal-weight sizing is a conservative baseline; in practice you may want to scale positions by model confidence, volatility, or risk budgets to improve risk-adjusted returns. The emptiness check prevents runtime errors from dividing by zero, but you should also ensure that the same symbol cannot appear in both context.longs and context.shorts (or add logic to resolve such conflicts). Overall, this function implements a clean, reproducible mapping from DNN signals to executed portfolio exposures while keeping the construction simple so that performance attribution can focus on the model’s predictive quality rather than complex sizing rules.
Recording Data Points
def record_vars(context, data):
    “”“
    Plot variables at the end of each day.
    “”“
    record(leverage=context.account.leverage,
           longs=context.longs,
           shorts=context.shorts)
This function is a small end-of-day hook that captures a few key portfolio-level variables and forwards them to the backtest/monitoring system. When the scheduler invokes record_vars(context, data) at the end of each trading day, it immediately calls the framework’s record function with three attributes pulled from the current context: leverage, longs, and shorts. The data argument is present only to match the expected signature for scheduled callbacks and isn’t used here; all inputs come from the context object, which represents the current state of the account and strategy.
Specifically, leverage is read from context.account.leverage and reports the gross leverage the account is carrying at close; longs and shorts are pulled from context (typically representing the current set of long positions and short positions, or aggregated metrics derived from them). Recording leverage lets you track risk amplification over time, while recording longs/shorts captures the directional exposure and position counts or sizes. Those three signals together provide a compact snapshot of position-level and portfolio-level exposure at daily frequency.
We record these variables at end of day for two practical reasons. First, daily sampling reduces intra-day noise and establishes a consistent cadence that matches many financial prediction horizons (daily returns, overnight signals, etc.), making the recorded series easier to align with labels and model input windows for deep learning. Second, recording after the market close helps avoid transient states during order placement and partial fills, producing more stable training targets and monitoring metrics.
From the perspective of building and operating deep neural networks for financial prediction, these recorded series serve two roles: observability and dataset construction. Observability: they are lightweight diagnostics you can plot to detect regime shifts, risk buildup, or unintended strategy drift while training or live-running a model. Dataset construction: if you plan to include portfolio-level context in model inputs or to build supervised targets (e.g., next-day change in leverage or position tilt), recording these values at a consistent timestamp provides the aligned, historical series you need. A few cautions: ensure the recorded values are numeric and normalized before feeding into a model; be careful about lookahead leakage if you use recorded portfolio variables as inputs for a model that should only see information available before decision time; and make sure recordings happen after fills settle if you depend on realized state.
If you want to extend this for better model engineering and diagnostics, consider also recording portfolio_value, cash, realized/unrealized P&L, and a timestamp or trading-day index so you can easily join these series with price-based features. Standardize naming and normalization (for example, leverage as a scalar, longs/shorts as counts or aggregated notional normalized by NAV) to simplify downstream preprocessing. Finally, the current minimal implementation is intentionally lightweight — its job is just to capture end-of-day exposure signals so the rest of the system (plots, logs, model training pipelines) can consume consistent, daily-aligned snapshots.
Execute the Algorithm
dates = predictions.index.get_level_values(’date’)
start_date, end_date = dates.min(), dates.max()
This block is extracting the temporal span of the prediction results. Because the predictions DataFrame uses a MultiIndex that contains a ‘date’ level, get_level_values(‘date’) pulls out the sequence of timestamp values associated with each prediction row (this is cheaper and more robust than resetting the whole index or assuming a particular index order). The subsequent min() and max() calls compute the earliest and latest timestamps in that sequence, giving you start_date and end_date as pandas Timestamp objects that represent the full time window covered by the predictions.
We do this to establish a single, authoritative time range for downstream steps: alignment with ground-truth labels, constructing evaluation windows (e.g., in-sample vs out-of-sample), resampling or calendar-conversion (business-day alignment), plotting x-axis limits, and ensuring consistent batching when aggregating results across assets or folds. Knowing the temporal bounds up front lets the model-evaluation pipeline enforce that metrics, lookbacks and rolling calculations operate on the intended interval and that comparisons across different prediction runs are apples-to-apples.
Two practical caveats to keep in mind: if the date level contains missing values you may get NaT results from min/max, and if the dates are timezone-aware vs. naive you should normalize or standardize them before comparisons to avoid subtle mismatches. Also guard against an empty index (which would make min/max invalid) and prefer this approach over full index materialization because it’s memory-efficient for large multi-indexed prediction tables.
print(’Start: {}\nEnd: {}’.format(start_date.date(), end_date.date()))This line logs the two temporal boundaries that the pipeline is about to use by printing a compact, human-readable “Start” and “End” pair on separate lines. In the context of DNNs for financial prediction, those boundaries are the single most important metadata for reproducibility and debugging: they determine which historical rows are fed into feature windows, how labels are aligned to prediction horizons, and how training/validation/test splits are created. The call to .date() intentionally strips off time components (hours/minutes/seconds/microseconds and any local-naive datetime details) so the output emphasizes the date-level boundary used for slicing — that reduction prevents noisy timestamps from obscuring whether you actually moved the window by whole days, which is a common source of subtle data leakage or off-by-one errors in time series modelling. The format string inserts each date and uses a newline (\n) so Start and End appear on separate lines for readability; the extra spaces after “End:” are simply to align the labels visually.
A couple of practical caveats and improvements to keep in mind: if start_date/end_date are already date objects, calling .date() may be unnecessary (or raise an error if they are None), and if they are pandas Timestamps .date() yields a datetime.date which is fine for display but loses timezone awareness — if you need exact, auditable boundaries include ISO 8601 timestamps or timezone info instead. Finally, in production or experiment-tracking you should replace print with structured logging (or experiment metadata recording) so these boundaries are captured reliably across runs, which is essential when comparing architectures, hyperparameters, and backtests.
start = time()
results = run_algorithm(start=start_date,
                        end=end_date,
                        initialize=initialize,
                        before_trading_start=before_trading_start,
                        capital_base=1e5,
                        data_frequency=’daily’,
                        bundle=’quandl’,
                        custom_loader=signal_loader)  # need to modify zipline

print(’Duration: {:.2f}s’.format(time() - start))
This block is the orchestration wrapper that runs the backtest and measures how long it takes. First we capture a wall-clock timestamp in start so we can compute elapsed runtime after the backtest completes. The heavy lifting happens inside the call to run_algorithm: it drives the event loop that steps through the historical interval from start_date to end_date and invokes the lifecycle functions you supply to initialize state, refresh signals, and place orders. The run_algorithm call returns a results object that aggregates the backtest output (portfolio history, performance metrics, transactions, positions, logs), which you can use to evaluate model performance and downstream risk/return calculations for the DNN architectures you are testing.
The initialize and before_trading_start hooks are the two places where your model and trading logic are tied into Zipline’s simulation. initialize is the one-time setup where you load the trained neural network weights, create persistent context (for example scalers, feature names, or model metadata), and schedule recurring tasks. before_trading_start runs at the start of each simulated trading day and is intentionally used to prepare the day’s inputs and decide actions without causing intra-day lookahead. In a DNN-based workflow you typically use before_trading_start to assemble the input feature vectors (from prices, macro data, or externally generated signals), run a forward pass of the network to produce predictions or target weights, and then emit orders based on those predictions. Using these lifecycle hooks keeps model inference and order logic neatly separated from the backtest engine.
The additional run_algorithm parameters control the environment that the algorithm runs against. capital_base=1e5 sets the initial cash — important because absolute position sizing, leverage constraints, and portfolio-level risk metrics scale with that number, so you pick a realistic capital base to make results interpretable. data_frequency=’daily’ configures the engine to use daily bars and run the daily lifecycle hooks; this is significant for DNN inputs and label construction because it determines the temporal resolution of the features and the risk of lookahead if features are misaligned. bundle=’quandl’ tells Zipline which price/economic data bundle to source standard market fields from; in combination with the next parameter this determines the union of price data and your custom signals that feed the model.
custom_loader=signal_loader is the key integration point for external, model-specific features: you’ve extended Zipline (hence the inline note “need to modify zipline”) so that a custom_loader can inject precomputed signals or alternative data into the environment alongside or instead of the standard bundle fields. The why is practical and methodological: deep learning models for financial prediction often depend on many non-price features (alternative data, engineered time-series, or outputs from a separate feature-generation pipeline) that are not part of the native bundle. A custom loader lets you align those signals to the backtest timeline, map them to Zipline asset identifiers, and control their release timing so the model never sees future information (preventing lookahead bias). Implementing this correctly typically requires changes to Zipline’s ingestion/loader layer so the loader can provide time-indexed columns of features, respect the data_frequency, and handle missing timestamps or asset delistings gracefully.
Finally, after run_algorithm completes you print the elapsed time; that simple measurement is practical for iterative experimentation with DNN architectures because training and forward-pass complexity, feature volume, and custom loader overhead can dramatically affect turnaround time. Monitoring runtime helps you decide when to optimize the feature pipeline, batch inference, or the Zipline modifications themselves. In short, this snippet ties together the evaluation interval, the model lifecycle hooks, the environment configuration (capital and frequency), and a custom data integration point so you can reliably simulate how your deep neural network would have behaved in production-style historical conditions.
PyFolio — Analysis
returns, positions, transactions = pf.utils.extract_rets_pos_txn_from_zipline(results)This single call is a convenience extractor that turns a Zipline backtest “results” object into the three canonical time-series artifacts we need for downstream model-building: portfolio returns (what actually happened to the P&L), per-asset positions (what we held and how exposure changed over time), and the transaction ledger (the executed trades, sizes, prices and fees). Conceptually, the function walks the Zipline result structure, pulls out the performance DataFrame and the bookkeeping tables, and returns them in a clean, aligned form so the rest of the pipeline can treat them as first-class data sources.
More specifically, the function isolates the portfolio-level return series because those returns are typically our primary labels or evaluation target when training predictive models. It ensures those returns are aligned on trading timestamps and normalized to a consistent convention (e.g., daily returns, same timezone and index) so that losses and evaluation metrics computed later are meaningful. Next it extracts the positions snapshot history: a time-indexed table of asset identifiers to position sizes (or notional exposures). Positions are important as explanatory features — they let you derive realized exposure, leverage, sector/asset-class weights, and per-asset holding durations — and the extractor will typically align positions to the same index as returns and handle missing snapshots so downstream feature windows don’t get misaligned or spuriously drop rows. Finally it collects the transactions ledger: discrete trade events with timestamp, asset id, signed amount, executed price and fee/commission fields. That ledger is the source for measuring turnover, realized transaction cost, slippage and for building cost-aware loss terms or training labels that reflect execution reality.
Why do we separate these three things? Because each answers a different modeling need: returns provide labels and portfolio-level signal, positions provide exposure-based features and risk/regime indicators, and transactions provide microstructure/cost signals and are necessary to compute realistic net returns. The extractor’s alignment and cleaning steps (reindexing to a common calendar, normalizing identifiers, filling or masking missing data, and preserving timestamp fidelity) are crucial to prevent label leakage, to make rolling-window feature construction straightforward, and to maintain reproducibility when you convert backtests into training and validation datasets for deep neural networks applied to financial prediction.
A few practical caveats to bear in mind after calling this function: confirm the timestamp granularity matches your model (e.g., daily vs intraday), verify whether positions are raw share counts or normalized weights and convert if necessary, and check transaction fields for zeros or omitted fees if you’ll be training cost-sensitive models. Finally, you’ll often follow this extraction with deterministic preprocessing steps — resampling or aggregating returns, computing log-returns or excess returns, standardizing features over rolling windows, and constructing sequence windows — so keeping these three artifacts clean and aligned makes those downstream transformations much simpler and less error-prone.
benchmark = web.DataReader(’SP500’, ‘fred’, ‘2014’, ‘2018’).squeeze()
benchmark = benchmark.pct_change().tz_localize(’UTC’)
This snippet is pulling a market benchmark (the S&P 500 series from FRED) and converting it into a time‑indexed return series that’s ready to be used as a target or input feature for a deep model.
First, web.DataReader(‘SP500’, ‘fred’, ‘2014’, ‘2018’) fetches the SP500 series for the specified time window. DataReader returns a time‑indexed pandas object (often a DataFrame when the source uses a single named column). squeeze() immediately collapses that single‑column result into a pandas Series so subsequent time‑series operations are simpler and you don’t have to worry about column alignment or accidental DataFrame broadcasting later in the pipeline.
Next, pct_change() computes one‑period simple percentage changes (default periods=1) on the Series. Converting price levels to period returns is deliberate: returns are much closer to stationary than raw prices, which helps the model learn patterns that generalize across regimes and prevents the network from trying to model nonstationary trends directly. Using simple percentage returns also keeps values on a comparable, scale‑invariant basis, which stabilizes gradients and makes normalization/standardization downstream more effective. Note the practical consequences: pct_change introduces a NaN for the first timestamp and can expose outliers on days with extreme moves — both of which you should handle (drop/forward‑fill, clip, winsorize, or use robust scaling) before batching into the network.
Finally, tz_localize(‘UTC’) makes the DatetimeIndex timezone‑aware by assigning UTC. The purpose is to ensure deterministic alignment when merging with other time series, when resampling or when constructing time‑based train/validation splits; timezone awareness avoids subtle bugs that arise from mixing naive and aware timestamps and improves reproducibility across environments. Caveats: tz_localize expects a naive index (it will error if the index is already tz-aware), and the year strings used for start/end are parsed to the corresponding boundary dates — be explicit about exact boundaries if you need a particular inclusive range.
In short: you fetch the benchmark, convert to a Series, turn prices into one‑period returns (for stationarity and scale normalization), and attach a UTC timezone so the series aligns reliably with other datasets. For use in a DNN pipeline you’ll still need to address the initial NaN, choose any additional scaling or outlier handling, and confirm the exact date bounds and sampling frequency match the rest of your feature set.
Custom plots
LIVE_DATE = ‘2016-11-30’This single named constant, LIVE_DATE = ‘2016–11–30’, serves as an explicit temporal cut‑off that anchors several decisions in the data pipeline and model lifecycle. In practice, when the pipeline ingests historical market data and labels for training, this value is used to partition the timeline: records with timestamps on or before LIVE_DATE are treated as the historical dataset for model development (training and cross‑validation), while records after LIVE_DATE are reserved for out‑of‑sample evaluation, paper‑trading simulations, or live deployment. That sequential split prevents “future leakage” — i.e., it ensures the model never sees information from the production period during training — which is critical for realistic performance estimates in financial prediction.
Why this constant is important goes beyond mere separation: using a fixed, human‑readable LIVE_DATE creates a reproducible snapshot of the dataset and the feature engineering logic tied to a specific market regime. Analysts and auditors can re‑run experiments or regulatory reviews knowing exactly which trades and market states were considered in model construction. It also communicates intent: the code is explicitly gating any model training or backtest to a clearly defined historical window rather than implicitly relying on the current system clock or ad‑hoc data slices.
From a data‑flow perspective, downstream components will typically consult LIVE_DATE before applying time‑based filters, constructing target windows, or computing performance metrics. For example, a feature builder will cap training features at LIVE_DATE, an evaluator will compute forward returns only on data after LIVE_DATE, and a deployment script will use the same date to determine which model snapshot corresponds to the “live” model. Consistency in how this value is interpreted (inclusive vs. exclusive bounds, whether it represents end‑of‑day or a specific timestamp) is essential to avoid subtle off‑by‑one errors that can manifest as label leakage or misaligned evaluation windows.
A few practical notes tied to the “how” and operational robustness: representing the date as an ISO string makes it easy to parse and display, but consider converting it to a timezone‑aware datetime or a date object at the earliest point in the pipeline to avoid ambiguity about market hours and daylight saving shifts. Be explicit about inclusivity (does LIVE_DATE include that day’s data?) and document whether it is an end‑of‑day cutoff, snapshot time, or last date used for training. Finally, treat this constant as a configuration item rather than a hardcoded magic value: version it alongside the model and experiment metadata, and update it as part of controlled retraining cycles to maintain auditability and defensible production behavior.
fig, axes = plt.subplots(ncols=2, figsize=(16, 5))
plot_rolling_returns(returns,
                     factor_returns=benchmark,
                     live_start_date=LIVE_DATE,
                     logy=False,
                     cone_std=2,
                     legend_loc=’best’,
                     volatility_match=False,
                     cone_function=forecast_cone_bootstrap,
                     ax=axes[0])
plot_rolling_sharpe(returns, ax=axes[1], rolling_window=63)
axes[0].set_title(’Cumulative Returns - In and Out-of-Sample’)
axes[1].set_title(’Rolling Sharpe Ratio (3 Months)’)
sns.despine()
fig.tight_layout()
fig.savefig((results_path / ‘pyfolio_out_of_sample’).as_posix(), dpi=300)
This block builds a two-panel diagnostic figure that summarizes how the model’s predicted trading strategy actually behaves over time and, crucially, how that behavior changes once we move from training (in-sample) to live (out-of-sample) data. The side-by-side layout is deliberate: the left panel gives a cumulative-performance narrative (returns vs. benchmark plus a forward-looking uncertainty cone) and the right panel gives a risk-adjusted stability check (rolling Sharpe), so you can judge both absolute and risk-adjusted performance at a glance and spot divergences that indicate overfitting, regime sensitivity, or implementation issues.
On the left panel we call plot_rolling_returns with the model strategy returns and a benchmark series. Supplying LIVE_DATE as live_start_date instructs the plotting routine to explicitly separate in-sample vs. live periods, which is the primary mechanism for assessing generalization: we want to see whether the cumulative returns path and alpha persist after the model leaves the development window. We disable log-scale (logy=False) because here we want to preserve linear perception of drawdowns and cumulative arithmetic returns — logarithmic scaling can compress large drawdowns and obscure meaningful absolute differences when evaluating trading strategies. The cone_function argument is set to forecast_cone_bootstrap and cone_std=2 to produce a bootstrap-derived uncertainty cone roughly corresponding to a two-standard-deviation band; using a bootstrap cone (instead of a parametric Gaussian cone) helps capture realistic return distributions and serial dependence, giving a more faithful picture of plausible future cumulative return paths. volatility_match=False intentionally prevents automatic rescaling of the cone to match recent realized volatility; that decision keeps the cone tied to the bootstrap-sampled dynamics rather than shrinking it to recent volatility, which is helpful when you want a conservative, model-driven uncertainty estimate rather than one conditioned on potentially non-representative recent volatility. legend_loc=’best’ just places the legend automatically so annotations don’t clutter the view.
The right panel is a rolling Sharpe plot with rolling_window=63 (about three months of trading days), which smooths daily Sharpe fluctuations into a meaningful short-term stability metric. Choosing 63 days balances responsiveness with noise reduction: it’s short enough to detect recent deterioration after deployment but long enough to avoid false alarms from a handful of outlier days. This rolling Sharpe is a compact check for whether the model’s signal remains information-rich in live trading — a steadily declining rolling Sharpe after live_start_date is a classic red flag for model drift or data leakage during training.
Finally, there are a few presentation and reproducibility touches: sns.despine removes chart borders to keep attention on the curves, tight_layout fixes spacing so titles and labels aren’t clipped, and fig.savefig writes a high-resolution (dpi=300) PNG to the results directory using a cross-platform path string. In the context of developing deep neural network architectures for financial prediction, these visuals serve as immediate, actionable feedback: they show whether architecture or training choices produce persistent, risk-adjusted alpha, reveal temporal degradation that suggests changes to regularization or online adaptation, and quantify forecast uncertainty so you can set risk limits or decide whether to recalibrate model confidence.
Tear Sheets
pf.create_full_tear_sheet(returns,
                          positions=positions,
                          transactions=transactions,
                          benchmark_rets=benchmark,
                          live_start_date=LIVE_DATE,
                          round_trips=True)
This single call invokes pyfolio’s comprehensive diagnostics pipeline to turn your strategy outputs into a full performance “tear sheet” so you can evaluate the DNN-driven trading strategy end-to-end. At runtime pyfolio treats the first argument, returns, as the baseline time series of strategy PnL (typically a pandas Series of periodic returns); it uses that series to compute all primary performance metrics — cumulative return, annualized return/volatility, Sharpe, maximum drawdown and drawdown durations, rolling statistics, and time-series visualizations that summarize how the model’s predictions actually translated into profit and risk over time.
We pass positions and transactions so the tear sheet can move beyond aggregate returns and explain *how* those returns were generated. Positions (the holdings over time) let pyfolio calculate exposure, leverage, sector/asset concentration and position-level P&L attribution across the sample period. Transactions (the trade-level records) allow it to compute turnover, realized PnL, transaction costs and fill the details needed for trade-level analytics. Supplying both is important because returns alone hide whether profitable performance comes from a few concentrated bets, steady small bets, or frequent round-trip trading; positions and transactions expose that structure.
Setting round_trips=True changes the trade analysis behavior: pyfolio will identify completed “round trips” (the sequence of trades that opens and then closes a position) and produce per-trade statistics — profit per round-trip, holding time distributions, win/loss ratios, and dispersion of trade returns. That logic matches opens and closes for each asset and computes realized P&L for closed trades, which is critical when you want to validate whether the DNN’s signals produce consistent, economically sensible trade outcomes rather than incidental aggregate gains.
The benchmark_rets argument places your strategy in context by computing relative metrics (alpha, information ratio, rolling beta, and performance attribution versus the chosen benchmark). live_start_date slices the results into backtest vs. live periods so you can compare in-sample/backtest performance to out-of-sample or live deployment performance; pyfolio will flag and separately summarize metrics after that date, which is a practical guardrail when assessing whether the architecture is generalizing outside of training and parameter-tuning phases.
From a model-validation perspective this call is doing three things: (1) translating model signals into a holistic view of risk-adjusted performance, (2) exposing trade-level and position-level behavior so you can diagnose overfitting, regime dependence, concentration risk and transaction sensitivity, and (3) benchmarking and splitting pre/post-live performance so you can judge real-world robustness. A few practical caveats: ensure your returns, positions and transactions are aligned on the same timestamp index and represent net P&L (include commissions/slippage in transactions if you want realistic results), and remember that pyfolio’s trade-matching and round-trip math assume reasonably clean, consistent transaction records — garbage in will produce misleading diagnostics.
