

Fixing Wikipedia Link Problem!
Hello to all. I would like to share with you a problem that has plagued me for a very long time. There is a problem with Wikipedia.

I encounter this problem every time I attempt to copy something from Wikipedia for work or study purposes. Using my mouse, I select what needs to be copied as follows:
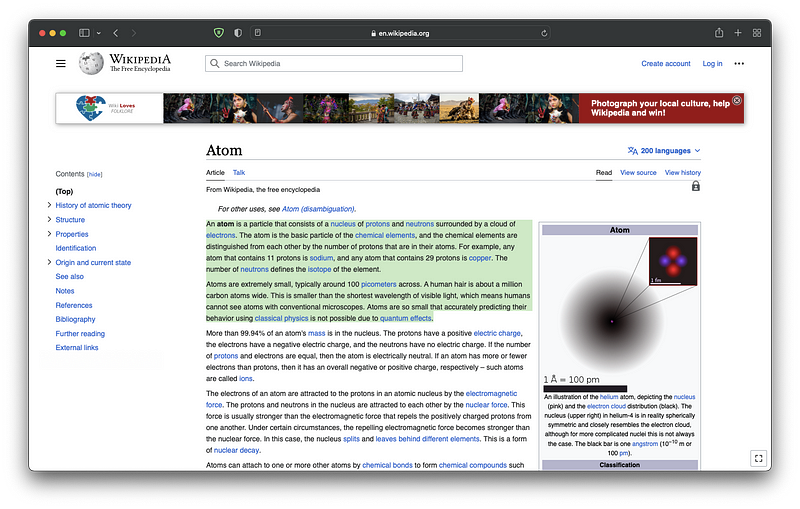
In addition, you will notice that all of the links are selected automatically as well, which is not a bad thing, but after pasting into Microsoft Word they also appear, so I have to do an extra step to remove all of the links. If I was to do that once, it would not be a problem, but it would be very problematic if I copied thousands of times, as a student might be required to do. If I select everything in the following manner:
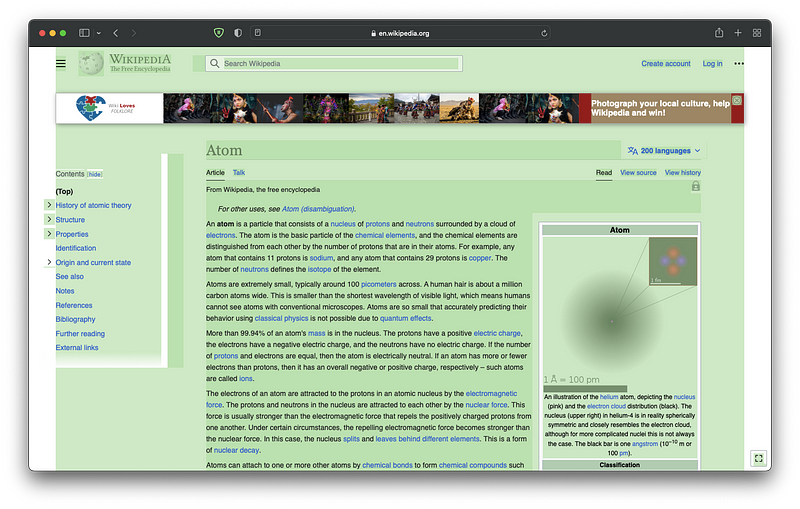
Then, everything will be selected, except for images, links, and sidebars, which I do not wish to select. I would like to remove the following items: Links, Images, Tables, and Sidebars. As a result I can just get the text.
To solve this problem, I will use Javascript.
In order to remove all the links and quotations, as well as other tabs that we do not want, I am going to create a Chrome extension.
I will be making an extension for Chrome, but you can use it with almost any browser. The majority of the time, on Chrome-based browsers such as Edge Chrome and Brave. Additionally, it is compatible with Firefox as well.
So without further adieu, let’s start coding. I have already created some of the files. And also, If you want to download the source code, the code is properly commented, and all syntax is highlighted; anyone who is a beginner will understand the code because of all the comments; if you want to download, then check this link and also check out my newsletter, where I publish about machine learning and programming in great detail.
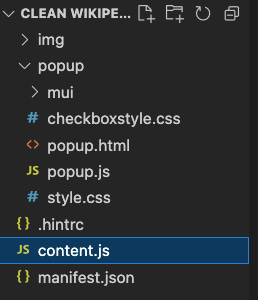
The first step will be to create four files named (create the files)
Popup.html (This is part of the chrome extension which users use to interact with the extension. This is what you will see in your browser)
Style.css: This is to style our chrome extension, so it looks good.
Checkboxstyles.css: This is for the styling of checkboxes.
Popup.js: This is where all the magic will be happening.
In addition, I need to add one more thing, which is content.js. By adding this, we will be able to improve the functionality of our Chrome extension.
Let’s get started with coding now. As a first step, we will work on the manifest.json file.
Manifest files contain information about the extension. Details include the extension name, version, description, manifest file version, public key, URL where it will be updated, the action that will be performed when the extension is clicked, scripts that will be executed on a webpage, etc. The details include the name, version, description, version of manifest file, and public key of the extension. An extension’s manifest file defines its details.
"browser_action": {
      "default_icon": "img/wiki16.png",
      "default_popup": "popup/popup.html",
      "default_title": "Wikipedia Copy"
   },
The “browser_action” key specifies the action that will be taken when a user clicks on the extension. An extension menu icon is defined by the default_icon key. When the extension is clicked, the default_popup key determines the popup that will appear. When the extension is hovered over, the default_title key determines the title that will appear.
 "commands": {
      "_execute_browser_action": {
         "description": "Open extension menu.",
         "suggested_key": {
            "default": "Ctrl+Shift+E",
            "mac": "MacCtrl+Shift+E"
         }
      }
   },
As soon as the extension is clicked, the “commands” key defines the action that will be taken. As a result of clicking the extension, the _execute_browser_action key determines what action should be taken. A description is defined by the description key in the extension menu. Defining the suggested_key key is the process of determining the hotkey for opening the extension menu.
"content_scripts": [ {
      "js": [ "content.js" ],
      "matches": [ "http://*.wikipedia.org/*", "https://*.wikipedia.org/*" ]
   } ],
Scripts that are to be executed on a page are defined by the “content_scripts” key. A JavaScript file is defined by the js key.In the matches key, the URL pattern for the webpages on which the script should be executed is defined.
"description": "Copy pure text from Wikipedia!",
   "icons": {
      "128": "img/wiki128.png",
      "16": "img/wiki16.png",
      "48": "img/wiki48.png",
      "64": "img/wiki64.png"
   },
   "key": "[Your Key Goes Here]",
   "manifest_version": 2,
   "name": "Wikipedia Copy",
   "update_url": "https://clients2.google.com/*",
   "version": "1.0.1"
The “description” key is used to define the extension’s description. The “icons” key defines the icons in the extension menu. The 128 key is used to define the 128x128 icon, same goes with 16, 48 and 64. The “Key” is used to define the public key of the extension. “manifest_version” key is used to define the version of the manifest file. The “name” key is used to define the extension’s name. The “update_url” key defines the URL where the extension is to be updated. The “version” key is used to define the version of the extension.
Now let’s start working on the main part.
popup.html
<head>
    <link rel="stylesheet" type="text/css" href="style.css">
    <link rel="stylesheet" type="text/css" href="checkboxstyle.css">
    <link rel="stylesheet" type="text/css" href="mui/mui.min.css">
    <script src="mui/mui.min.js"></script>
</head>

<body>
    <div class="mui-appbar">
        <img class="img-icon" alt="icon" src="/img/wiki48.png">
    </div>

    <div class="checkboxes">
        <h4 class="chkheader mui--text-dark-secondary">Items to remove: </h4>
        <div class="checkbox">
            <input type="checkbox" name="clearLinks" id="clearLinks" checked>
            <label for="clearLinks">Links</label>
        </div>

        <div class="checkbox">
            <input type="checkbox" name="clearContent" id="clearContent" checked>
            <label for="clearContent">Images</label>
        </div>

        <div class="checkbox">
            <input type="checkbox" name="deleteEdit" id="deleteEdit" checked>
            <label for="deleteEdit">Contents</label>
        </div>

        <div class="checkbox">
            <input type="checkbox" name="deleteNavs" id="deleteNavs">
            <label for="deleteNavs">Header, sidebar etc.</label>
        </div>

    </div>
    <div class="buttons">
        <button id="btnClear" class="mui-btn mui-btn--raised">Clear!</button>
        <button id="btnBack" class="mui-btn mui-btn--raised">Back</button>
    </div>
</body>
<script src="popup.js"></script>

</html>
It is not necessary for me to explain this HTML file in great detail, as it is fairly self-explanatory.
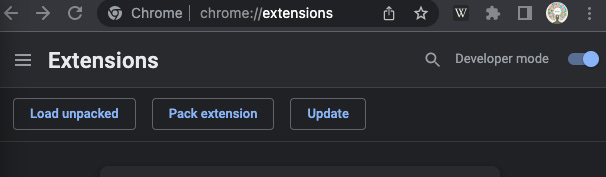
We now need to load an unpacked extension in Google Chrome in order to determine if our extension is working or not. Follow these steps in order to accomplish this:
Open the Google Chrome browser
On the toolbar, click the Extensions icon, then click on Manage Extensions, and then turn on Developer Mode. You will now see a new tab that looks as follows:
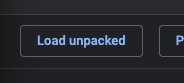
3. After clicking the load unpacked button, follow these steps:
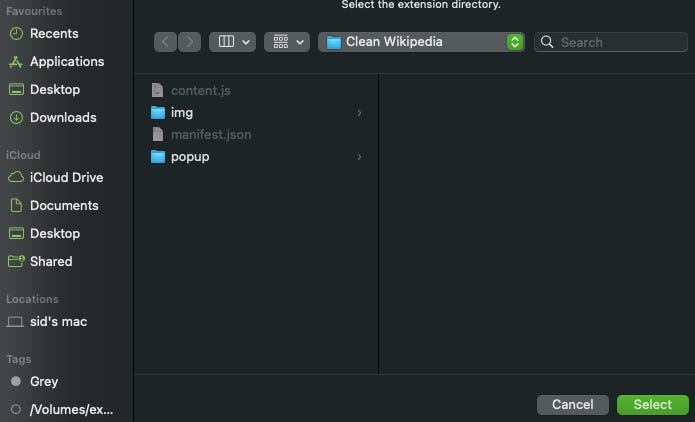
4. You can select your file by finding where it is located:
5. The extension will now appear on the toolbar, so you can easily access it.
Click on your extension and check how the popup appears. The following is a screenshot of our extension:
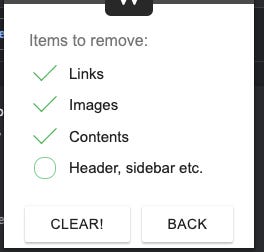
Changes made to popup.html will be reflected in popup. The above image has been completed by creating two CSS files.Two CSS files are required: style.css and checkboxstyles.css. To make the css code more understandable, i have added comments right next to what the code does.
style.css
*{
    margin: 0;
    padding: 0;
}

body{
    width: 250px; /* width of the body */
    background-color:  #fdfdfd; /* background color of the body */
    height: 300px; /* height of the body */
}

.mui-appbar {
    /* Set the background color of the application bar to a dark gray */
    background-color: rgba(47, 47, 47, 0.87) !important;
}

/*The first part is the declaration of the class name, if you want to use it in the div, you need to write the
class name in the div, and the class name must be preceded by a dot.*/
.img-icon{
    /*The second part is the position of the class name, the position of the absolute is relative to the body.*/
    position: absolute;
    /*The third part is the top and left of the class name, the top is from the top to the top of the
    class name, and the left is from the left to the left.*/
    top: 20px;
    left: 101px;
}

/* 1. Set margins for the entire div to 25px top and bottom, and 30px left and right. */
.checkboxes{
    margin: 25px 30px;
}

.chkheader{
    margin-left: -5px;  /* This code will move the header to the left by 5 pixels */
}

/* Set the font size to 15px */
label{
    font-size: 15px;
}


/* For example, this code will center the buttons at the bottom of the page. */
.buttons{
    position: fixed; /* This makes the buttons stay at the bottom of the page even when you scroll. */
    bottom: 0px; /* This makes the buttons stay at the bottom of the page even when you scroll. */
    text-align: center; /* This centers the buttons. */
    width: 100%; /* This makes the buttons take up the entire width of the page. */
}


/* define a new class called "checkbox" */
.checkbox{
    /* set the display property to "block", which causes it to be displayed as a block element*/
    display: block;
    /* set the margin to 10px on the top and bottom, and 0 on the left and right*/
    margin: 10px 0;
}
checkboxstyles.css
