

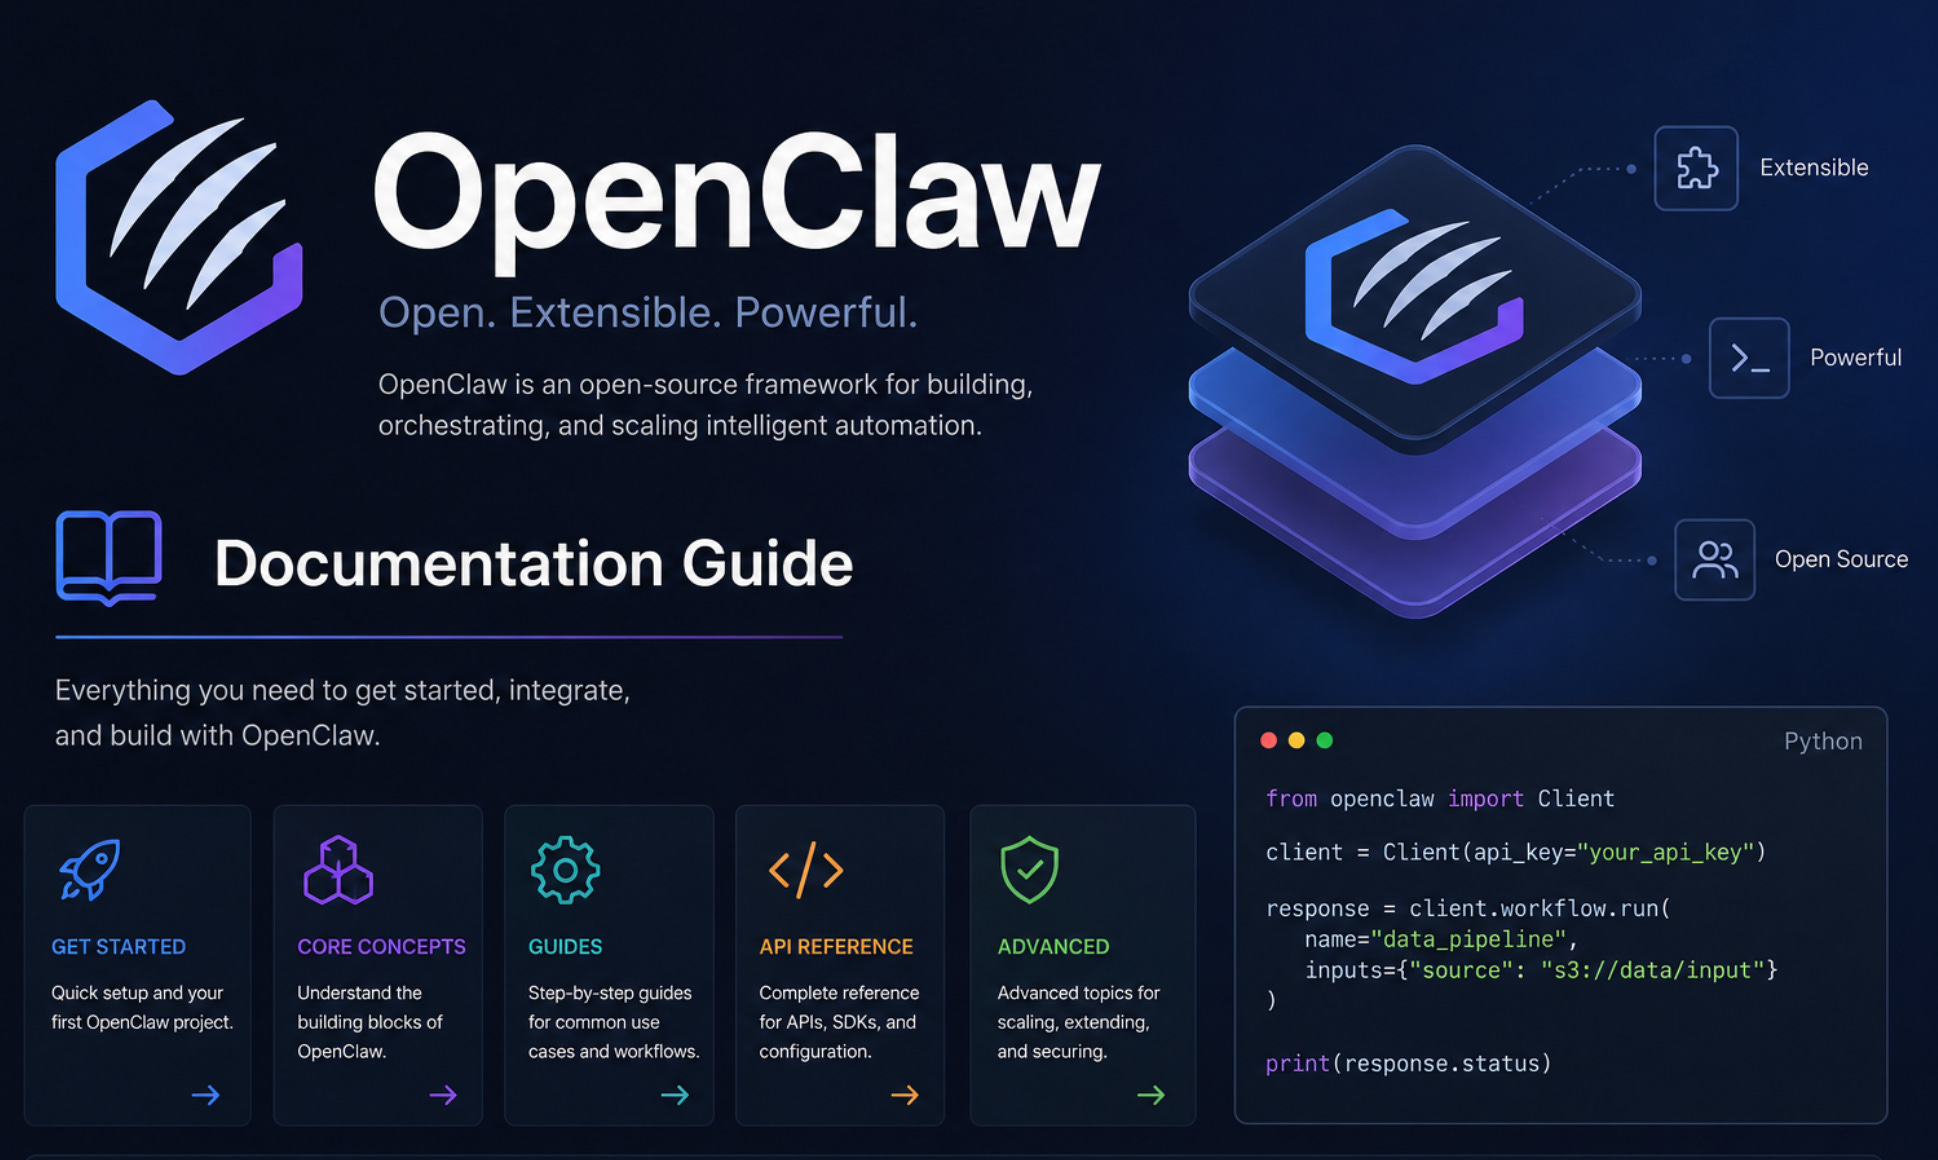
OpenClaw CLI Commands: The Complete Operator Reference
A deep-dive into every OpenClaw command — agents, sessions, inference, plugins, skills, channels, memory, gateway, configuration, and automation-ready JSON workflows.

Download the entire book using the button at the end of this article
Introduction: Agents, Sessions, and Gateway vs Embedded Execution
Agents are the Gateway-backed brains that make decisions and call tools; sessions are their conversation state, stored as append-only transcripts plus a mutable index (compaction and pruning are covered later). When you ask a turn to an agent from the CLI, you must first choose which session or agent should receive that turn and whether the run happens through the Gateway process or locally in an embedded runtime.
By default openclaw agent sends the turn through the Gateway daemon. Use --local to force the embedded execution path (useful for quick experiments or when the Gateway is unavailable). Note that --local still preloads the plugin registry, so plugins that register tools, providers, or channels are available to embedded runs.
Routing selectors You must pass at least one selector to choose the target for the run: --to, --session-id, or --agent. Each selector affects routing differently:
--to <address> (phone, matrix id, slack user/channel): resolves to a session via directory bindings and delivery targets; good for channel-focused workflows.
--session-id <id>: targets a specific session by its persistent id (useful for replaying or debugging).
--agent <id>: targets the named agent workspace; the Gateway will open or reuse a session according to agent defaults.
Delivery vs routing --deliver instructs OpenClaw to send the agent’s reply back to the selected channel/account. Reply routing fields (--reply-channel, --reply-to, --reply-account) affect delivery destination and formatting but do not change which session receives the turn. If you need to route a run to a different session while delivering to another destination, pass both the appropriate selector and delivery overrides.
Operational notes
Always include a selector; the CLI will error if you do not specify at least one of --to, --session-id, or --agent.
Use --thinking and --verbose to control internal progress and verbosity. Use --json for automation-friendly output.
If the command triggers regeneration of models.json, SecretRef-managed provider credentials may be persisted as non-secret markers rather than plaintext secrets; audit any credentials after such changes.
Canonical examples (runnable bash) The following are copy-paste-ready examples demonstrating Gateway vs local runs, selectors, delivery, and JSON output:
openclaw agent --to +15555550123 --message "status update" --deliver
openclaw agent --agent ops --message "Summarize logs"
openclaw agent --session-id 1234 --message "Summarize inbox" --thinking medium
openclaw agent --to +15555550123 --message "Trace logs" --verbose on --json
openclaw agent --agent ops --message "Generate report" --deliver --reply-channel slack --reply-to "#reports"
openclaw agent --agent ops --message "Run locally" --local
Keep these patterns in mind: selectors choose session routing, --deliver controls outward delivery, and --local runs embedded but with plugin support available. Subsequent chapters show how sessions are stored and how compaction changes transcript shape.
Managing Agents and Bindings
An agent is the Gateway’s isolated persona: a workspace-backed runtime with its own auth, skills, and routing. The agents CLI group manages those personas and their inbound routing (bindings), identities, and lifecycle. Treat "bindings" as the pinning mechanism that directs inbound channel traffic to a particular agent.
openclaw agents with no subcommand behaves like openclaw agents list; it prints the configured agents and basic metadata.
Routing binding rules and behavior
A binding can be channel-only (e.g., telegram) or channel:accountId scoped (e.g., telegram:ops). Channel-only bindings match the channel’s default account. An explicit channel:accountId match is more specific than a channel-only binding.
accountId:"*" is a channel-wide fallback; it is less specific than an explicit account-scoped binding.
If you bind a channel-only entry first and later bind the same channel with an explicit accountId, OpenClaw upgrades the existing binding in place rather than creating a duplicate entry.
Omitting accountId on --bind lets OpenClaw resolve the accountId from channel defaults and plugin setup hooks when available.
Creating and listing agents
Creating an agent interactively runs the CLI wizard. Supplying explicit flags moves the command into non-interactive mode: you must provide the agent id/name and --workspace.
The agent id main is reserved. You cannot create or delete an agent with id main.
Identity and avatar behavior
set-identity writes into agents.list[].identity in configuration. Avatar paths are resolved relative to the workspace root when given as a relative path; they may also be URLs or data URIs.
Deletion semantics and safety
Deleting an agent moves its workspace, state, and session transcript directories to Trash by default. This provides a safety net. Without --force, deletion requires interactive confirmation. Use --force to bypass interactive confirmation and to perform a hard delete if supported by your platform. Remember main cannot be deleted.
Canonical command examples (recipes) The following examples show common workflows: listing, adding, binding/unbinding, setting identity, and deleting.
openclaw agents list
openclaw agents list --bindings
openclaw agents add work --workspace ~/.openclaw/workspace-work
openclaw agents add ops --workspace ~/.openclaw/workspace-ops --bind telegram:ops --non-interactive
openclaw agents bindings
openclaw agents bind --agent work --bind telegram:ops
openclaw agents unbind --agent work --bind telegram:ops
openclaw agents set-identity --workspace ~/.openclaw/workspace --from-identity
openclaw agents set-identity --agent main --avatar avatars/openclaw.png
openclaw agents delete work
Bindings inspection and JSON output
openclaw agents bindings
openclaw agents bindings --agent work
openclaw agents bindings --json
Multiple binds in one command
openclaw agents bind --agent work --bind telegram:ops --bind discord:guild-aChannel-only → account-scoped upgrade (in-place)
# initial channel-only binding
openclaw agents bind --agent work --bind telegram

## later upgrade to account-scoped binding
openclaw agents bind --agent work --bind telegram:ops
Removing bindings
openclaw agents unbind --agent work --bind telegram:ops
openclaw agents unbind --agent work --all
Set identity from workspace file
openclaw agents set-identity --workspace ~/.openclaw/workspace --from-identityExplicit identity fields
openclaw agents set-identity --agent main --name "OpenClaw" --emoji "🦞" --avatar avatars/openclaw.pngExample JSON shape for identity (openclaw.json configuration)
{
 "agents": {
 "list": [
 {
 "id": "main",
 "identity": {
 "name": "OpenClaw",
 "theme": "space lobster",
 "emoji": "🦞",
 "avatar": "avatars/openclaw.png"
 }
 }
 ]
 }
}
Operational checklist
Use --workspace when adding agents non-interactively.
Prefer explicit account-scoped bindings for channel routing clarity.
Verify bindings with openclaw agents bindings --json before relying on routing.
Back up workspaces before destructive deletions; default Trash semantics can save recovery time.
Hooks: Discovery, Eligibility, Enabling, and Installing Hook Packs
Hooks let you attach small, event-driven automations to Gateway events (startup, commands, cron-like triggers). Discovering, inspecting, and toggling hooks is a common operational task: you need to confirm a hook is present, verify its requirements are satisfied, opt a workspace into using it, and—when a hook comes from a plugin—manage it via the owning plugin rather than the hooks CLI.
Discovery and listing The CLI discovers hooks in multiple locations: workspace, managed (plugin) directories, extraDirs, and bundled hooks shipped with OpenClaw. Gateway startup will not wire up internal hook handlers until at least one internal hook is configured to run. Use the simple list command to see what the CLI finds:
openclaw hooks listTypical human-readable output looks like this (illustrative):
Hooks (4/4 ready)

Ready:
 🚀 boot-md ✓ - Run BOOT.md on gateway startup
 📎 bootstrap-extra-files ✓ - Inject extra workspace bootstrap files during agent bootstrap
 📝 command-logger ✓ - Log all command events to a centralized audit file
 💾 session-memory ✓ - Save session context to memory when /new or /reset command is issued
Filtering, JSON output, and verbosity
--eligible shows only hooks whose requirements are met.
--json produces structured output suitable for automation.
--verbose prints missing requirements for ineligible hooks so you can resolve them.
Examples:
openclaw hooks list --verbose
openclaw hooks list --json
Inspect hook details To view a hook’s metadata, handler path, events, and requirement checks, call info:
openclaw hooks info <name>Example:
openclaw hooks info session-memoryIllustrative info output:
💾 session-memory ✓ Ready

Save session context to memory when /new or /reset command is issued

Details:
 Source: openclaw-bundled
 Path: /path/to/openclaw/hooks/bundled/session-memory/HOOK.md
 Handler: /path/to/openclaw/hooks/bundled/session-memory/handler.ts
 Homepage: https://docs.openclaw.ai/automation/hooks#session-memory
 Events: command:new, command:reset

Requirements:
 Config: ✓ workspace.dir
Eligibility check Run a quick summary of readiness:
openclaw hooks checkSample summary:
Hooks Status

Total hooks: 4
Ready: 4
Not ready: 0
Enable and disable workspace hooks Enabling a workspace (or bundled) hook writes the opt-in into your config at hooks.internal.entries.<name>.enabled = true and persists it to disk. The Gateway will only load workspace hook handlers after this opt-in.
openclaw hooks enable session-memorySuccess confirmation:
✓ Enabled hook: 💾 session-memoryTo disable:
openclaw hooks disable <name>
# e.g.
openclaw hooks disable command-logger
Confirmation:
⏸ Disabled hook: 📝 command-loggerImportant: restart required After enabling or disabling hooks, restart the Gateway so the new hook state is loaded. On macOS this means restarting the menu-bar app; in other environments restart the gateway process or system service.
Plugin-managed hooks Hooks owned by plugins are shown with a plugin:<id> source in openclaw hooks list. These cannot be toggled with openclaw hooks enable/disable. To enable or disable such hooks, enable or disable the owning plugin with the plugins commands.
Installing hook packs (recommended) Hook packs should be installed via the plugin installer. openclaw plugins install is the canonical installer; openclaw hooks install exists only as a compatibility alias that forwards to plugins install and warns.
The plugin installer accepts registry-only NPM specs (git/URL/file specs and semver ranges are rejected). Installs run dependency steps with --ignore-scripts for safety; use --pin to pin versions when needed.
Examples:
openclaw plugins install <package> # ClawHub first, then npm
openclaw plugins install <package> --pin # pin version
openclaw plugins install <path> # local path

# Local directory
openclaw plugins install./my-hook-pack

## Local archive
openclaw plugins install./my-hook-pack.zip

## NPM package
openclaw plugins install @openclaw/my-hook-pack

## Link a local directory without copying
openclaw plugins install -l./my-hook-pack
Updating plugins
openclaw plugins update <id>
openclaw plugins update --all
Inspecting command logs Command-related hooks (e.g., command-logger) write to the Gateway logs. Use standard tools to inspect or filter them:
# Recent commands
tail -n 20 ~/.openclaw/logs/commands.log

# Pretty-print
cat ~/.openclaw/logs/commands.log | jq.

# Filter by action
grep '"action":"new"' ~/.openclaw/logs/commands.log | jq.
Safety notes
Plugin-managed hooks must be controlled via the plugin lifecycle; attempting to toggle them with the hooks CLI will fail.
Installers run with --ignore-scripts to limit arbitrary lifecycle scripts; you cannot install via Git/URL/file specs or open semver ranges—use registry or local archives/directories and pin when you require reproducible installs.
The Infer CLI: Capability-Oriented Provider Workflows
OpenClaw exposes a single, capability-oriented CLI for provider-backed tasks: openclaw infer. Treat it as the canonical, headless surface for model runs, image/video generation and description, audio transcription, TTS, web search/fetch, and embedding creation. The infer CLI groups operations by capability (model, image, audio, tts, video, web, embedding) rather than by raw RPC names or provider tool IDs. That makes scripting and skill routing predictable: map user intents to an infer subcommand and pass provider/model overrides only when necessary.
Top-level command vocabulary The following lists the infer subcommands and capability families. Use this as a quick reference when authoring scripts or agent skills that call openclaw infer.
 openclaw infer
 list
 inspect

 model
 run
 list
 inspect
 providers
 auth login
 auth logout
 auth status

 image
 generate
 edit
 describe
 describe-many
 providers

 audio
 transcribe
 providers

 tts
 convert
 voices
 providers
 status
 enable
 disable
 set-provider

 video
 generate
 describe
 providers

 web
 search
 fetch
 providers

 embedding
 create
 providers
Why use --json Prefer --json whenever a command's output will be consumed by another command, script, or an agent skill. That flag produces a stable, machine-readable response shape that commonly includes ok, capability, transport, provider, model, attempts, and outputs. Example JSON output:
{
 "ok": true,
 "capability": "image.generate",
 "transport": "local",
 "provider": "openai",
 "model": "gpt-image-1",
 "attempts": [],
 "outputs": []
}
Transport and targeting rules
Stateless inference commands (single-run model calls, image/video generate, embeddings) default to the local transport. Use --transport gateway if you need Gateway routing or logging.
Commands that interact with Gateway-managed state default to the gateway transport.
When you must target a particular backend, use --provider or --model with the provider/model form (for example openai/whisper-1). Some capabilities require explicit provider qualification when specifying a model: image describe, audio transcribe, and video describe are examples.
Concrete examples Model runs and inspection:
openclaw infer model run --prompt "Reply with exactly: smoke-ok" --json
openclaw infer model run --prompt "Summarize this changelog entry" --provider openai --json
openclaw infer model providers --json
openclaw infer model inspect --name gpt-5.4 --json
Image generation and description:
openclaw infer image generate --prompt "friendly lobster illustration" --json
openclaw infer image generate --prompt "cinematic product photo of headphones" --json
openclaw infer image describe --file./photo.jpg --json
openclaw infer image describe --file./ui-screenshot.png --model openai/gpt-4.1-mini --json
Audio transcription:
openclaw infer audio transcribe --file./memo.m4a --json
openclaw infer audio transcribe --file./team-sync.m4a --language en --prompt "Focus on names and action items" --json
openclaw infer audio transcribe --file./memo.m4a --model openai/whisper-1 --json
TTS:
openclaw infer tts convert --text "hello from openclaw" --output./hello.mp3 --json
openclaw infer tts convert --text "Your build is complete" --output./build-complete.mp3 --json
openclaw infer tts providers --json
openclaw infer tts status --json
Video and web:
openclaw infer video generate --prompt "cinematic sunset over the ocean" --json
openclaw infer video describe --file./clip.mp4 --json
openclaw infer web search --query "OpenClaw docs" --json
openclaw infer web fetch --url https://docs.openclaw.ai/cli/infer --json
Embeddings:
openclaw infer embedding create --text "friendly lobster" --json
openclaw infer embedding create --text "customer support ticket: delayed shipment" --model openai/text-embedding-3-large --json
openclaw infer embedding providers --json
When to qualify model names Always use provider/model form when the model requires an explicit provider. This avoids ambiguous failures.
# Bad
openclaw infer audio transcribe --file./memo.m4a --model whisper-1 --json

## Good
openclaw infer audio transcribe --file./memo.m4a --model openai/whisper-1 --json
Small usability warning Some describe/transcribe operations will fail or select an unexpected provider if you omit the provider prefix. If you depend on a specific model behavior (transcription quality, image-describe format), explicitly set --model openai/whisper-1 or --provider openai.
Routing infer from an agent skill When authoring a skill that routes to infer, map intents to the relevant subcommands (model run, image generate, audio transcribe, tts convert, web search, embedding create) and prefer --json for downstream parsing. A minimal prompt to bootstrap such a skill:
Read https://docs.openclaw.ai/cli/infer, then create a skill that routes my common workflows to `openclaw infer`.
Focus on model runs, image generation, video generation, audio transcription, TTS, web search, and embeddings.
Summary Use openclaw infer as the single, consistent entrypoint for provider-backed capabilities. Prefer the capability families it defines, use --json for automation, and qualify models with provider/model when precision matters.
Memory: Status, Indexing, Promotion, and Dreaming
Memory in OpenClaw is provided by the active memory plugin. By default that plugin is memory-core. If you prefer to disable semantic memory entirely, set plugins.slots.memory = "none" in your configuration; otherwise memory commands act against the active plugin. Many memory operations can be targeted to a single agent with --agent <id>; without --agent they run for each configured agent or fall back to a default agent.
Run these commands to inspect health, reindex, search, preview promotions, apply promotions, and preview REM-stage reflections:
openclaw memory status
openclaw memory status --deep
openclaw memory status --fix
openclaw memory index --force
openclaw memory search "meeting notes"
openclaw memory search --query "deployment" --max-results 20
openclaw memory promote --limit 10 --min-score 0.75
openclaw memory promote --apply
openclaw memory promote --json --min-recall-count 0 --min-unique-queries 0
openclaw memory promote-explain "router vlan"
openclaw memory promote-explain "router vlan" --json
openclaw memory rem-harness
openclaw memory rem-harness --json
openclaw memory status --json
openclaw memory status --deep --index
openclaw memory status --deep --index --verbose
openclaw memory status --agent main
openclaw memory index --agent main --verbose
Key behaviors and rules
Plugin ownership: openclaw memory commands call the active memory plugin. The default is memory-core. Disable by setting plugins.slots.memory = "none".
Status probes: memory status reports plugin health. Use --deep to probe vector store and embedding availability. --index implies --deep and triggers reindexing when the store is marked dirty.
Reindexing: memory index re-creates vector indexes. Use --force to bypass store-dirty checks and rebuild from source documents.
Search requirement: memory search requires either a positional query string or --query. If neither is provided, the command exits with an error.
Agent scoping: add --agent <id> to run operations for a single agent; otherwise commands iterate agents or run against the default.
Promotion and REM
Memory promote ranks short-term promotion candidates using multiple weighted signals: frequency, relevance, query diversity, recency, consolidation score, and conceptual richness. By default promote runs in preview mode—no writes—so you can inspect candidates before changing state. Apply promotions by adding --apply. Use --json for machine-friendly output in automation.
To understand why a candidate is promoted, use memory promote-explain <selector> which returns a score breakdown and reasoning. For deeper consolidation previews (the REM stage), run memory rem-harness; it simulates REM reflections without committing changes.
Dreaming and background consolidation
Dreaming is an optional background consolidation pipeline consisting of light, deep, and REM phases. Enable it in the memory-core plugin config; when enabled, memory-core auto-manages a background cron for consolidation. Beware: enabling dreaming causes periodic background work (CPU, embedding calls, storage writes) and may increase provider usage and disk I/O.
Enable dreaming with this configuration (strict JSON for your config file):
{
 "plugins": {
 "entries": {
 "memory-core": {
 "config": {
 "dreaming": {
 "enabled": true
 }
 }
 }
 }
 }
}
Quick command templates
openclaw memory promote [--apply] [--limit <n>] [--include-promoted]openclaw memory promote-explain <selector> [--agent <id>] [--include-promoted] [--json]openclaw memory rem-harness [--agent <id>] [--include-promoted] [--json]Warning: run promote --apply and enable dreaming only after reviewing previews and estimating cost. Background consolidation can consume embedding API credits and produce write-heavy workloads on large stores.
Messaging Commands: send, poll, react, and Provider-specific Targets
The Gateway CLI can perform full message-level actions across channels: sending text and media, creating polls, adding reactions, editing or deleting messages, and pin/unpin operations. Use the message subcommands to perform these actions from scripts or the command line; the general invocation pattern is:
openclaw message <subcommand> [flags]Channel selection and target formats If your installation has more than one configured channel you must pass --channel; when only one channel exists it becomes the default. Targets are provider-specific strings: WhatsApp uses E.164 numbers or group JIDs, Discord accepts channel:<id> or user:<id>, Google Chat uses spaces/<spaceId> or users/<userId>, and Slack accepts channel:<id> or user:<id>. OpenClaw also caches a directory of names and will attempt a live lookup on a cache miss for providers that support it.
SecretRef resolution and failure semantics Before running the action, openclaw message resolves required channel/account SecretRefs. Resolution scope depends on flags: --channel makes channel-scoped SecretRefs apply; --account targets account-scoped credentials. If the selected channel or account SecretRef is unresolved the command fails closed and the action is not attempted. Unresolved SecretRefs for unrelated channels do not block a targeted action.
Send and rich payloads Most send payloads accept provider-native rich fields. Some examples:
openclaw message send --channel discord \
 --target channel:123 --message "hi" --reply-to 456
To pass interactive components or blocks you can supply provider JSON. Discord uses --components:
openclaw message send --channel discord \
 --target channel:123 --message "Choose:" \
 --components '{"text":"Choose a path","blocks":[{"type":"actions","buttons":[{"label":"Approve","style":"success"},{"label":"Decline","style":"danger"}]}]}'
Google Chat uses a separate --interactive payload:
openclaw message send --channel googlechat --target spaces/AAA... \
 --message "Choose:" \
 --interactive '{"text":"Choose a path","blocks":[{"type":"actions","buttons":[{"label":"Approve"},{"label":"Decline"}]}]}'
Provider-specific flags and media Many providers expose unique flags. Telegram supports --buttons, --force-document, and --thread-id; Teams accepts --card with Adaptive Card JSON; Discord and Slack use --components. Example Adaptive Card for Teams:
openclaw message send --channel msteams \
 --target conversation:19:abc@thread.tacv2 \
 --card '{"type":"AdaptiveCard","version":"1.5","body":[{"type":"TextBlock","text":"Status update"}]}'
Send media (Telegram example with force-document):
openclaw message send --channel telegram --target @mychat \
 --media./diagram.png --force-document
Polls Polls require --target, --poll-question, and one or more --poll-option. Providers expose extra controls: Discord supports multi-select and --poll-duration-hours; Telegram supports --poll-duration-seconds and --silent. Examples:
openclaw message poll --channel discord \
 --target channel:123 \
 --poll-question "Snack?" \
 --poll-option Pizza --poll-option Sushi \
 --poll-multi --poll-duration-hours 48
openclaw message poll --channel telegram \
--target @mychat \
--poll-question "Lunch?" \
--poll-option Pizza --poll-option Sushi \
--poll-duration-seconds 120 --silentReactions, pins and edits Reaction actions typically need --message-id and --target. Some providers require extra attribution fields (Signal uses --target-author-uuid; WhatsApp may need --participant or --from-me). Slack example:
openclaw message react --channel slack \
 --target C123 --message-id 456 --emoji "✅"
Signal example with author UUID:
openclaw message react --channel signal \
 --target signal:group:abc123 --message-id 1737630212345 \
 --emoji "✅" --target-author-uuid 123e4567-e89b-12d3-a456-426614174000
Operational notes and gotchas
Sending components or cards to a provider that doesn't support them will be rejected or ignored; check provider capability before automation.
Live lookups may fail for some providers — if name resolution fails, prefer explicit target IDs.
Because the CLI resolves SecretRefs before actions, ensure gateway secrets and auth-profiles are present when scripting; missing credentials cause a closed failure rather than a silent fallback.
These commands are intended for automation-friendly usage; combine them with --json output when scripting or capturing responses.
Models and Provider Auth: Discovery, Status, and Probing
OpenClaw resolves which provider and model an agent will use before sending any inference requests. Use the models commands to inspect the resolved default, fallbacks, and the authentication state that OpenClaw will attempt when a run is executed.
The quick command set for discovery, inspection, and configuration:
openclaw models status
openclaw models list
openclaw models set <model-or-alias>
openclaw models scan
openclaw models status shows the current resolved default model, the fallback chain, and an auth overview. When providers expose usage windows or quota snapshots, status will surface that information.
openclaw models list enumerates discovered models across configured providers (local caches plus any scanned results).
openclaw models scan performs provider discovery; pair this with status to verify what will be chosen at runtime.
Be cautious with live probes. The status and scan commands accept a --probe mode which issues real requests to providers to validate credentials and availability. These are real network calls that can consume quotas or trigger rate limits; do not run --probe in bulk or from automated loops without rate‑limit controls.
Model reference parsing rules
Model refs are parsed by splitting on the first '/'. The prefix before the first slash is treated as the provider identifier and the remainder as the model id.
If a model name itself contains additional slashes (for example, OpenRouter-style refs), include the provider prefix to avoid parsing ambiguity; otherwise only the first slash is considered.
Omitting a provider when setting a model When you run openclaw models set with a value that omits the provider, OpenClaw resolves it in this order:
Treat the value as an alias (agents.defaults or models.aliases). If an alias matches, that mapped provider/model is used.
If not an alias, check whether the string uniquely matches a model across all configured providers. If unique, select that provider.
If still ambiguous or no match, fall back to the configured default provider. This final fallback path emits a deprecation warning; to avoid ambiguity, always include the provider prefix when setting models programmatically.
Auth flows and token setup
openclaw models aliases list
openclaw models fallbacks list
openclaw models auth add
openclaw models auth login --provider <id>
openclaw models auth setup-token --provider <id>
openclaw models auth paste-tokenopenclaw models auth add is an interactive helper that can start provider OAuth flows or guide manual token entry.
setup-token and login require an interactive TTY; setup-token in particular will prompt you to paste a long-lived token.
Example: run an interactive provider login and make that auth profile the default:
openclaw models auth login --provider openai-codex --set-defaultRecommended practice: prefer fully qualified provider/model refs (provider/model) in scripts and CI. Use --probe deliberately and sparingly to verify credential health before production runs.
Sessions: Listing, Scoping, and Cleanup
Sessions are stored as per-agent session stores on disk (sessions.json index plus per-session JSONL transcripts). Before running any destructive maintenance, locate the stores you intend to operate on and preview the changes: use the sessions listing and the cleanup dry-run modes so you can script safely.
What scope openclaw sessions uses
By default openclaw sessions looks at the configured default agent store (the agent store selected by your active workspace or gateway config).
Override the default store with --agent <agentId> to target one agent, --all-agents to aggregate every configured agent store the Gateway knows about, or --store <path> to point at an explicit sessions.json file.
When you run --all-agents, OpenClaw discovers configured agent stores and reports the sessions.json path for each regular store it finds. Discovery intentionally skips symlinks and out-of-root paths; those are not reported in the aggregated scan.
Listing examples The following CLI examples show common listing and output modes. Use --json for machine-friendly output and --verbose to include more detail when debugging.
openclaw sessions
openclaw sessions --agent work
openclaw sessions --all-agents
openclaw sessions --active 120
openclaw sessions --verbose
openclaw sessions --json
Example JSON output This is representative output from openclaw sessions --all-agents --json. Parse the top-level fields to automate tasks: path is the scoped store path (null when scanning multiple), stores lists resolved sessions.json paths, allAgents indicates aggregated mode, count is total sessions found, activeMinutes echoes any --active window, and sessions is an array of session metadata entries you can inspect or feed into other tooling.
{
 "path": null,
 "stores": [
 { "agentId": "main", "path": "/home/user/.openclaw/agents/main/sessions/sessions.json" },
 { "agentId": "work", "path": "/home/user/.openclaw/agents/work/sessions/sessions.json" }
 ],
 "allAgents": true,
 "count": 2,
 "activeMinutes": null,
 "sessions": [
 { "agentId": "main", "key": "agent:main:main", "model": "gpt-5" },
 { "agentId": "work", "key": "agent:work:main", "model": "claude-opus-4-6" }
 ]
}
Running cleanup safely Session cleanup applies the session.maintenance policy from your config. Always preview with --dry-run first; that shows what would be pruned or capped without making changes. If the configured mode is "warn" you can force cleanup by passing --enforce. Protect currently active sessions by passing an active key or short active window.
Key flags and behaviors
--dry-run: Preview pruning/capping; no writes. Combine with --json for automation.
--enforce: Apply cleanup even if session.maintenance.mode is "warn".
--fix-missing: Remove index entries whose transcript files are missing on disk — useful to repair stores with incomplete file operations; this removes entries even if they wouldn't otherwise age out.
--all-agents / --agent / --store: Scope the cleanup to all discovered agent stores, a single agent store, or an explicit sessions.json path.
--active-key or --active <minutes>: Protect a session by key or protect sessions active within the last N minutes (useful to avoid pruning live conversations).
Cleanup command examples These commands illustrate preview and enforcement workflows. Prefer --dry-run --json in CI or automation to capture structured output for audits.
openclaw sessions cleanup --dry-run
openclaw sessions cleanup --agent work --dry-run
openclaw sessions cleanup --all-agents --dry-run
openclaw sessions cleanup --enforce
openclaw sessions cleanup --enforce --active-key "agent:main:telegram:direct:123"
openclaw sessions cleanup --json
Cleanup preview JSON A sample preview response from openclaw sessions cleanup --all-agents --dry-run --json. Each store entry reports beforeCount/afterCount and the number pruned or capped so scripts can summarize impact.
{
 "allAgents": true,
 "mode": "warn",
 "dryRun": true,
 "stores": [
 {
 "agentId": "main",
 "storePath": "/home/user/.openclaw/agents/main/sessions/sessions.json",
 "beforeCount": 120,
 "afterCount": 80,
 "pruned": 40,
 "capped": 0
 },
 {
 "agentId": "work",
 "storePath": "/home/user/.openclaw/agents/work/sessions/sessions.json",
 "beforeCount": 18,
 "afterCount": 18,
 "pruned": 0,
 "capped": 0
 }
 ]
}
Operational cautions
Backup session state before applying destructive cleanup operations. Sessions combine an index (sessions.json) and per-session JSONL transcripts; losing both is often irreversible.
Use --dry-run --json for any automated retention job and review the JSON summary before running with --enforce.
When using --all-agents in multi-Gateway or shared storage setups, confirm the paths reported are the intended physical files (discovery skips symlinks/out-of-root paths to reduce accidental cross-store operations).
System Helpers: Events, Heartbeats, and Presence (Gateway RPC)
System helpers let you send short-lived control signals to a running Gateway: enqueue ephemeral events, toggle or inspect heartbeat behavior, and query presence. These commands are RPCs to the Gateway — they do not modify persisted session transcripts or configuration and they require a reachable Gateway instance.
All system subcommands speak Gateway RPC and accept the same shared flags to target a local or remote Gateway:
--url: WebSocket or HTTP address of the Gateway (for example ws://127.0.0.1:18789).
--token: gateway token for authentication (useful for remote Gateways).
--timeout: RPC timeout in seconds for the request.
--expect-final: make the CLI wait for the Gateway to return a final response (useful for event acknowledgement).
Be explicit about the target Gateway. The examples below show both the default local invocation and an explicit remote RPC invocation.
Runnable CLI examples (enqueue an event, control heartbeats, view presence)
openclaw system event --text "Check for urgent follow-ups" --mode now
openclaw system event --text "Check for urgent follow-ups" --url ws://127.0.0.1:18789 --token "$OPENCLAW_GATEWAY_TOKEN"
openclaw system heartbeat enable
openclaw system heartbeat last
openclaw system presence
What these do and operational notes
system event: enqueues an ephemeral system event. Use --text to provide the event payload and --mode to control scheduling semantics (now in the examples). Events are transient — they are sent into the Gateway runtime and are not written to on-disk session transcripts. They do not survive Gateway restarts.
system heartbeat enable / disable (or pause): toggle heartbeat emission state. enable resumes or turns on heartbeat reporting; a disable/pause command suspends it. Use heartbeat last to inspect the most recent heartbeat timestamp/state reported by the Gateway.
system presence: lists presence entries known to the Gateway (nodes, clients, sessions with recent activity).
Requirements and warnings
A running, reachable Gateway is required. If your configuration cannot reach the Gateway, RPC calls will time out or fail; verify openclaw gateway status or use --url/--token to point at the correct instance.
Do not rely on system events for durable state changes. If you need persistence, use configuration or agent-level APIs that update stored state.
When issuing commands remotely, keep tokens secret and prefer SSH/Tailscale tunnels or other secure transport for --url to avoid exposing the Gateway control plane.
Checklist before issuing system RPCs
Confirm Gateway is running: openclaw gateway status or a local health probe.
If remote, confirm reachability and authentication: --url and --token set correctly.
Expect ephemeral behavior: events are runtime-only and cleared on restart.
Practical Reference and Automation Notes
Automation-first CLI runs should emit stable, machine-readable output and avoid side effects that consume provider quota. Prefer --json when you plan to parse openclaw command output in scripts or pipelines — that flag is the contract for stable fields and simple success/failure checks.
The infer command returns a predictable JSON shape suitable as an automation contract. Treat the block below as strict JSON you can parse directly from CI, a webhook, or another agent:
{
 "ok": true,
 "capability": "image.generate",
 "transport": "local",
 "provider": "openai",
 "model": "gpt-image-1",
 "attempts": [],
 "outputs": []
}
Key operational rules to encode in automation:
Use --json for any output you consume. Scripts should fail fast if JSON parsing fails.
Stateless "execution" commands (for example infer with local transport) default to the local transport. Commands that manage Gateway state (agents list, sessions, hooks, gateway install) default to the gateway transport and may require Gateway access or a running daemon.
openclaw message resolves any channel SecretRefs before it executes. The scope of SecretRef resolution depends on flags:
--channel limits resolution to a channel-scoped SecretRef.
--account limits to an account-scoped SecretRef.
Be explicit in automation to avoid accidental resolution against an unexpected credential.
The --probe flag performs live authentication probes. These are real network requests: they may consume provider tokens, count against rate limits or billing, and trigger auth-side rate limits. Treat probes as potentially costly and avoid running them in tight test loops.
Practical automation checklist
Always run destructive or cleanup commands with --dry-run first; combine with --json to programmatically inspect the planned changes.
When scripts interact with Gateway-managed items (hooks, agents, sessions), confirm the Gateway is reachable (openclaw gateway status) and back up ~/.openclaw state before mass deletes.
Interactive flows (provider auth-token interactive setup, some onboarding flows) require a TTY. Detect non-interactive CI environments and use pre-seeded SecretRefs/auth-profiles instead.
When changing models or auth, remember that models.set or models configuration can be ambiguous; prefer explicit auth-profile + provider/model references in automation.
Follow these patterns and your automation will be auditable, safe against accidental token consumption, and robust across local vs gateway transports.
Managing Channels, Devices, and Pairing via CLI
What this chapter covers and how to use the CLI
Most channel and device CLI commands follow the same operational pattern: they either read configuration and print a summary, or they perform a live probe/action against the running Gateway (and, through it, the provider). Understanding which mode a command uses, how auth is resolved, and who is permitted to do what will save time and prevent accidental exposure of secrets or destructive changes.
First, a small example showing how to read the configured gateway auth token from the CLI configuration (useful when scripting or debugging auth resolution):
openclaw config get gateway.auth.tokenLive probing versus config-only summaries
Commands that accept --probe (for example openclaw channels status --probe) invoke per-account probeAccount routines and optional auditAccount checks. This produces realtime transport state and probe results from the Gateway and its adapters.
If the Gateway is unreachable the CLI falls back to printing a config-only summary. You will see account entries and declared settings but not live probe results. Use openclaw doctor --fix to repair mixed states where named accounts and legacy top-level single-account values coexist; doctor will suggest or apply safe rewrites so the config and accounts map are consistent.
Interactive vs non-interactive account flows
openclaw channels add supports both interactive and non-interactive modes. The interactive flow can bind the created account to agents during the add; the non-interactive path does not create or rewrite bindings automatically. Per-provider flags vary widely (token, private-key, app-token, webhook URL, signal-cli paths, Matrix homeserver fields, Nostr relays, etc.); consult openclaw channels add --help for provider-specific options.
When you add a non-default account for channels that historically used top-level single-account settings, OpenClaw will often promote those top-level values into channels.<name>.accounts.default. Doctor --fix helps sort out these migrations safely.
Auth precedence and CLI overrides
CLI flags such as --token and --password override configuration and environment secrets. When you pass --url, the CLI will not fall back to config or environment credentials; you must provide explicit credentials (--token or --password) or the command will error.
For remote QR/setup operations --remote, OpenClaw requires gateway.remote.url or gateway.tailscale.mode set to serve|funnel. If the active remote credentials are SecretRefs and no CLI override was given, the command attempts to resolve them from the active gateway snapshot and fails fast if the Gateway is unreachable.
Devices, pairing, and permissions
Device pairing operations are gated: openclaw devices approve requires an explicit requestId to mint a token. Passing --latest or omitting requestId merely prints the chosen pending request and exits.
Non-admin callers may remove, rotate, or revoke only their own paired devices. Cross-device management needs operator.admin privileges. Token rotation cannot elevate scopes: the rotated token will carry only the scopes already approved for that device; rotating returns the token payload as JSON — treat it as sensitive.
Bulk destructive commands (for example openclaw devices clear) are guarded by confirmation flags like --yes; do not run these without a backup or explicit intent.
Directory and pairing UX
Directory lookups are intended to produce identifiers you paste into subsequent commands (for example openclaw message send --target...). Default directory output is id separated by tabs; use --json when scripting. Many channel directory results are config-backed (allowlists and configured groups) rather than live provider directories—expect differences between what you see here and what the provider API would return.
If multiple pairing-capable channels are configured you must supply a channel positionally or via --channel for pairing list/approve. pairing approve supports --account for multi-account channels and --notify to send a confirmation back to the requester.
QR and remote setup tokens
The QR/setup-code payload contains a short-lived opaque bootstrapToken (not the shared gateway token/password). For openclaw qr, --token and --password are mutually exclusive. Mobile pairing is intentionally conservative: it fails closed for public ws:// gateway URLs — prefer wss:// or Tailscale Serve/Funnel for mobile pairing.
Voice-call plugin
Voice-call commands appear only if the voice-call plugin is installed and enabled on the Gateway. Exposing webhook endpoints via openclaw voicecall expose should be limited to trusted networks; prefer Tailscale Serve to Funnel when possible.
Follow these patterns and checks when scripting or operating channels: prefer --probe for diagnostics, use explicit CLI auth overrides for remote actions, run openclaw doctor --fix for mixed config anomalies, and treat rotated tokens and printed token JSON as high-sensitivity secrets.
Manage channel accounts and runtime status
Channels are the Gateway’s adapters to external messaging systems. You’ll use the channels CLI to inspect which transports are configured, probe per-account health, add or remove accounts, and resolve human-friendly names into canonical channel targets. These commands are the first line of operational checks when a channel behaves oddly or an account needs onboarding.
Quick command cheat-sheet Use this compact set to discover and inspect channel state. These examples are CLI snippets you can run directly.
openclaw channels list
openclaw channels status
openclaw channels capabilities
openclaw channels capabilities --channel discord --target channel:123
openclaw channels resolve --channel slack "#general" "@jane"
openclaw channels logs --channel all
What each command does and what to expect
openclaw channels list prints configured channel plugins and any named accounts. Expect a short table of channels and counts. If a channel seems missing, check plugins and gateway logs.
openclaw channels status shows per-account state. By default this reads the Gateway’s current runtime view; run with --probe to perform live per-account probeAccount checks (see warning below).
openclaw channels capabilities shows general capability profiles (for example: text, media, buttons). Supplying --channel narrows to that adapter; adding --target asks the adapter whether the specified target supports extra features (file uploads, threading, ephemeral messages).
openclaw channels resolve turns human names or paths into canonical identifiers (useful before scripting sends or bindings).
openclaw channels logs streams channel-adapter logs; use --channel all or a specific channel id.
Status probing and Gateway reachability The --probe flag triggers live probeAccount calls for each configured account and may run optional auditAccount checks. probeAccount exercises transport-level connectivity and permission checks, so you’ll see auth errors (expired token, insufficient scopes) or network failures. If the Gateway is unreachable—daemon stopped, firewall blocking, or wrong socket address—the status command falls back to a config-only summary and will not surface live probe results. If you expect live probes but see only config summaries, verify gateway reachability (openclaw gateway status / gateway probe) before further investigation.
Adding accounts: flags, interactive flows, and binding behavior openclaw channels add accepts many provider-specific flags: token, private-key, app-token, webhook URL, Matrix homeserver/user fields, nostr relays, signal-cli path, etc. Use --help for per-channel options; flags differ per adapter. Example patterns:
openclaw channels add --channel telegram --token <bot-token>
openclaw channels add --channel nostr --private-key "$NOSTR_PRIVATE_KEY"
openclaw channels remove --channel telegram --delete
Interactive add flows will often prompt to bind the new account to an agent during onboarding. Non-interactive adds (scripting/automation) do not create or rewrite agent bindings; you must explicitly bind afterward with openclaw agents bind. A common pitfall: some channels historically supported a single top-level account value in config. When you add a named non-default account, OpenClaw will promote existing top-level single-account values into channels.<channel>.accounts.default to avoid losing configuration. Think of this promotion like adding a new user to a multi-tenant system: the global “single-user” settings become a named user to preserve behavior, which can surprise scripted configs.
Remediation for mixed-state configs If your configuration ends up with both top-level single-account entries and named accounts causing confusion, run openclaw doctor --fix. The doctor can normalize and migrate top-level values into the accounts map and report the final layout.
Interactive login/logout For channels that require interactive pairing or OAuth flows, use:
openclaw channels login --channel whatsapp
openclaw channels logout --channel whatsapp
If only one login-capable channel exists, the CLI may infer the channel and let you omit --channel.
Inspecting capabilities with and without a target Querying capabilities without a --target returns the adapter’s general feature set. Supplying --target asks the adapter to evaluate the specific destination (channel:123, room name, matrix room id) and returns target-scoped capabilities and constraints; this is helpful to detect per-room restrictions or upload limits before sending large media.
Operational warnings
probeAccount is live and can trigger rate limits or ephemeral locks on provider APIs—avoid running --probe in tight loops.
Channel credentials and private keys are sensitive; never log or store them in public places.
Removing accounts with --delete is destructive. Backup config before bulk removals.
Use these commands as your daily toolbox for channel health, onboarding, and troubleshooting; they are the starting point before digging into adapter logs, gateway probes, or device pairing flows.
Device pairing: list, approve, rotate, revoke, and safe bulk actions
Always inspect paired devices and pending requests before mutating anything. The list command is your safe read-only starting point; use --json for machine-parsable output you can pipe into scripts or audits.
openclaw devices list
openclaw devices list --json
The list shows active paired devices and any pending pairing requests (requestId, requested roles/scopes, originating client metadata). Record the requestId for approvals or rejections; it is the canonical reference used by mutating commands.
Approving and rejecting pairing requests
Approvals must reference an explicit requestId. Running approve without an ID does not create a token. Instead, openclaw devices approve with no arguments will print the selected pending request and exit so you can inspect it first. The --latest flag behaves as a preview helper: it prints the most recent pending request and exits — it does not perform approval.
To mint a token you must run approve with the exact requestId.
Preview and approve examples:
openclaw devices approve
openclaw devices approve <requestId>
openclaw devices approve --latest
Important rule: openclaw devices approve requires an explicit requestId to mint a token; using --latest or omitting requestId only prints the selected pending request and exits.
Device token rotation and revocation Rotation issues a new token for an existing device/role. Rotation cannot expand the device’s privileges: you may not rotate to mint a token with a broader role or scopes than were originally approved for that device. The rotation command returns the new token payload as JSON on success — treat that output as a secret. Persist it to a secure store immediately (secret manager, vault) and rotate any consumers that used the old token.
Example: rotate for operator role with explicit scopes:
openclaw devices rotate --device <deviceId> --role operator --scope operator.read --scope operator.writeYou can also rotate with a minimal command when no scope change is needed:
openclaw devices rotate --device <deviceId> --role operatorTo revoke an issued token for a specific role:
openclaw devices revoke --device <deviceId> --role nodePermission boundaries Non-admin callers can only manage their own device entries. remove, rotate, and revoke operations invoked by a non-admin are restricted to the caller’s deviceId. Cross-device management requires operator.admin privileges. Always verify your caller privileges before attempting cross-device actions to avoid confusing "permission denied" failures.
Removing devices and bulk clears Remove deletes a single paired device entry:
openclaw devices remove <deviceId>
openclaw devices remove <deviceId> --json
Bulk removal is gated by an explicit confirmation flag to prevent accidents. Use --pending to target only outstanding pairing requests. This command is destructive and irreversible; take a backup of ~/.openclaw or your device store if you need a recoverable snapshot.
openclaw devices clear --yes
openclaw devices clear --yes --pending
openclaw devices clear --yes --pending --json
Warning: clear requires --yes. Without it the command will refuse to run. Also, when you pass --url to any devices command, the CLI will not fall back to config or environment credentials — you must supply --token or --password explicitly; omitting credentials in that case is an error.
Audit and operational notes
Rotate tokens trigger a sensitive JSON output; treat it like any secret: copy to a vault and rotate dependent clients immediately.
Approvals and revocations should be logged and correlated with requestId and deviceId for auditing. Expect your system logs or gateway audit trail to include these operations if auditing is enabled.
Common safe workflow: list → preview pending with --latest → approve by requestId → store returned token securely.
Directory lookups and constructing message targets
You need a canonical, machine-safe identifier before sending a message. The directory commands return those identifiers so you can paste or pipe them into openclaw message send. By default directory output prints a human-oriented line with the identifier as the first field (tab-separated), which is convenient to copy by hand. For automation or scripts always use --json so you parse a stable structure instead of relying on visual output.
The directory is often a local/config-backed index rather than a live provider lookup. Channels frequently expose an allowlist or workspace-configured group membership; results may not reflect external provider-side changes until you refresh pairing or re-sync the channel. Treat directory lookups as authoritative for Gateway-aware routing, but validate freshness if you need up-to-the-second provider state.
When your host has multiple channels configured, include --channel to disambiguate. If only one channel is configured, the CLI may infer the channel; do not rely on inference in scripts or automation — opt for explicit --channel to avoid accidental delivery to the wrong account.
Example: find a peer and then send a message using the returned canonical ID. The first command is illustrative input; copy the returned ID into the second command or pipe it in a script.
openclaw directory peers list --channel slack --query "U0"
openclaw message send --channel slack --target user:U012ABCDEF --message "hello"
To discover which local account the Gateway is using for a given channel, query the special self entry. This returns the configured identity you should use for system messages or self-targeted flows.
openclaw directory self --channel zalouserLarge directories can be filtered and limited. Use --query to search by name or partial id, and --limit to bound results when paging or scanning large directories.
openclaw directory peers list --channel zalouser
openclaw directory peers list --channel zalouser --query "name"
openclaw directory peers list --channel zalouser --limit 50
Group workflows: list groups to find the group id, then fetch members by group id before messaging the group target.
openclaw directory groups list --channel zalouser
openclaw directory groups list --channel zalouser --query "work"
openclaw directory groups members --channel zalouser --group-id <id>
Quick scripting checklist
Use --json for machine parsing.
Always pass --channel in scripts when more than one channel exists.
Validate identifier format before send (e.g., user:U..., group:G..., channel-specific prefixes).
Remember directory may be config-backed; re-sync or re-pair if results seem stale.
Pairing approvals and generating QR/setup codes
Pairing is the operator gate for allowing mobile or companion devices to send messages into a Gateway-managed account. Treat pairing requests like access requests: inspect them, scope approvals to the correct channel/account, and send a confirmation to the requester when appropriate.
When you list pending pairing requests use openclaw pairing list. If your installation has more than one pairing-capable channel configured you must supply which channel to inspect either positionally or with --channel; otherwise the CLI will refuse to proceed. Example queries for a Telegram workspace look like this:
openclaw pairing list telegram
openclaw pairing list --channel telegram --account work
openclaw pairing list telegram --json
The --account flag filters requests for multi-account channels (Telegram, WhatsApp, etc.). Use --json for machine-readable output you can feed into automation or approval UIs.
Approving a pairing code follows the same scoping rules: provide a channel when multiple pairing-capable channels exist, and pass --account if the request is tied to a specific account. You can optionally notify the requesting device; --notify sends a confirmation message back to that device after approval. Typical approval flows:
openclaw pairing approve <code>
openclaw pairing approve telegram <code>
openclaw pairing approve --channel telegram --account work <code> --notify
--notify is useful when the requester expects an in-channel acknowledgment or a short “paired” message; it does not change the permissions the pairing grants.
Generating a mobile pairing QR or setup code uses openclaw qr. The setup payload contains a short-lived, opaque bootstrapToken rather than the shared gateway token or password; this token is scoped for onboarding and expires quickly. You can request just the setup code, render a QR image in your UI, or emit JSON for tooling:
openclaw qr
openclaw qr --setup-code-only
openclaw qr --json
openclaw qr --remote
openclaw qr --url wss://gateway.example/ws
Key rules and remote-mode behavior
--token and --password are mutually exclusive for openclaw qr. Do not pass both.
When you use --remote, the command requires either gateway.remote.url to be configured or gateway.tailscale.mode set to serve or funnel. openclaw qr --remote will attempt to resolve active remote credentials from the Gateway snapshot. If those credentials are stored as SecretRefs and the active Gateway supports secrets.resolve, the CLI asks the Gateway to resolve them; if the Gateway is unreachable or does not support secrets.resolve, the command fails fast. This prevents exposing secret material in the local environment unintentionally.
The setup payload uses a bootstrapToken unique to the setup operation. It is not the persistent gateway token/password; treat it as short-lived and single-use.
Operational warnings
Mobile pairing is intentionally conservative: public, non-TLS ws:// endpoints and Tailscale public ws:// URLs may fail closed. Prefer Tailscale Serve or Funnel or expose a wss:// endpoint for reliable mobile pairing.
Treat pairing codes and bootstrap payloads as sensitive. Do not publish them in public logs.
Realistic sequence
Run openclaw pairing list telegram to find the pending code and identify account context.
Approve it with openclaw pairing approve --channel telegram --account work <code> --notify to both grant access and inform the requester.
If onboarding a phone remotely, run openclaw qr --remote --url wss://gateway.example/ws (or ensure gateway.tailscale.mode=serve). If the Gateway delegates secret resolution, ensure it is reachable so the command can return a valid setup payload.
These steps let you validate, scope, approve, and distribute pairing tokens safely while respecting remote-secret resolution and transport constraints.
Voice-call plugin: call lifecycle and safe webhook exposure
Voice calling is controlled by a gateway-side plugin; the CLI surface appears only after you install and enable that plugin. If the voice-call plugin is not enabled, openclaw voicecall will not be present—verify installation before troubleshooting call failures.
The voicecall commands implement a simple call lifecycle: initiate a call (call), send follow-up content into an ongoing call (continue), terminate a call (end), and probe call state (status). Use status to check delivery, current media/webhook events, or a provider-assigned call identifier. These examples are runnable CLI commands you can use from an operator shell once the plugin is active:
openclaw voicecall status --call-id <id>
openclaw voicecall call --to "+15555550123" --message "Hello" --mode notify
openclaw voicecall continue --call-id <id> --message "Any questions?"
openclaw voicecall end --call-id <id>
Exposing a webhook endpoint for inbound provider events (call progress, DTMF, recordings) is a separate operational decision. The plugin supports three exposure modes: serve, funnel, and off. Serve binds a publicly reachable endpoint through Tailscale Serve (recommended when you run Tailscale); Funnel is broader and may be easier in some deployments but increases surface area; off disables external exposure, leaving only loopback/websocket delivery.
Switch exposure modes with the CLI:
openclaw voicecall expose --mode serve
openclaw voicecall expose --mode funnel
openclaw voicecall expose --mode off
Security checklist before opening webhooks:
Verify the voice-call plugin is enabled and up-to-date.
Prefer --mode serve (Tailscale Serve) to restrict traffic to your Tailscale network and audit who can hit the endpoint.
If you must use funnel or public endpoints, restrict by IP, require HMAC/replay protection from providers, and keep tokens secret.
Monitor gateway logs for unexpected inbound webhook spikes immediately after enabling exposure.
Warning: only expose webhooks to trusted networks. Funnel or public endpoints can surface provider-facing attack vectors—audit access and rotate provider keys after testing.
Commands cheatsheet and scripting tips
When you automate channel tasks or need a quick lookup at the shell, favor small, copy-pasteable commands and predictable machine-readable outputs. The two canonical command groups below (channel probes and pairing/QR generation) cover the most common day-to-day operations: discovering channel capabilities and producing pairing artifacts for mobile or companion nodes.
Channel probes — quick checks and discovery
openclaw channels list
openclaw channels status
openclaw channels capabilities
openclaw channels capabilities --channel discord --target channel:123
openclaw channels resolve --channel slack "#general" "@jane"
openclaw channels logs --channel all
openclaw channels list: enumerate configured channel adapters and their IDs.
openclaw channels status: health and connection state for each adapter.
openclaw channels capabilities: what features (messages, attachments, threads) the gateway sees; use --channel and --target to scope checks to a specific account or target object.
openclaw channels resolve: translate human identifiers to canonical target refs (useful before sending messages or approving pairings).
openclaw channels logs: fetch channel adapter logs; --channel all is useful for broad troubleshooting.
Pairing and QR generation — produce the payloads clients consume
openclaw qr
openclaw qr --setup-code-only
openclaw qr --json
openclaw qr --remote
openclaw qr --url wss://gateway.example/ws
openclaw qr: prints a pairing QR and setup code for local clients; suitable for interactive pairing flows.
--setup-code-only: emit the textual setup code without a QR image wrapper (handy for voice or keyboard entry).
--json: machine-readable artifact — required for scripts that pass the payload to other processes.
--remote: request a QR/setup object that is valid for remote onboarding (respect gateway.remote settings and tokens).
--url: override the gateway URL encoded into the payload for non-default network topologies.
Three scripting tips
Always use --json for automation. Human-friendly text is fragile; JSON is stable for parsing and plumbing into CI or companion daemons.
When your instance has multiple channel adapters, pass --channel explicitly (or resolve a target first) so scripts operate on the intended account.
Before running probes or pairing flows in scripts, assert gateway connectivity (openclaw gateway status or a small /status probe). Failing fast avoids generating invalid pairing tokens.
Safety notes
Rotated tokens and pairing secrets are sensitive. Treat any setup code or QR payload as credential material; store them like API keys.
Avoid --yes on destructive device or channel removal commands in unattended scripts unless you intentionally want irreversible deletes.
OpenClaw CLI: Flags, Output, and Workflows
What this CLI chapter covers
OpenClaw’s CLI is both the operator’s control surface and the automation entry point. You’ll use it interactively for troubleshooting and day‑to‑day tasks, and programmatically from scripts and CI. This chapter organizes the surface so you can quickly find a human‑friendly example or a machine‑friendly flag depending on the task.
Start here for two quick facts you’ll reuse throughout the book: global flags control state isolation and output format, and TTY presence changes behavior and coloring. Use --dev or --profile to isolate runtime state under alternate workspaces; this avoids accidental cross‑workspace operations. For automation and parsers prefer --json or --plain; --json yields machine‑parseable objects, --plain suppresses ANSI styling while preserving readable text.
The chapter is laid out for both discovery and execution:
Global flags and the state‑isolation model, including --dev, --profile, and container/targeting flags.
Output and TTY behavior: --json, --plain, --no-color, and when the CLI emits progress/interactive prompts vs non‑interactive summaries.
A single canonical command‑tree reference (one-line flattened sheet) for fast lookups. Treat the command‑tree as a reference map only — it’s not a runnable command.
Practical, copy‑paste examples grouped by common operator tasks: channels (add/login/status), logs and probes (gateway status, gateway probe, openclaw doctor), and pairing/approval flows.
Examples in this chapter are runnable shell snippets unless marked otherwise. When scripting, always pass --json and check exit codes rather than relying on colored output. When a command can be destructive (reset, uninstall, gateway uninstall), the examples explicitly show backup and confirm steps. Use this chapter as a quick reference: consult the command‑tree to find the command name, then run the nearby example block for the exact flags and expected machine output.
Global flags, profiles, and state isolation
Commands that change which workspace OpenClaw reads and writes let you create reproducible, isolated testing environments and target containerized runtimes without touching your primary installation. Use --dev to create a developer-local state area and --profile <name> to create named, separate state directories; both flags move all persisted CLI-visible state (configuration, sessions, plugins, approvals, device pairings, workspace files) into their own directory.
When you run with --dev the runtime stores state under ~/.openclaw-dev. When you run with --profile staging the runtime stores state under ~/.openclaw-staging. This isolation is persistent: any command you run with the same flag will read and write the same profile directory until you remove it.
One-line examples:
Quick developer sandbox:
openclaw --dev plugins install./local-plugin
openclaw --dev gateway start
Separate Gateway instance for staging:
openclaw --profile staging onboard --non-interactive
openclaw --profile staging gateway install
Warning: these flags are not ephemeral overrides. They affect live data — sessions, approvals, installed plugins, and agent state — so use them deliberately. Back up or snapshot the profile directory before destructive actions like openclaw --profile staging reset or uninstall.
Targeting container runtimes: use --container <name> to direct the CLI at a named container target. This lets the same CLI command execute against a containerized Gateway rather than the local daemon. Example:
openclaw --container gateway-container statusTypical workflows:
Develop a plugin locally under --dev so you can iterate without polluting your primary ~/.openclaw.
Run a second, isolated Gateway using --profile staging for integration testing, CI, or blue/green experiments.
Combine --container with a profile to point at a containerized Gateway that uses a separate profile-backed volume.
Keep these flags in your operational playbook for safe experimentation and predictable, reproducible CLI-driven workflows.
Output formatting, colors, and TTY behavior
Interactive runs show richer, human-friendly output; scripts and CI need stable, machine-friendly output. OpenClaw adapts automatically based on whether it detects a TTY, and provides explicit flags and an environment variable for operators to force the mode they need.
When OpenClaw detects a TTY it will emit ANSI colors, OSC-8 hyperlinks, and progress indicators. Long-running commands display a progress indicator; when the terminal supports it this uses the OSC 9;4 escape for progress. In non‑TTY contexts (pipes, CI, logs) OpenClaw falls back to plain URLs, no progress styling, and no animated indicators.
You can override detection and control formatting:
--no-color disables ANSI colors. The NO_COLOR=1 environment variable is also honored and has the same effect.
--json emits structured JSON output where supported; it suppresses styling regardless of TTY and is the preferred mode for scripts and automation.
--plain (where supported) requests text output without styling or extra decorations; it similarly disables colors and rich links but preserves human-readable plaintext.
Examples:
bash openclaw agents list --json openclaw gateway status --no-color openclaw logs tail --plain
Note the difference: --no-color only removes ANSI color sequences; it does not change the output format to JSON. Use --json when you need parseable output. Use NO_COLOR=1 to force colorless output for entire CI jobs without changing every command.
OpenClaw’s visual identity (the lobster color palette) is defined in the repository at src/terminal/palette.ts; that file is the source of truth for CLI colors. Think of TTY vs non‑TTY like a GUI that hides animations and hyperlinks when running headless: OpenClaw preserves semantics but removes transient/terminal-dependent flourishes so logs and CI remain stable and machine-consumable.
Flattened command‑tree reference (compact)
Warning: the block below is a flattened, human-readable reference of the openclaw command tree. It is not a single runnable command; treat each token as a separate subcommand or namespace to call (for example: openclaw channels add...). Use this listing to discover namespaces and aliases, then consult the runnable examples later in this chapter.
openclaw [--dev] [--profile <name>] <command>
 setup
 onboard
 configure
 config
 get
 set
 unset
 file
 schema
 validate
 completion
 doctor
 dashboard
 backup
 create
 verify
 security
 audit
 secrets
 reload
 audit
 configure
 apply
 reset
 uninstall
 update
 wizard
 status
 channels
 list
 status
 capabilities
 resolve
 logs
 add
 remove
 login
 logout
 directory
 self
 peers list
 groups list|members
 skills
 search
 install
 update
 list
 info
 check
 plugins
 list
 inspect
 install
 uninstall
 update
 enable
 disable
 doctor
 marketplace list
 memory
 status
 index
 search
 wiki
 status
 doctor
 init
 ingest
 compile
 lint
 search
 get
 apply
 bridge import
 unsafe-local import
 obsidian status|search|open|command|daily
 message
 send
 broadcast
 poll
 react
 reactions
 read
 edit
 delete
 pin
 unpin
 pins
 permissions
 search
 thread create|list|reply
 emoji list|upload
 sticker send|upload
 role info|add|remove
 channel info|list
 member info
 voice status
 event list|create
 timeout
 kick
 ban
 agent
 agents
 list
 add
 delete
 bindings
 bind
 unbind
 set-identity
 acp
 mcp
 serve
 list
 show
 set
 unset
 status
 health
 sessions
 cleanup
 tasks
 list
 audit
 maintenance
 show
 notify
 cancel
 flow list|show|cancel
 gateway
 call
 usage-cost
 health
 status
 probe
 discover
 install
 uninstall
 start
 stop
 restart
 run
 daemon
 status
 install
 uninstall
 start
 stop
 restart
 logs
 system
 event
 heartbeat last|enable|disable
 presence
 models
 list
 status
 set
 set-image
 aliases list|add|remove
 fallbacks list|add|remove|clear
 image-fallbacks list|add|remove|clear
 scan
 infer (alias: capability)
 list
 inspect
 model run|list|inspect|providers|auth login|logout|status
 image generate|edit|describe|describe-many|providers
 audio transcribe|providers
 tts convert|voices|providers|status|enable|disable|set-provider
 video generate|describe|providers
 web search|fetch|providers
 embedding create|providers
 auth add|login|login-github-copilot|setup-token|paste-token
 auth order get|set|clear
 sandbox
 list
 recreate
 explain
 cron
 status
 list
 add
 edit
 rm
 enable
 disable
 runs
 run
 nodes
 status
 describe
 list
 pending
 approve
 reject
 rename
 invoke
 notify
 push
 canvas snapshot|present|hide|navigate|eval
 canvas a2ui push|reset
 camera list|snap|clip
 screen record
 location get
 devices
 list
 remove
 clear
 approve
 reject
 rotate
 revoke
 node
 run
 status
 install
 uninstall
 stop
 restart
 approvals
 get
 set
 allowlist add|remove
 browser
 status
 start
 stop
 reset-profile
 tabs
 open
 focus
 close
 profiles
 create-profile
 delete-profile
 screenshot
 snapshot
 navigate
 resize
 click
 type
 press
 hover
 drag
 select
 upload
 fill
 dialog
 wait
 evaluate
 console
 pdf
 hooks
 list
 info
 check
 enable
 disable
 install
 update
 webhooks
 gmail setup|run
 pairing
 list
 approve
 qr
 clawbot
 qr
 docs
 dns
 setup
 tui
Use this listing as an index: search for high-level namespaces (channels, plugins, agents, gateway, nodes, models, auth, logs, cron, sandbox). The leftmost token is the CLI root; follow with subcommands shown below it. Aliases are indicated inline (for example: infer (alias: capability)). Global flags you’ll commonly use are --dev (developer isolation) and --profile <name> (workspace/profile isolation); many commands accept --json or --plain for machine-friendly output—see the CLI chapter for output-mode flags.
When you need a runnable example, jump to the practical examples that follow in this chapter (channels add/login, gateway probe/health, streaming logs). If a listing entry looks destructive (reset, uninstall, delete), stop and run openclaw backup create first. The flattened block is intentionally exhaustive; use it to surface the right namespace and then invoke that specific subcommand with its arguments.
Channels: add, remove, and status — practical examples
You need to supply credentials and a channel type when you register a messaging integration. The CLI accepts common flags (--channel, --account, --name, --token) and we typically source tokens from environment variables so secrets never appear directly on the command line.
The following canonical example shows common add/remove/status flows; treat it as runnable shell commands:
openclaw channels add --channel telegram --account alerts --name "Alerts Bot" --token $TELEGRAM_BOT_TOKEN
openclaw channels add --channel discord --account work --name "Work Bot" --token $DISCORD_BOT_TOKEN
openclaw channels remove --channel discord --account work --delete
openclaw channels status --probe
openclaw status --deep
First line: creates a Telegram account named "alerts" using the bot token read from the TELEGRAMBOTTOKEN environment variable. Use environment variables (or a SecretRef via config) to avoid leaking credentials in shell history.
Second line: creates a Discord account named "work" with the token in $DISCORDBOTTOKEN.
Third line: removes the Discord account; the --delete flag performs destructive removal of the account record and any associated pairing state.
Fourth line: runs a connectivity probe for all configured channels; --probe makes the command actively test reachability and auth.
Fifth line: runs a deep gateway status probe for broader diagnostics (providers, services, and channel health).
Warning: --delete is destructive. Backup your configuration and sessions before removing accounts. A safe backup is to archive ~/.openclaw or run openclaw backup create first.
If add fails, check these in order: 1) confirm the environment variable is set (echo $TELEGRAMBOTTOKEN), 2) verify token scopes/permissions on the provider dashboard, 3) confirm outbound network access from the Gateway host to provider endpoints, and 4) inspect gateway logs for authentication errors. Authentication failures are surfaced as CLI errors; use openclaw channels status --probe immediately after add to verify connectivity before trusting production traffic. For deeper troubleshooting, openclaw status --deep gathers extended diagnostics across the Gateway and connected providers.
Logs: streaming, limiting, and machine formats
The quickest way to get diagnostic output from a Gateway is the logs subcommand. Use --follow to attach to the live stream when debugging, --limit to capture a bounded snapshot for a ticket, and --plain or --json when you need machine-friendly output. The examples below show the canonical invocations you’ll use repeatedly.
openclaw logs --follow
openclaw logs --limit 200
openclaw logs --plain
openclaw logs --json
openclaw logs --no-color
What each flag does
--follow: Tail logs in real time; the command stays open and prints new entries as they arrive. Good for reproducing an issue or watching startup sequences.
--limit <n>: Return at most n recent lines (or entries). Use this to produce a concise snapshot to attach to a support ticket or to capture startup logs without streaming.
--plain: Emit human-readable plain text without extra structured fields or colorized styling. Easier to grep and pipe to standard Unix tools when you don’t need JSON.
--json: Emit structured JSON lines suitable for parsing with jq, log processors, or CI scripts. Each line is a JSON object representing a log entry.
--no-color: Disable ANSI color sequences. Combine with --plain or --json for deterministic output in terminals that don’t handle color.
Practical tips
For automation, prefer --json and pipe into jq: openclaw logs --limit 500 --json | jq '.message,.level' to extract fields reliably. --plain is simpler for grepping but provides no structured fields.
Use --follow when you need live interaction (watching a channel pairing, Gateway reloads). For bug reports, capture a bounded snapshot with --limit and include timestamps.
Terminal behavior: progress indicators and ANSI styling may be suppressed when the command is not run in a TTY. If you run logs in CI or from a remote script, explicitly pass --json or --plain to ensure consistent output.
Warning: reading logs may require appropriate local permissions; the CLI will error if it cannot access log files. When truncating logs or performing destructive maintenance, always capture a backup snapshot first.
Progress indicators and color palette
Long-running openclaw commands show a visual progress indicator only when running in an interactive terminal. The CLI detects a TTY and will render an animated progress bar or spinner; in environments that advertise support for the OSC 9;4 escape sequence the CLI emits OSC 9;4 updates so terminal emulators that honor that sequence can expose a richer progress state. If no TTY is present (for example a CI job, a redirected stdout, or when you use --json/--plain output modes) the CLI suppresses animation and falls back to a single status line or only machine-readable output.
Expect an animated progress bar or spinner for operations that take many seconds (install, plugin download, gateway install). Short operations or non-interactive runs will instead print a compact status line and exit. If you require deterministic, non-interactive behavior—scripts, automation, or log capture—disable TTY-style UX by running in a non-TTY environment (ssh -T, CI runners, or redirecting output) or by using structured output flags such as --json or --plain; both paths prevent animated output and OSC 9;4 emissions.
OpenClaw’s color choices are consistent across the CLI and progress UI. The single source of truth for the terminal palette is src/terminal/palette.ts in the codebase; consult that file when you need to match colors in logs, craft integrations that parse colored output, or adjust theme choices for accessibility. When customizing output for automation, prefer structured formats rather than relying on color or terminal escape behavior—colors and OSC support vary by emulator and are strictly a TTY convenience, not a machine-facing contract.
Common CLI patterns and container targeting
When scripting or running commands against OpenClaw you should treat the CLI as stateful and environment-aware. Two global flags let you isolate where that state lives and avoid surprise interactions between environments. Use --dev to run in a development sandbox (state rooted at ~/.openclaw-dev) and --profile <name> to isolate into ~/.openclaw-<name>. These flags create separate runtime directories for config, plugins, and workspace defaults so multiple environments can coexist on one host.
For automation and machine parsing prefer the non-styled output modes. --json emits structured JSON; --plain removes color and other terminal styling. Both are supported where a command exposes machine output and are required for reliable CI scripts and log scraping. Avoid relying on TTY-only interactive features (progress bars, pagers) when you pass these flags.
Targeting containerized Gateways is explicit: --container <name> directs the CLI to run the command against a named container instance. The flag does not invent orchestration behavior — it simply points the CLI at the container you name. Confirm the container name with your local tooling (docker ps, podman ps, kubectl get pods) before relying on it in automation.
Example combination:
openclaw --profile staging --container gateway-1 status --jsonAutomation checklist
Set --profile or --dev to isolate state per environment.
Use --json (or --plain) for machine-friendly output.
Specify --container <name> when the Gateway runs in a container; verify the name with docker/podman/kubectl.
Avoid TTY-only interactions; capture stdout/stderr and check exit codes for status.
Warning: destructive commands (reset/uninstall) still act on the profile you target. Always run status with the same profile/container first to confirm you’re operating against the intended instance.
Operational cautions and best practices
Before you remove or alter persistent gateway state, be deliberate: many CLI commands mutate workspace, channel, device, and daemon state that is hard to roll back. Always gather diagnostics, snapshot configuration, and test credentials before destructive actions.
Recommended quick pre-checks
Confirm overall health and a deep snapshot of runtime state:
openclaw status --deep
Inspect effective configuration and the specific keys you will change:
openclaw config get agents.list
Create a state backup (safe, copyable archive) before destructive changes:
openclaw backup create
When experimenting, isolate changes with a profile or dev state:
use --dev or set a named profile so you don’t touch production workspaces.
Channels and credentials Add channels with openclaw channels add and supply credentials via flags or environment variables. Typical flags: --channel, --account, --name, --token. Tokens are commonly exported to the shell (example: TELEGRAMBOTTOKEN) and referenced in the command to avoid embedding secrets in shell history. Validate connectivity with --probe before enabling a channel for live traffic.
Destructive operations The --delete flag (for channels remove and similar commands) is destructive. Back up first and prefer remove --probe or run remove without --delete to observe the planned effect when supported. Be cautious when removing auth-profiles or devices; follow your organization’s change control and approval process.
Logs and automation Use openclaw logs --follow for interactive troubleshooting and --limit <n> to bound output. For automation or centralized logging, prefer --json (machine-friendly) or --plain, and use --no-color when piping or storing logs to avoid control sequences.
Examples The following short examples show channel management and deep status probing (illustrative shell invocations):
openclaw channels add --channel telegram --account alerts --name "Alerts Bot" --token $TELEGRAM_BOT_TOKEN
openclaw channels add --channel discord --account work --name "Work Bot" --token $DISCORD_BOT_TOKEN
openclaw channels remove --channel discord --account work --delete
openclaw channels status --probe
openclaw status --deep
Common log commands:
openclaw logs --follow
openclaw logs --limit 200
openclaw logs --plain
openclaw logs --json
openclaw logs --no-color
Operational tips
Run --probe before routing real traffic to a new channel to validate tokens and network reachability.
Use --json or --plain for scripted tooling; reserve --follow for interactive debugging.
Keep secret values out of history and consider ephemeral environment injection or SecretRef for automation.
Quick reference: flags and common subcommands
When you operate OpenClaw from the shell you usually want predictable state, consistent output for scripts, and quick access to logs and channel tooling. Use the compact form below as a mnemonic for daily work.
Minimal usage form openclaw [--dev] [--profile <name>] [--container <name>] <command>
State isolation and profiles --dev and --profile <name> change where CLI state is stored. --dev uses ~/.openclaw-dev; --profile foo uses ~/.openclaw-foo. Use these to isolate workspaces, tokens, and local state for testing or multi-tenant setups.
Targeting containers --container <name> directs the command at a named container target (useful for CI or ClawDock workflows). The flag selects the container execution target rather than your host environment.
Output, colors, and machine modes Set NO_COLOR=1 or pass --no-color to disable ANSI color sequences. Use --json for machine-parseable structured output and --plain where supported to remove styling but keep human-readable text. These flags are additive and intended for automation and piping.
Logs and streaming openclaw logs supports:
--follow to stream new entries (like tail -f).
--limit <n> to show only the most recent n lines.
--plain / --json / --no-color to control formatting of streamed or batched output.
Example patterns: pipe follow to grep or jq, or use --json for ingestion by log collectors.
Channel and common command patterns
Add a channel account: openclaw channels add <provider> [flags]
Remove or status: openclaw channels remove <id>; openclaw channels status <id>
Plugins, agents, and gateway control use the same global flags: openclaw plugins install <spec>, openclaw agents list, openclaw gateway status
Keep this checklist near your terminal. For full examples (pairing flows, daemon install, and log collection tips) see the longer command examples elsewhere in this chapter.
Safe OpenClaw Configuration: CLI Patterns, SecretRefs, Wizard, and Gmail Webhooks
Configuration conventions and path notation
OpenClaw's configuration CLI addresses nested objects and arrays with a familiar dot-and-bracket path syntax so you can target exactly the field you intend to change. Use dotted paths to descend into objects and bracketed indices to address list items. For example, read a workspace default or a specific agent id with:
openclaw config get agents.defaults.workspace
openclaw config get agents.list[0].id
To view or update an entire agents list or set a property on the second agent in that list, the same notation applies:
openclaw config get agents.list
openclaw config set agents.list[1].tools.exec.node "node-id-or-name"
Parsing rules and typed values
By default OpenClaw attempts to parse values you pass to config set as JSON5. That means common syntaxes (numbers, booleans, arrays, objects, and single-quoted strings) will be interpreted as native types when possible.
If you need to enforce strict JSON parsing — for example to ensure a numeric port is stored as a number rather than a string — use --strict-json on the set command.
Examples showing implicit parsing and strict JSON enforcement:
openclaw config set agents.defaults.heartbeat.every "0m"
openclaw config set gateway.port 19001 --strict-json
openclaw config set channels.whatsapp.groups '["*"]' --strict-json
Practical tips and pitfalls
Shell quoting matters. When passing arrays or objects from a POSIX shell use single quotes around the whole JSON payload to avoid the shell interpreting characters like [, ], or $. Example: --strict-json '{"key": "value"}' or '["a","b"]'.
Without --strict-json a value that looks like JSON may still be stored as a plain string if parsing fails; use --strict-json when the type matters for downstream validation or runtime behavior.
Use config get to confirm the effective type after a set. If the stored type is wrong, re-run set with --strict-json.
Schema inspection and validation Print the runtime/merged JSON schema (useful when authoring manual json or validating programmatic changes):
openclaw config schemaSave the schema for offline inspection or to validate with external tools:
openclaw config schema > openclaw.schema.jsonUse the schema file to catch mis-typed fields before applying them to a running Gateway. When changing secrets or auth-related fields prefer a dry-run or validate step so SecretRef rejection policies or schema mismatches are discovered before a daemon reload.
openclaw config: subcommands and common workflows
Start by treating openclaw config as the authoritative CLI for reading and mutating the running configuration. Use single-path set/unset for small tweaks, and batch mode when you must apply multiple changes atomically (think: a single transaction that updates related keys). Always preview with --dry-run and validate before restarting the Gateway.
Quick command recipes
Inspect where the active config lives, and list the compiled schema.
Read single values with config get.
Write single values with config set (or use builders for SecretRefs and providers).
Remove values with config unset.
Apply multiple changes atomically with --batch-json or --batch-file.
Validate changes with config validate; use --json to get a machine-readable report.
Example invocations (illustrative shell commands)
openclaw config file
openclaw config --section model
openclaw config --section gateway --section daemon
openclaw config schema
openclaw config get browser.executablePath
openclaw config set browser.executablePath "/usr/bin/google-chrome"
openclaw config set agents.defaults.heartbeat.every "2h"
openclaw config set agents.list[0].tools.exec.node "node-id-or-name"
openclaw config set channels.discord.token --ref-provider default --ref-source env --ref-id DISCORD_BOT_TOKEN
openclaw config set secrets.providers.vaultfile --provider-input material --provider-path /etc/openclaw/secrets.json --provider-mode json
openclaw config unset plugins.entries.brave.config.webSearch.apiKey
openclaw config set channels.discord.token --ref-provider default --ref-source env --ref-id DISCORD_BOT_TOKEN --dry-run
openclaw config validate
openclaw config validate --json
Batch mode examples
Use --batch-json to apply several patches in one call. This is the right tool for coordinated updates (provider + references) because the CLI treats the batch as an atomic operation.
openclaw config set --batch-json '[
 {
 "path": "secrets.providers.default",
 "provider": { "source": "env" }
 },
 {
 "path": "channels.discord.token",
 "ref": { "source": "env", "provider": "default", "id": "DISCORD_BOT_TOKEN" }
 }
]'
Or read the operations from disk and preview before committing:
openclaw config set --batch-file./config-set.batch.json --dry-runPreview → apply → validate workflow
Preview a change:
openclaw config set gateway.reload.mode hybrid --dry-runApply:
openclaw config set gateway.reload.mode hybridValidate the active configuration:
openclaw config validate
openclaw config validate --json
When you pass --dry-run and/or --json the CLI emits a structured JSON summary useful for automation. Expect keys such as:
ok: boolean overall result
operations: list of planned operations and their status
configPath: path to the active config file considered
inputModes: how each input was parsed (value, ref, provider, batch)
checks: validation checks performed
refsChecked: SecretRef/provider resolution attempts
errors: array of error objects if any checks failed
Operational notes and warnings
SecretRef and provider builders: prefer them for credentials. The CLI supports ref builders (--ref-provider, --ref-source, --ref-id) and provider builders (--provider-source, --provider-path, --provider-mode). SecretRef entries may be rejected by the validator if they violate policy or cannot be resolved.
Rejected edits are written alongside the active config as.rejected.* files. To find them:
CONFIG="$(openclaw config file)"
ls -lt "$CONFIG".rejected.* 2>/dev/null | head
openclaw config validate
Validate before restarting the Gateway. Invalid configuration can be rejected at reload time; validate provides the same checks and JSON output useful for CI.
Gmail webhooks CLI (brief definition) openclaw webhooks gmail setup requires an --account and exposes options to control the GCP project, Pub/Sub topic/subscription, push endpoint, hook URL/token, and delivery customization flags. Use the --account to select which Gmail pairing the webhook will act for; supply project/topic/subscription or let the CLI create them if permitted. Follow the same dry-run/validate pattern when wiring webhooks into a production Gateway.
SecretRef builders and secrets provider configuration
OpenClaw separates secret values from configuration by letting you write pointers (SecretRefs) and providers instead of embedding secrets directly. The config CLI supports four assignment styles for setting configuration entries: value mode (direct literal), SecretRef builder mode (ref flags that create a SecretRef object), provider builder mode (create or update a secrets.providers.<alias> entry with --provider-* flags), and batch mode (--batch-json or --batch-file) for multiple operations at once. Choose the style that matches your operational security posture: value for non-secret strings, SecretRef for credential references, provider builder when you need OpenClaw to consult an external provider, and batch when applying many changes atomically.
Use builder flags when you want a reference to an env/file/exec provider rather than a literal token. The example below demonstrates creating a SecretRef that points to an environment variable through the default provider alias. This is a runnable shell invocation; it writes a SecretRef to channels.discord.token rather than placing the token in plain text.
openclaw config set channels.discord.token \
 --ref-provider default \
 --ref-source env \
 --ref-id DISCORD_BOT_TOKEN
When you need OpenClaw to call an external helper to fetch secrets (exec provider), configure a provider entry using the provider builder flags. The following command shows how to define an exec-based secrets provider. This is a shell invocation that creates secrets.providers.vault pointing to an executable and arguments.
openclaw config set secrets.providers.vault \
 --provider-source exec \
 --provider-command /usr/local/bin/openclaw-vault \
 --provider-arg read \
 --provider-arg openai/api-key \
 --provider-timeout-ms 5000
You can also pass builder payloads as inline JSON and force strict parsing with --strict-json. These examples show passing the same concepts as JSON strings — useful for automation or when you build builder objects programmatically.
openclaw config set channels.discord.token \
 '{"source":"env","provider":"default","id":"DISCORD_BOT_TOKEN"}' \
 --strict-json

openclaw config set secrets.providers.vaultfile \
 '{"source":"file","path":"/etc/openclaw/secrets.json","mode":"json"}' \
 --strict-json
Exec providers expose power and risk. Use these provider flags to tighten runtime constraints: --provider-json-only restricts output parsing to JSON, --provider-pass-env lets you forward specific env vars (explicit names only), and --provider-trusted-dir limits which exec paths are considered safe. Example:
openclaw config set secrets.providers.vault \
 --provider-source exec \
 --provider-command /usr/local/bin/openclaw-vault \
 --provider-arg read \
 --provider-arg openai/api-key \
 --provider-json-only \
 --provider-pass-env VAULT_TOKEN \
 --provider-trusted-dir /usr/local/bin \
 --provider-timeout-ms 5000
Operational constraints and dry-run behavior
Some runtime-mutable surfaces are rejected for SecretRef assignment. OpenClaw will refuse SecretRefs for certain hook or channel credential fields that are intended to be changed live (examples: transient webhook callbacks or some channel pairing tokens). If you attempt this, the CLI returns a rejection error; use openclaw config get <path> to inspect the current shape before changing it.
Use --dry-run with --json to preview changes without applying them. Dry-run JSON includes fields such as ok, operations, configPath, inputModes, checks, refsChecked, and errors. Exec-based provider resolution is skipped in a conservative dry-run; add --allow-exec to permit execution during preview (only use this in trusted environments).
Checklist before enabling daemon-managed providers
Verify provider executable exists and is owned/trusted (matching --provider-trusted-dir).
Ensure executable has minimal privileges and correct file permissions.
Confirm any env vars you intend to pass are explicitly listed with --provider-pass-env.
Run the config change with --dry-run --json, then without --dry-run when satisfied.
If you plan to install the daemon, run openclaw doctor and resolve any PATH or permission warnings first.
Common CLI quick commands The config command family provides file, schema, get, set, unset, and validate subcommands. Use set with builders for SecretRefs and providers, validate (and validate --json) to check the full configuration, and file to show the active file. Running these steps in dry-run first reduces risk of accidental secret exposure.
Batch updates, dry-run previews, and machine-readable validation results
When you need to change many config keys at once—or want CI-safe validation before applying changes—use the batch and dry-run features of openclaw config together with machine-readable JSON output. The CLI supports three complementary workflows: single-path builders, batch payloads (inline JSON or file), and schema/resolvability validation with --dry-run and --json. Combine these to automate, preview, and gate configuration changes.
Here is a canonical inline batch example (illustrative CLI invocation). It sets a provider entry and a channel token in one call. Treat this as a command-line payload, not a file.
openclaw config set --batch-json '[
 {
 "path": "secrets.providers.default",
 "provider": { "source": "env" }
 },
 {
 "path": "channels.discord.token",
 "ref": { "source": "env", "provider": "default", "id": "DISCORD_BOT_TOKEN" }
 }
]'
If you prefer a file-driven workflow (recommended for CI or audit trails), write the same payload to a file and preview with --dry-run:
openclaw config set --batch-file./config-set.batch.json --dry-runFor CI gating, always run with --dry-run and --json. The CLI emits a structured JSON summary you can parse and assert on. A permissive preview that allows exec-based builders (which may call host commands) must explicitly include --allow-exec; otherwise exec-based refs are skipped in dry-run and counted in skippedExecRefs.
Examples of dry-run permutations:
openclaw config set channels.discord.token \
 --ref-provider default \
 --ref-source env \
 --ref-id DISCORD_BOT_TOKEN \
 --dry-run

openclaw config set channels.discord.token \
 --ref-provider default \
 --ref-source env \
 --ref-id DISCORD_BOT_TOKEN \
 --dry-run \
 --json

openclaw config set channels.discord.token \
 --ref-provider vault \
 --ref-source exec \
 --ref-id discord/token \
 --dry-run \
 --allow-exec
When you use --json the CLI returns a canonical operation summary. This is the template shape to expect:
{
 ok: boolean,
 operations: number,
 configPath: string,
 inputModes: ["value" | "json" | "builder",...],
 checks: {
 schema: boolean,
 resolvability: boolean,
 resolvabilityComplete: boolean
 },
 refsChecked: number,
 skippedExecRefs: number,
 errors?: [
 {
 kind: "schema" | "resolvability",
 message: string,
 ref?: string
 }
 ]
}
A successful run looks like this JSON (strict JSON shown):
{
 "ok": true,
 "operations": 1,
 "configPath": "~/.openclaw/openclaw.json",
 "inputModes": ["builder"],
 "checks": {
 "schema": false,
 "resolvability": true,
 "resolvabilityComplete": true
 },
 "refsChecked": 1,
 "skippedExecRefs": 0
}
If a resolvability check fails (for example an expected environment variable is missing), the JSON includes an errors array with kind "resolvability" and a ref identifier that shows the failing reference:
{
 "ok": false,
 "operations": 1,
 "configPath": "~/.openclaw/openclaw.json",
 "inputModes": ["builder"],
 "checks": {
 "schema": false,
 "resolvability": true,
 "resolvabilityComplete": true
 },
 "refsChecked": 1,
 "skippedExecRefs": 0,
 "errors": [
 {
 "kind": "resolvability",
 "message": "Error: Environment variable \"MISSING_TEST_SECRET\" is not set.",
 "ref": "env:default:MISSING_TEST_SECRET"
 }
 ]
}
Troubleshooting checklist for resolvability failures
Confirm the env var or secret exists in the environment where you ran the CLI (process-level env >.env > workspace override rules).
If the ref uses a provider (e.g., provider "default"), ensure that provider entry itself is resolvable and present in the target configPath.
If exec-based builders were expected, re-run with --allow-exec for a more complete preview; note that allowing exec in CI enlarges the trust surface.
If schema=false in checks, inspect the schema mismatch messages (they appear in errors with kind "schema") before addressing resolvability issues.
Operational tip: Treat any --json dry-run as your CI gate. Fail the pipeline if ok is false. For safety, keep --allow-exec off in automated checks unless you explicitly trust the execution environment.
Interactive configure wizard: scope, defaults, and daemon prechecks
The configure wizard is the fastest safe path to populate credentials, agent defaults, and channel allowlists without hand-editing JSON. Running openclaw configure (or running openclaw config with no subcommand) launches the same interactive flow and walks you through web/dashboard, model onboarding, channel pairing, gateway settings, and daemon install options. Use --section to focus the wizard on just the areas you need to change.
The wizard groups related questions. The Model section presents a multi-select for agents.defaults.models. If you authenticate to a provider during the session, the wizard prefers that provider when constructing the default multi-select. If that provider has no candidates for the selected allowlist and would leave the selection empty, the wizard falls back to the unfiltered provider catalog so you still get sensible defaults instead of a blank allowlist. This preference-for-auth behavior reduces manual follow-up when you onboard credentials and then immediately choose models.
Channel prompts ask for channel- or room-level allowlists (for example: Telegram chat names, Discord channel names or IDs, Matrix room aliases). The wizard accepts either human-friendly names or canonical IDs; when you enter a name the configure flow will try to resolve it to the channel’s internal ID. If resolution fails you’ll be warned and given a chance to re-enter an ID or skip—resolve names when possible to avoid ambiguous routing later.
Daemon-install prechecks are strict by design. Two checks commonly block a gateway install attempt:
If both gateway.auth.token and gateway.auth.password are present but gateway.auth.mode is unset, the wizard will refuse to proceed with daemon install until you explicitly set gateway.auth.mode (token or password). This avoids accidental deployment with ambiguous auth semantics.
If a required SecretRef (e.g., a provider token stored as a SecretRef) is unresolved or invalid, the wizard will surface the missing SecretRef and prevent daemon install until it’s resolved.
Typical interactive flow (example invocations; illustrative text commands):
openclaw configure
openclaw configure --section web
openclaw configure --section model --section channels
openclaw configure --section gateway --section daemon
After using the wizard for model + channels, validate and dry-run the outcome before attempting gateway install:
Run openclaw config validate --strict-json (or openclaw config get and inspect) to confirm structural validity.
Run openclaw config --dry-run (or openclaw gateway install --dry-run) to surface unresolved SecretRefs or auth-mode ambiguities.
Quick checklist to resolve daemon-install blocks:
If both token and password are set: explicitly set gateway.auth.mode to "token" or "password".
Confirm every SecretRef referenced by gateway or providers resolves (openclaw config get <path> shows SecretRef placeholders).
Re-run the wizard focused on gateway/daemon, or set fields with openclaw config set and revalidate.
These steps let you iterate safely: focus the wizard with --section, let the provider-preference simplify model selection, resolve channel names to IDs, and clear auth ambiguity before requesting daemon install.
Webhooks: Gmail Pub/Sub setup and run commands
Gmail push delivery in OpenClaw is driven by two CLI flows: a one-time wiring step that binds a local OpenClaw account to a GCP Pub/Sub topic/subscription, and a long‑running process that receives delivered messages, renews subscriptions, and forwards payloads into the Gateway. The setup step requires you to identify the local account email; the run step launches the watch/serve loop and the auto‑renew background tasks that keep Pub/Sub push credentials alive.
Start by wiring an account to Pub/Sub. The setup command requires --account and accepts options to bind a project, topic, subscription, and delivery endpoint. Typical quick invocations:
openclaw webhooks gmail setup --account you@example.com
openclaw webhooks gmail run
To customize the wiring (target GCP project, change push endpoint, or request machine-readable output), pass the optional flags. These examples show commonly used options:
openclaw webhooks gmail setup --account you@example.com
openclaw webhooks gmail setup --account you@example.com --project my-gcp-project --json
openclaw webhooks gmail setup --account you@example.com --hook-url https://gateway.example.com/hooks/gmail
After setup, start the receiver loop for that account. The run command accepts the same account binding and delivery flags so you can override or supply missing binding information at runtime:
openclaw webhooks gmail run --account you@example.comOperational notes and best practices
Required fields and common flags: --account is mandatory. Optional flags include --project (GCP project), --topic, --subscription, --hook-url (push endpoint), and --json (produce machine-readable diagnostics). The CLI mirrors common Pub/Sub concepts so you can supply explicit topic/sub names if you prefabricated them in GCP.
CLI convenience vs GCP provisioning: OpenClaw provides convenience wiring and local credential handling, but it does not replace the full Gmail Pub/Sub provisioning flow. You must provision the GCP project, enable the Gmail Pub/Sub API, create topics/subscriptions, and ensure service account credentials and IAM permissions per Google’s documentation. If you rely on the CLI to create resources, validate the created topic and subscription in the GCP Console.
Running the run process in production: Run the run command under a supervisor (systemd, launchd, or container manager). The process manages an auto‑renew loop for push verification tokens and subscription leases; when supervised, ensure log capture and restart policies so the loop is resilient to transient failures.
Common failure modes:
Missing Pub/Sub permissions: IAM errors during setup or renew will appear in the CLI. Use --json to capture structured error output for automation and debugging.
Invalid or unreachable hook-url: Failed push deliveries return HTTP errors from your endpoint. Verify TLS and firewall rules and inspect Gateway logs.
Expired or misconfigured credentials: Service account keys or OAuth tokens must be valid for subscription renewal; verify credentials in GCP.
Troubleshooting tips: Re-run setup with --json to get structured diagnostics. Check the subscription and topic exist in the GCP console, verify the service account’s Pub/Sub Publisher/Subscriber roles, and confirm the hook URL responds with a 2xx status to push requests.
Always cross-reference the Gmail Pub/Sub documentation for end‑to‑end setup details; OpenClaw’s commands are a convenience layer but depend on properly configured GCP resources and credentials.
Examples, troubleshooting, and next steps
Preview changes before you touch the live Gateway. The config CLI supports builders and batch files, but every change that introduces SecretRefs or provider builders must be checked for schema and resolvability problems first. Use --dry-run and --json to get a machine-readable summary you can gate in CI or inspect locally.
The canonical examples below show common config commands (file, schema, get, set, unset, validate) and two operational recipes you'll use repeatedly.
Shell examples (common openclaw config commands)
openclaw config file
openclaw config --section model
openclaw config --section gateway --section daemon
openclaw config schema
openclaw config get browser.executablePath
openclaw config set browser.executablePath "/usr/bin/google-chrome"
openclaw config set agents.defaults.heartbeat.every "2h"
openclaw config set agents.list[0].tools.exec.node "node-id-or-name"
openclaw config set channels.discord.token --ref-provider default --ref-source env --ref-id DISCORD_BOT_TOKEN
openclaw config set secrets.providers.vaultfile --provider-input material --provider-path /etc/openclaw/secrets.json --provider-mode json
openclaw config unset plugins.entries.brave.config.webSearch.apiKey
openclaw config set channels.discord.token --ref-provider default --ref-source env --ref-id DISCORD_BOT_TOKEN --dry-run
openclaw config validate
openclaw config validate --json
Interpreting dry-run JSON output A successful --dry-run --json returns a structured object that includes ok, operations, configPath, inputModes, checks, refsChecked and optional errors. Example (valid JSON):
{
 "ok": true,
 "operations": 1,
 "configPath": "~/.openclaw/openclaw.json",
 "inputModes": ["builder"],
 "checks": {
 "schema": false,
 "resolvability": true,
 "resolvabilityComplete": true
 },
 "refsChecked": 1,
 "skippedExecRefs": 0
}
When a resolvability check fails the errors array contains entries with kind "resolvability" and a ref string. Example when an env var is missing:
{
 "ok": false,
 "operations": 1,
 "configPath": "~/.openclaw/openclaw.json",
 "inputModes": ["builder"],
 "checks": {
 "schema": false,
 "resolvability": true,
 "resolvabilityComplete": true
 },
 "refsChecked": 1,
 "skippedExecRefs": 0,
 "errors": [
 {
 "kind": "resolvability",
 "message": "Error: Environment variable \"MISSING_TEST_SECRET\" is not set.",
 "ref": "env:default:MISSING_TEST_SECRET"
 }
 ]
}
A resolvability error is a hard signal: referenced secrets (env, file, provider) could not be resolved and must be fixed before applying.
Locate rejected uploads If OpenClaw rejects uploaded config fragments, rejected files are written beside the active config. Quick inspect:
CONFIG="$(openclaw config file)"
ls -lt "$CONFIG".rejected.* 2>/dev/null | head
openclaw config validate
Runbook 1 — change gateway.reload.mode safely
Preview change:
openclaw config set gateway.reload.mode hybrid --dry-run
Apply:
openclaw config set gateway.reload.mode hybrid
Validate:
openclaw config validate Always back up ~/.openclaw/openclaw.json before destructive changes and consult the Gateway runbook for restart and daemon procedures.
Runbook 2 — preview SecretRef changes in CI Have your CI run: openclaw config set --batch-file./proposed-changes.json --dry-run --json Fail the pipeline if the JSON output has ok:false or any errors with kind "resolvability". This prevents unchecked SecretRef regressions from reaching production.
Configure wizard, daemon constraint, and Gmail webhooks The interactive openclaw configure wizard can target sections with --section (for example --section model or --section gateway). Note: if both gateway.auth.token and gateway.auth.password are set and gateway.auth.mode is unset, the wizard will block any daemon install until you set gateway.auth.mode explicitly (this prevents ambiguous auth behavior). For Gmail webhooks, openclaw webhooks gmail integrates via Gmail Pub/Sub; the commands require the Pub/Sub topic/project flags and a service-account credential. Consult the webhooks help for required flags and follow Google Pub/Sub setup (subscribe topic, verify push endpoint or pull flow) before running openclaw webhooks gmail run.
Warnings
Backup openclaw.json before major edits.
SecretRef rejections and resolvability failures must be resolved before enabling daemon install or applying changes that affect auth or providers.
See Gateway runbook (ch032) for daemon install and restart safety procedures.
Gateway & Service Runbook: Operator Workflows and Safe Procedures
Gateway & Service Runbook — what this chapter covers
Start by preparing a workspace and a minimal config. Running the installer is only the first step; you must initialize OpenClaw’s runtime layout and (optionally) run the interactive onboarding flow that configures workspaces, models, and gateway auth. The plain initialization command creates ~/.openclaw/openclaw.json and the default workspace without starting onboarding. If you want the interactive or scripted onboarding to run, include one of the onboarding flags — --wizard, --non-interactive, --mode, --remote-url, or --remote-token — and the onboarding flow will auto-run.
Example invocations (runnable shell commands shown for copy/paste):
openclaw setup
openclaw setup --workspace ~/.openclaw/workspace
openclaw setup --wizard
openclaw setup --non-interactive --mode remote --remote-url wss://gateway-host:18789 --remote-token <token>
Service control has two front-ends. Historically the daemon alias is used; it maps to the gateway service control surface. The daemon subcommands you’ll see in older notes translate one-for-one to the gateway service workflows:
openclaw daemon status
openclaw daemon install
openclaw daemon start
openclaw daemon stop
openclaw daemon restart
openclaw daemon uninstall
For development and troubleshooting you may run the Gateway in the foreground:
openclaw gatewayUse status and discovery commands to inspect running Gateways and probe machine-readable state. status supports --json and --require-rpc to demand a healthy RPC response:
openclaw gateway status
openclaw gateway status --json
openclaw gateway status --require-rpc
openclaw gateway discover
openclaw gateway discover --timeout 4000
openclaw gateway discover --json | jq '.beacons[].wsUrl'
Operational guardrails and common flags
The Gateway refuses to start unless gateway.mode is explicitly set to "local" in ~/.openclaw/openclaw.json. This prevents accidental unprotected bindings. Use --allow-unconfigured only for ad‑hoc or dev runs; it bypasses the guardrail but does not repair or write your config.
Binding beyond loopback is blocked unless proper auth is configured; avoid exposing an unauthenticated Gateway to the public internet.
Common CLI options you will use: --port, --bind, --auth, --token, --password, --password-file, --tailscale, --allow-unconfigured, --dev, --reset (requires --dev), --force, --verbose, plus logging/raw-stream flags.
The --usage display normalizes provider quota windows as “X% left.” OpenClaw inverts some provider fields (e.g., MiniMax usagePercent) because upstream fields sometimes report remaining quota vs used quota—verify what “percent” means before acting.
These patterns form the day‑one runbook: initialize (openclaw setup), onboard if needed, then install/manage the Gateway via the gateway/daemon control surface. Later sections cover daemon installation, automated onboarding, secrets management, backups, and health diagnostics in detail.
Backup and Verify: creating restorable archives
A reliable backup is the first line of defense before any destructive operation—reset, uninstall, migration, or a risky upgrade. OpenClaw’s backup command produces a portable, timestamped tarball that records exactly what it captured and where each item came from. Use backups to verify you can restore state, to move an installation to a new host, or simply to archive credentials and config before making changes.
openclaw backup create builds a timestamped.tar.gz by default and includes a manifest.json at the tar root. The manifest records resolved absolute source paths (the canonical sources you backed up) and the archive layout so verify/restore tools can map entries back to their origins. If a source path already lives under OpenClaw’s state directory, the tool canonicalizes it: the manifest will point to the single canonical source and the archive will not duplicate the same files as separate top-level sources.
Common flags and their effects:
--output <dir>: write the archive to the given directory instead of the default location.
--verify: run verification immediately after creating the archive.
--dry-run --json: show what would be included without creating an archive; machine-readable JSON output.
--no-include-workspace: skip workspace discovery and copying (useful when workspaces are large or corrupted).
--only-config: archive only the active JSON config file; skips state, credentials directory, and workspace discovery.
Important failure modes and rules:
If the config file exists but is invalid and you allow workspace inclusion, openclaw backup create fails fast. To still obtain credentials/config/state without walking or compressing workspaces, pass --no-include-workspace.
openclaw backup verify requires the archive contain exactly one root manifest, rejects traversal-style paths in the manifest, and checks that every manifest-declared payload actually exists in the tarball. This prevents malformed or tampered archives from being treated as valid backups.
There is no built-in maximum archive size. Practical limits are your disk space, upload time, and the time required to walk and compress large workspaces. Plan retention and off-host copies accordingly.
Run examples (text; copy-paste friendly):
openclaw backup create
openclaw backup create --output ~/Backups
openclaw backup create --dry-run --json
openclaw backup create --verify
openclaw backup create --no-include-workspace
openclaw backup create --only-config
openclaw backup verify./2026-03-09T00-00-00.000Z-openclaw-backup.tar.gz
A minimal partial backup that skips workspaces:
openclaw backup create --no-include-workspaceOperational recommendations: run a backup before any destructive CLI action (reset, uninstall, migration). For systems with large or frequently changing workspaces, schedule regular backups but keep at least one recent off-host copy. Use --only-config for quick, low-risk captures of config when you suspect state corruption. Run openclaw backup verify immediately after creation (or after transfer) to ensure archive integrity before relying on it.
Service lifecycle: install, start, stop, restart, uninstall
Manage the Gateway as a system service using the CLI’s gateway service surface. The legacy openclaw daemon command is a compatibility alias that maps directly to the same service control verbs the gateway commands expose; you can use either form but the gateway.* commands are canonical.
For quick reference, these are the legacy daemon subcommands (informational text):
openclaw daemon status
openclaw daemon install
openclaw daemon start
openclaw daemon stop
openclaw daemon restart
openclaw daemon uninstall
A typical service lifecycle is: install the service, start it, validate health and status, then use stop/restart for maintenance. These shell invocations perform those steps with the canonical gateway commands:
openclaw gateway install
openclaw gateway start
openclaw gateway stop
openclaw gateway restart
openclaw gateway uninstall
Operational notes and safety checks
Privileges: installing or uninstalling the gateway service requires platform privileges (systemd/launchd/Service Manager). The installer will prompt for elevation where appropriate.
Auth-mode guard: if both gateway.auth.token and gateway.auth.password are configured but gateway.auth.mode is not set, the install is blocked. Explicitly set gateway.auth.mode before installing to avoid an ambiguous auth state.
Status probing: use openclaw gateway status; append --deep to perform a best-effort system-level scan that warns if multiple gateway-like services are present. The normal recommendation is one Gateway instance per machine.
Backup before destructive ops: create a restorable snapshot before removing runtime state or workspaces:
openclaw backup createUninstall behaviour and flags
The uninstall command supports fine-grained removal: --service removes only the service unit, --state removes runtime state, --workspace removes workspaces, and --app removes application files. The --all flag is shorthand to remove service + state + workspace + app together.
Preview first: run openclaw uninstall --dry-run to see planned actions without deleting anything.
Non-interactive CI or scripted runs: --non-interactive disables prompts and requires you to pass --yes to proceed; omit --yes to keep interactive confirmation.
Example uninstall scenarios (illustrative command forms):
openclaw uninstall
openclaw uninstall --service --yes --non-interactive
openclaw uninstall --state --workspace --yes --non-interactive
openclaw uninstall --all --yes
openclaw uninstall --dry-run
Follow the sequence: backup → dry-run (if unsure) → uninstall with explicit flags and --yes when running non-interactively. This pattern prevents accidental data loss and ensures a recovery path.
Running and probing the Gateway: foreground runs, probes, and RPC calls
A Gateway outage or misconfiguration is easiest to diagnose by running the server in the foreground and exercising its probe and RPC surfaces. Run foreground when you need immediate logs, to capture startup timing, or to diagnose why a service unit fails to come up.
The simplest foreground invocation is a direct CLI run; this prints startup logs to your terminal and keeps the process in the foreground so you can watch for errors and stack traces:
openclaw gatewayYou can also call the explicit run subcommand; behavior is the same but some tooling or scripts prefer the explicit form:
openclaw gateway runSafety and startup guards
By default the Gateway refuses to start unless gateway.mode is set to "local" in ~/.openclaw/openclaw.json. Use --allow-unconfigured only for ad‑hoc development runs; it bypasses the guard but does not write or repair the persistent config.
The Gateway will block binding to non‑loopback interfaces unless a secure auth mode is configured. Never remove auth and bind to 0.0.0.0 on a public host.
SIGUSR1 triggers an in‑process restart only when commands.restart is enabled in config. Set commands.restart: false to prevent manual restarts while still allowing apply/update operations.
SIGINT and SIGTERM stop the process. Note: wrappers that put the terminal into raw mode must restore terminal state on exit; the Gateway itself does not guarantee terminal restoration for external wrappers.
Startup tracing and benchmarking Set OPENCLAWGATEWAYSTARTUP_TRACE=1 in the environment to emit phase timing during startup. For a recorded benchmark you can run the project helper pnpm test:startup:gateway to capture trace timings.
Health, probe, and JSON output openclaw health returns the Gateway health snapshot. The Gateway may return a cached snapshot immediately and refresh the snapshot asynchronously. To force a live probe and expanded connection details use --verbose. Health accepts --json for machine‑readable output and --timeout (milliseconds) to control the connection timeout (default 10000).
Query the health over a WebSocket URL explicitly (explicit URL requires any necessary credentials; there is no credential fallback):
openclaw gateway health --url ws://127.0.0.1:18789Probes and remote probing Use gateway probe for the general probe command. --json yields machine‑readable output suitable for automation:
openclaw gateway probe
openclaw gateway probe --json
To probe a remote Gateway via SSH tunnel, point probe at the remote host (the CLI handles the tunnel):
openclaw gateway probe --ssh user@gateway-hostUse --verbose with probe to expand per-account/agent details and force live checks rather than cached snapshots.
Deep channel probes and status backfill The --deep flag performs live checks against external channel adapters (WhatsApp Web, Telegram, Discord, Slack, Signal). These are more expensive and slower but necessary when channels appear degraded.
openclaw status reports per‑channel and session diagnostics. When the live snapshot lacks counters, status can backfill token and cache counters from the most recent transcript usage logs; live values take precedence. If a configured channel SecretRef is unavailable in your current environment, status will report degraded output rather than crash and will include secretDiagnostics in JSON output when you request --all.
RPCs: calling Gateway methods For deeper inspection you can call Gateway RPCs directly. This is useful for tailing logs or invoking status RPCs with parameters:
openclaw gateway call status
openclaw gateway call logs.tail --params '{"sinceMs": 60000}'
Keep these patterns in your runbook: foreground runs to capture logs, health/probe for liveness checks (use --verbose for live detail), --deep for channel checks, and gateway call for targeted RPCs such as logs.tail or status. Always back up state before destructive ops and avoid exposing an unauthenticated Gateway on public interfaces.
Logs and Usage‑Cost reports
When you need to understand what the Gateway is doing right now, the logs command is the first tool: it can stream recent events, follow a live stream, and emit machine-readable lines for easy filtering. Use follow mode for active troubleshooting; --follow polls at a configurable interval (milliseconds) — for example --interval 2000 polls every 2s — and sensible defaults apply when you omit the flag.
By default openclaw logs prints styled, human-friendly output. Use --json to produce line-delimited JSON events (one JSON object per line), which is safe to pipe to jq for filtering. --plain preserves the human layout but disables styling; --no-color strips color codes. A common quick filter for recent streaming errors is:
openclaw logs --follow --json | jq -c 'select(.level=="error")'
When targeting a remote Gateway with --url the CLI will not fall back to configuration or environment credentials. Include explicit credentials (for example --token) when you supply --url or the call will fail. This rule applies to all Gateway query commands. Note: if you point the CLI at the local loopback Gateway without --url and the Gateway requests pairing, openclaw logs will automatically fall back to the configured local log file to avoid blocking; explicit --url bypasses that fallback.
Common gateway runtime options you will encounter when starting or troubleshooting the daemon include --port, --bind, --auth, --token, --password, --password-file, --tailscale, --allow-unconfigured, --dev, --reset (requires --dev), --force, --verbose and raw-stream/logging flags. These exist to enforce bind and auth guardrails (don’t run in unsafe bind/auth combinations).
Examples — tailing logs and requesting usage-cost summaries:
openclaw logs
openclaw logs --follow
openclaw logs --follow --interval 2000
openclaw logs --limit 500 --max-bytes 500000
openclaw logs --json
openclaw logs --plain
openclaw logs --no-color
openclaw logs --limit 500
openclaw logs --local-time
openclaw logs --follow --local-time
openclaw logs --url ws://127.0.0.1:18789 --token "$OPENCLAW_GATEWAY_TOKEN"
openclaw gateway usage-cost
openclaw gateway usage-cost --days 7
openclaw gateway usage-cost --jsonWarning: avoid embedding long-lived tokens directly on the shell line where your shell history can capture them; prefer environment variables or password files (--password-file) when scripting repeated remote access.
Onboarding & Setup: interactive and scripted flows
Onboarding is the moment you turn a fresh install into a working Gateway: it creates the runtime config, seeds provider credentials, selects a default model, and—when requested—registers a local Gateway token and installs the daemon. OpenClaw supports both interactive (wizard) and scripted (non‑interactive) flows. Use the interactive wizard when you’re hands‑on and need guidance; use non‑interactive mode for automation, CI, or reproducible bootstrap scripts.
Non‑interactive vs interactive
Interactive (default): run openclaw onboard (or openclaw setup --wizard) and answer prompts. Safe for day‑one manual setup.
Non‑interactive: add --non-interactive and pass explicit flags for each choice. The CLI will not prompt. This mode is suitable for scripts but demands correct environment variables and flags.
Basic invocations The following examples show typical interactive and remote onboarding calls (illustrative CLI invocations):
openclaw onboard
openclaw onboard --flow quickstart
openclaw onboard --flow manual
openclaw onboard --mode remote --remote-url wss://gateway-host:18789
How onboarding and setup relate
Running openclaw setup with no onboarding flags initializes ~/.openclaw/openclaw.json and the workspace directory but does not run the onboarding flow. It’s a safe initializer for config and agent workspace creation.
Any onboarding flags (--wizard, --non-interactive, --mode, --remote-url, --remote-token) cause the onboarding flow to run automatically.
Scripting provider registration Non‑interactive onboarding accepts provider flags. Many providers offer provider‑specific flags (e.g., --lmstudio-api-key, --mistral-api-key). For a generic custom provider you can pass base URL, model and API key explicitly:
openclaw onboard --non-interactive \
 --auth-choice custom-api-key \
 --custom-base-url "https://llm.example.com/v1" \
 --custom-model-id "foo-large" \
 --custom-api-key "$CUSTOM_API_KEY" \
 --secret-input-mode plaintext \
 --custom-compatibility openai
Provider examples
LM Studio (local or remote): pass --lmstudio-api-key and accept risk if necessary.
openclaw onboard --non-interactive \
 --auth-choice lmstudio \
 --custom-base-url "http://localhost:1234/v1" \
 --custom-model-id "qwen/qwen3.5-9b" \
 --lmstudio-api-key "$LM_API_TOKEN" \
 --accept-risk
Ollama:
openclaw onboard --non-interactive \
 --auth-choice ollama \
 --custom-base-url "http://ollama-host:11434" \
 --custom-model-id "qwen3.5:27b" \
 --accept-risk
Secret handling: plaintext vs ref Use --secret-input-mode plaintext to write provider keys directly into config (not recommended for production). Use --secret-input-mode ref to have onboarding emit environment-backed SecretRefs instead of plaintext. When you choose ref mode, the named environment variable(s) must exist in the onboarding process environment; onboarding will fail if the required env var is missing. Example that requests ref mode for OpenAI:
openclaw onboard --non-interactive \
 --auth-choice openai-api-key \
 --secret-input-mode ref \
 --accept-risk
Gateway token handling You can provide a gateway token directly or as an env ref. --gateway-token and --gateway-token-ref-env are mutually exclusive. If you use --gateway-token-ref-env the named environment variable must be non-empty in the process running onboarding.
export OPENCLAW_GATEWAY_TOKEN="your-token"
openclaw onboard --non-interactive \
 --mode local \
 --auth-choice skip \
 --gateway-auth token \
 --gateway-token-ref-env OPENCLAW_GATEWAY_TOKEN \
 --accept-risk
Local onboarding behaviors and safety notes
Local onboarding writes gateway.mode="local" into the config. If that field disappears later, treat it as config damage—not a valid fallback.
When running non‑interactive local onboarding, onboarding waits for the local Gateway to become reachable before it exits successfully. Use --skip-health to avoid this wait (for advanced use only).
For private-network plaintext WebSocket targets that use ws:// rather than wss://, set OPENCLAWALLOWINSECUREPRIVATEWS=1 in the onboarding environment to allow insecure private WS endpoints.
Remote onboarding requirements Remote onboarding requires both a remote Gateway WebSocket URL (--remote-url) and a remote token (--remote-token). These are mandatory in non‑interactive remote flows.
Workspace flag Use --workspace to set the agent workspace directory; onboarding stores this as agents.defaults.workspace in the configuration.
Quick setup and agent add If you only want to initialize config and then add agents manually:
openclaw setup
openclaw agents add <name>
Troubleshooting common failures
Missing env var for ref mode: onboarding will error. Fix by exporting the required variable and re-run.
Mutually exclusive gateway token flags: remove one of --gateway-token or --gateway-token-ref-env.
Health wait timeouts in non‑interactive local onboarding: either ensure the gateway can start or pass --skip-health to proceed (use carefully).
If onboarding writes gateway.mode and you later remove it, run openclaw doctor and inspect openclaw.json; do not rely on its absence as a mode selector.
Use the interactive flow for exploratory work. Use non‑interactive with explicit flags and exported env vars for automation; prefer --secret-input-mode ref for production to keep plaintext credentials out of config files.
Secrets & SecretRef lifecycle: audit, configure, apply, reload
Secrets must be treated as living configuration: discoverable, auditable, planned, and applied atomically so the Gateway never runs with a half‑baked credential set. The practical operator loop is: audit to detect issues, produce a plan with configure, validate the plan with apply --dry-run, apply the plan, re‑audit, and finally reload the Gateway to atomically swap the runtime secret snapshot.
A safe, canonical operator loop looks like this (runnable CLI sequence):
openclaw secrets audit --check
openclaw secrets configure
openclaw secrets apply --from /tmp/openclaw-secrets-plan.json --dry-run
openclaw secrets apply --from /tmp/openclaw-secrets-plan.json
openclaw secrets audit --check
openclaw secrets reload
What each step does and why it matters
openclaw secrets audit --check: scans your configuration and state for plaintext secrets, unresolved SecretRefs, precedence drift between auth-profiles.json and openclaw.json, residues from generated model credentials, and legacy secret artifacts. Use --check to integrate into CI or preflight scripts. Note: audit --check exits with code 1 if the audit found findings; unresolved refs cause exit code 2. These numeric exit codes are meaningful for automation.
openclaw secrets configure: an interactive wizard that maps missing credentials into SecretRefs, generates a JSON plan when asked, and can optionally set up provider auth flows. configure requires a TTY; it cannot combine --providers-only with --skip-provider-setup (those flags are mutually constraining). Configure targets secret-bearing fields in openclaw.json and auth-profiles.json and can be scoped to an agent with --agent <id>.
Use --plan-out /path to save a machine-editable plan rather than immediately applying changes.
For unattended validation you may use --json to receive structured output, but the mapping phase is interactive by design.
openclaw secrets apply --from <plan>: reads a saved plan and writes secrets into their target stores. Always run with --dry-run first to see what would change. If the plan contains exec-type SecretRefs (host exec approvals or local exec credentials) you must include --allow-exec to permit applying those entries; exec SecretRefs are sensitive and guarded by explicit operator consent.
openclaw secrets audit --check (again): re-run to ensure no leftover plaintext or unresolved refs remain after apply.
openclaw secrets reload: invokes the Gateway RPC secrets.reload to re-resolve SecretRefs and atomically swap the runtime snapshot used by the running Gateway. If reload fails, the Gateway retains the last-known-good snapshot and returns an error—reload is atomic from the Gateway perspective.
Audit and apply examples Run audits in different modes to inspect or include exec checks:
openclaw secrets audit
openclaw secrets audit --check
openclaw secrets audit --json
openclaw secrets audit --allow-exec
Use configure interactively or emit a plan:
openclaw secrets configure
openclaw secrets configure --plan-out /tmp/openclaw-secrets-plan.json
openclaw secrets configure --apply --yes
openclaw secrets configure --providers-only
openclaw secrets configure --skip-provider-setup
openclaw secrets configure --agent ops
openclaw secrets configure --json
Applying plans (dry-run first, pass --allow-exec when needed):
openclaw secrets apply --from /tmp/openclaw-secrets-plan.json
openclaw secrets apply --from /tmp/openclaw-secrets-plan.json --allow-exec
openclaw secrets apply --from /tmp/openclaw-secrets-plan.json --dry-run
openclaw secrets apply --from /tmp/openclaw-secrets-plan.json --dry-run --allow-exec
openclaw secrets apply --from /tmp/openclaw-secrets-plan.json --json
Reloading the Gateway After a successful apply, re-resolve and activate secrets with:
openclaw secrets reload
openclaw secrets reload --json
openclaw secrets reload --url ws://127.0.0.1:18789 --token <token>
Secrets.reload can be invoked remotely by pointing at a Gateway WebSocket URL and supplying the token. This performs an atomic snapshot swap; on error the Gateway continues running with the previous secrets snapshot—use logs and the JSON output to diagnose failures.
Operational cautions and checklist
Always backup openclaw.json and auth-profiles.json before large changes.
Run audit --check in CI to catch accidental plaintexts; treat exit codes 1 and 2 as actionable signals.
Use configure --plan-out to enable peer review of secrets plans.
Require explicit --allow-exec for any plan that touches exec SecretRefs; document and record operator consent for compliance.
Keep the configure step interactive unless you deliberately generate and apply plans in automation with appropriate approvals recorded.
Following this loop keeps credential churn auditable, re-loads atomic, and prevents the Gateway from ever running with a partially applied or malformed secrets set.
Doctor, Status & Health checks: repairs, deep scans, and diagnostics
Start by confirming whether the Gateway is responsive and providing a fresh health snapshot. A stale or missing health snapshot changes how much the doctor and status commands can repair or report.
The quick probe: openclaw health returns the Gateway’s current health snapshot. By default this may be a cached snapshot; a background refresh can be in progress. Use --verbose to force a live probe, --json for machine-readable output, and --timeout (milliseconds) to limit how long the CLI waits (default 10000 ms). Example invocations:
openclaw health
openclaw health --json
openclaw health --timeout 2500
openclaw health --verbose
openclaw health --debug
If health shows obvious connectivity or auth failures, move to doctor. The doctor command runs a series of checks across runtime state, configuration, and common migrations. It reports problems and can apply recommended remediations. The canonical invocations:
openclaw doctor
openclaw doctor --repair
openclaw doctor --deep
openclaw doctor --repair --non-interactive
openclaw doctor --generate-gateway-token
Behavioral notes and safe‑operation rules
openclaw doctor performs checks and can apply repairs when you pass --repair (alias --fix). In interactive mode doctor will prompt before making potentially destructive changes. --non-interactive suppresses prompts and limits changes to safe migrations only; do not expect full reparative action in headless environments unless you have confirmed the exact fixes beforehand.
When --fix runs, the CLI writes a backup of the configuration before mutating it: ~/.openclaw/openclaw.json.bak. Doctor may remove unknown or deprecated keys; it lists each removal so you can review the differences against the backup.
Doctor will auto-migrate legacy Talk configuration keys into the modern talk.provider structure where possible. Migrations are logged and, when run interactively, you get a chance to accept or reject the proposed change.
The doctor honors secret management: if a credential is stored as a SecretRef (gateway.auth.token or gateway.auth.password) and the SecretRef isn’t resolvable in the current environment, doctor emits a read-only warning and explicitly avoids writing a plaintext fallback. This prevents accidental leakage of secrets into local config files.
macOS launchctl gotcha
On macOS, launchctl environment variables take precedence over on-disk config and can create persistent “unauthorized” symptoms even after you fix gateway configuration. Inspect and clear them from the user launchctl environment before deeper repairs:
launchctl getenv OPENCLAW_GATEWAY_TOKEN
launchctl getenv OPENCLAW_GATEWAY_PASSWORD

launchctl unsetenv OPENCLAW_GATEWAY_TOKEN
launchctl unsetenv OPENCLAW_GATEWAY_PASSWORD
Status and deep diagnostics
openclaw status summarizes channels, sessions, node & service install status, update channel and git SHA when available. Use --deep to run live probes across configured accounts and agents; --usage summarizes normalized usage windows. --all expands diagnostics to include a Secrets overview row and secret-diagnostics summary; this will not stop the report but will flag problems for follow-up.
openclaw status
openclaw status --all
openclaw status --deep
openclaw status --usage
Troubleshooting ladder
openclaw health (--verbose) — confirm Gateway is reachable and whether snapshot is fresh.
openclaw doctor [--repair] — apply safe fixes; use --non-interactive only in automation where you accept limited migrations.
openclaw status --deep --all — enumerate per-channel and secret diagnostics.
Inspect logs (Gateway daemon logs, ~/.openclaw logs) for detailed traces.
When you run doctor --repair, always verify the backup (~/.openclaw/openclaw.json.bak) before trusting automated key removals or migrations. Treat SecretRef read-only warnings as an intentional safety guard rather than a failure mode to be “fixed” by writing plaintext credentials.
Security audit and remediation
OpenClaw's security audit is designed to find common misconfigurations that reduce the Gateway's safety posture, and to provide deterministic, safe remediations you can apply either interactively or in automation. Run the audit in two tiers: a shallow probe (no credentials, quick checks) and a deep probe (authenticated checks that exercise webhooks, sandbox connectors, and device policies). Use --json for CI-friendly output; combine --fix with --json to both apply safe remediations and receive a final machine-readable report.
A few high‑priority checks and operator actions to watch for:
Shared inbox risk: the audit flags configurations where multiple DM senders share the same main session. When you see the security.trustmodel.multiuser_heuristic finding, it means your config looks like a shared-user ingress. The default OpenClaw trust model assumes a personal assistant. Harden shared inboxes by setting session.dmScope="per-channel-peer" or the stricter per-account-channel-peer to isolate sessions by origin.
Webhook and sandbox misconfigurations commonly lead to high-severity findings. The audit warns about hooks.token reuse or short tokens, hooks.path="/" (catch-all), missing hooks.defaultSessionKey, unrestricted hooks.allowedAgentIds, and absent hooks.allowedSessionKeyPrefixes when overrides are enabled. Treat these findings as immediate remediation targets.
SecretRef handling is safe: the audit resolves supported SecretRefs read-only for targeted paths where possible. If a SecretRef is unavailable the audit continues and reports secretDiagnostics entries rather than failing—this keeps reports usable in air-gapped or permissioned CI.
Use these canonical commands locally and in CI:
openclaw security audit
openclaw security audit --deep
openclaw security audit --deep --password <password>
openclaw security audit --deep --token <token>
openclaw security audit --fix
openclaw security audit --json
For CI gating, fail the pipeline when critical findings are present. Example checks with jq:
openclaw security audit --json | jq '.summary'
openclaw security audit --deep --json | jq '.findings[] | select(.severity=="critical") |.checkId'
To run automated remediations but still inspect results, combine --fix and --json:
openclaw security audit --fix --json | jq '{fix:.fix.ok, summary:.report.summary}'Operational notes and cautions:
--fix only applies deterministic, safe changes (no destructive deletes). Still take backups before running fixes in production.
Supplying --token or --password enables deeper probes only for that invocation; credentials are not persisted by the audit command.
Use the JSON output keys (summary, findings[], fix) in your policy tooling to map checks to severity and required human review.
Reset, Uninstall, and destructive operations (safety first)
Destructive operations must be deliberate. Always create a restorable backup and use --dry-run to preview what will be removed. The reset command lets you erase progressively more local state; uninstall removes the Gateway service and can also remove local data and the workspace. Non-interactive modes suppress prompts and therefore have strict guardrails—use them only in scripted automation after you have validated a dry run.
openclaw reset supports three scopes that control the extent of removal:
config — removes configuration (settings) only.
config+creds+sessions — removes config plus stored credentials and session transcripts.
full — removes everything in the workspace and local runtime state.
If you omit --scope, openclaw reset will prompt interactively to choose what to remove. To run resets in automation, you must provide --scope and confirm with --yes; additionally, --non-interactive is only valid when both --scope and --yes are present (it disables prompts and requires explicit consent).
Create a backup before you reset or uninstall. The backup command captures a restorable snapshot of ~/.openclaw state.
The --all flag for uninstall is shorthand that removes service, state, workspace, and app together. Use --dry-run on uninstall to preview file and service removals without changing the system.
Illustrative command sequences (preview and safe order):
openclaw backup create
openclaw reset
openclaw reset --dry-run
openclaw reset --scope config --yes --non-interactive
openclaw reset --scope config+creds+sessions --yes --non-interactive
openclaw reset --scope full --yes --non-interactive
Uninstall examples and dry-run:
openclaw backup create
openclaw uninstall
openclaw uninstall --service --yes --non-interactive
openclaw uninstall --state --workspace --yes --non-interactive
openclaw uninstall --all --yes
openclaw uninstall --dry-run
Decommissioning checklist
Run openclaw backup create and verify the archive.
Run uninstall/ reset with --dry-run and inspect results.
When automating, pass --scope and --yes; include --non-interactive only when those are present.
After uninstall, check for leftover files under ~/.openclaw, the system service (systemd/launchd), and any firewall or reverse-proxy entries. Remove stale systemd units or LaunchAgents if present.
Retain backups off-host if you may need to restore sessions, tokens, or provider auth later.
Warnings
Back up before removing state or workspace. This is the only safe way to recover transcripts, auth-profiles, and workspace files.
--non-interactive disables prompts; misuse can cause irreversible data loss.
Updating OpenClaw: channels, dry‑run, and dev workflow considerations
OpenClaw’s updater is channel‑aware: choosing a channel determines how the updater fetches and installs code. Stable and beta use published distributions (npm dist-tags), while dev performs a git checkout and build. That mapping is intentional: stable/beta give you packaged releases; dev gives you a working tree for iterative development—so the updater enforces different preconditions and steps depending on channel.
Dev channel specifics
The dev flow requires a clean git worktree. The updater may run linters and a TypeScript build as part of preflight. If the current tip fails to build, the updater will walk backwards (up to 10 commits) searching for a commit that produces a clean build artifact and use that. This makes dev updates tolerant of recent broken commits, but it also means you must not have uncommitted changes: stash or commit before switching.
Dry‑run and automation --dry-run previews the exact plan without changing configuration, installing packages, syncing plugins, building the UI, or restarting services. Use --json for machine‑readable output in automation. The updater also supports --no-restart to let you apply files and then restart manually after validation.
What the updater actually runs Channel-specific steps include fetching/updating checkouts (git for dev, npm for released channels), installing dependencies, building the Control UI, running openclaw doctor as a safe-update preflight, and syncing plugins to the active channel.
Downgrade safety Downgrades are potentially destructive: older versions may assume different config shapes. The updater requires explicit confirmation for downgrades—do a backup before proceeding.
Safe update checklist
Run openclaw update --dry-run --json and inspect the plan.
Verify backups exist.
Apply update with --no-restart if you want manual verification, or use --yes for non-interactive CI.
Run openclaw doctor after restart.
Canonical CLI examples (illustrative CLI invocations)
openclaw update
openclaw update status
openclaw update wizard
openclaw update --channel beta
openclaw update --channel dev
openclaw update --tag beta
openclaw update --tag main
openclaw update --dry-run
openclaw update --no-restart
openclaw update --yes
openclaw update --json
openclaw --update
Querying update availability and channel state
openclaw update status
openclaw update status --json
openclaw update status --timeout 10
Control Interfaces: Dashboard and Terminal UI
What the interfaces do
Both the browser dashboard (Control UI) and the Terminal UI (TUI) are simply control surfaces for the same Gateway: they open a WebSocket-backed connection to the running Gateway and authenticate using whatever gateway auth the system is configured to use. Use the dashboard when you want a full graphical experience — visual agent lists, plugin/skill inspectors, token management and logs — and use the TUI when you are on an SSH-only host, working in a narrow terminal session, or need a lightweight, fast control surface.
Opening the UIs
Running openclaw dashboard opens the Control UI in your browser and connects it to the Gateway using the current resolved authentication.
Running openclaw tui opens the Terminal UI and establishes the same authenticated WebSocket connection to the Gateway.
Shared authentication model Both commands resolve gateway authentication via SecretRefs in configuration. SecretRefs are not raw tokens stored directly in config; they describe how to obtain credentials at runtime. The CLI attempts SecretRef resolution using the configured providers in this order (when available): environment variables, local files, and exec (a command whose stdout yields the secret). If the CLI successfully resolves a SecretRef it supplies the token or password to the UI connection. If resolution fails, the UI will not be able to open an authenticated session and the CLI will surface a clear error and suggested remediation steps.
Why this matters Because SecretRefs can produce credentials from environment or from commands, the CLI avoids embedding tokens into the dashboard URL. The Control UI intentionally uses non-tokenized URLs: your browser is given a short-lived session handshake rather than a permanent token in the URL bar. This reduces the risk of accidental token leakage via browser history, logs, or referrers. Treat any fallback or manual --token usage as sensitive: avoid pasting tokens into shared shells or scripts.
Practical notes and common situations
Workspace session inference: When you run openclaw tui inside an agent workspace directory, the TUI will attempt to infer the relevant agent/session and preselect it. This speeds common workflows (inspect active session, tail transcripts) without extra flags.
SSH-only hosts: Prefer the TUI. It requires only an authenticated WebSocket and has smaller bandwidth/latency needs than a full browser session.
Local admin or desktop: Prefer the dashboard for visual tools (logs, plugin inspectors, token builders).
Remediation when tokens are unresolved
Check openclaw config get gateway.auth and inspect SecretRef entries.
Verify environment provider: expected env var present in your shell session.
Verify file provider: readable path and correct permissions.
Verify exec provider: executable in PATH, returns the secret to stdout and exits with 0.
Use openclaw config set or openclaw onboard to repair and re-run openclaw dashboard / openclaw tui.
Keep the credential surface minimal and prefer SecretRef providers that fit your operational risk model (env for ephemeral sessions, file or exec for automated CI/hosted scenarios).
Control UI (dashboard): invoking and protecting tokens
Open the Control UI with your current gateway authentication; the CLI will attempt to resolve any SecretRef used for gateway.auth.token and then present a safe, non-tokenized URL (and normally open it in your browser). This behavior prevents accidental leakage of sensitive token values into command-line parameters or browser launch arguments.
The simplest invocations are:
openclaw dashboard
openclaw dashboard --no-open
The dashboard command workflow, in practical terms:
It checks your active configuration for gateway.auth.token. If that value is a SecretRef (an indirect reference to a secret), the CLI tries to resolve it using the available providers (environment variables, files, or configured exec providers).
Whether the token resolves or not, the CLI prints and copies a non-tokenized URL that points to the Control UI. The URL does not contain the secret embedded in query parameters or fragments.
By default the CLI attempts to launch your system browser to that URL. Use --no-open to suppress browser launching; the command still prints the safe URL so you can open it manually or forward it to a local browser over an SSH tunnel.
Why the CLI prints a non-tokenized URL
Embedding resolved tokens directly into a launched browser URL or into console output risks leakage into shell histories, process lists, or remote logs. OpenClaw intentionally avoids that by separating authentication (the gateway token) from the URL used to land in the UI.
If the token was resolved successfully and the CLI can perform an authenticated short-lived handshake with the Gateway, it will complete any necessary session setup without embedding secrets in the URL. If resolution failed or is unavailable, you still receive a usable non-tokenized URL and a clear remediation path.
When SecretRef resolution fails — quick remediation
Confirm the SecretRef provider is available in your current environment. For example, ensure the environment variable is exported, the referenced file exists and is readable, or the exec-based resolver is callable from this shell.
Run openclaw configure to set an explicit gateway.auth.token value (only in secure, local contexts), or populate the SecretRef source (env/file/exec) used by your config.
On remote hosts or CI, prefer file or env SecretRef providers over interactive exec providers to avoid blocking resolution.
Headless and remote usage
For SSH sessions, containers, or VPS instances without a GUI, prefer openclaw dashboard --no-open. The command will print the safe URL; use ssh -L to forward the gateway port or forward 127.0.0.1:18789 to your desktop, then open the printed URL locally.
Do not copy the printed non-tokenized URL into untrusted chat tools or logs. The CLI avoids placing tokens in the URL, but sharing the UI link may still expose access opportunities if the gateway is publicly reachable without additional network controls.
Warning: Avoid pasting or script-inserting resolved tokens
The CLI’s non-tokenized URL is a safety feature. Do not bypass it by constructing browser URLs that include tokens or by placing tokens in command-line arguments. Storing tokens in plaintext config should be a deliberate, audited choice.
Terminal UI (TUI): connection options and workspace auto-selection
The terminal UI is a compact, terminal-first control surface that connects a local terminal to a running Gateway over its WebSocket API. Use it when you need a small-footprint interface (SSH-only hosts, low-bandwidth shells, or when you prefer keyboard-driven workflows). The TUI negotiates authentication the same way other control surfaces do: it will attempt to resolve configured SecretRefs for gateway auth, but you can also override everything on the command line.
TUI authentication and SecretRef resolution
By default the TUI asks the Gateway for the connection parameters the same way the dashboard does: it resolves gateway auth SecretRefs using the configured providers. That resolution follows the usual precedence (environment, workspace.env/config blocks, file providers, exec providers) so tokens or password secrets injected via env/file/exec will be discovered automatically.
You can bypass SecretRef resolution and supply an explicit token with --token. Supplying --token is useful for temporary sessions, CI scripts, or when the client cannot access the configured SecretRef providers.
Workspace auto-selection and session defaults When you run the TUI from inside a directory that is a configured agent workspace, the TUI will auto-select that agent as the default session key. Practically this means:
If you omit --session and you are inside an agent workspace, the TUI uses that agent's default session (for example session key "main" or whatever the workspace defines).
If you explicitly provide --session, that flag always takes precedence and overrides the workspace-inferred default.
If you are not inside a configured agent workspace and you do not provide --session, the TUI will not infer an agent; you must provide --session to interact with a specific session.
Explicit connection flags and common use cases Use explicit flags when the Gateway is remote, when you want to avoid SecretRef resolution, or when scripting the TUI:
--url expects a Gateway WebSocket URL (ws:// or wss://). Example: ws://127.0.0.1:18789.
--token supplies an explicit token and bypasses SecretRef discovery for auth.
--session sets the session key the TUI should use (for example "main" or "bugfix"); it overrides workspace auto-selection.
Canonical example invocations (runnable CLI examples) The block below shows common ways to launch the TUI. These are literal CLI examples you can copy and run.
openclaw tui
openclaw tui --url ws://127.0.0.1:18789 --token <token>
openclaw tui --session main --deliver
## when run inside an agent workspace, infers that agent automatically
openclaw tui --session bugfix
Operational notes and troubleshooting
Unreachable URL: verify the URL scheme (ws:// vs wss://), firewall/SSH tunnel (ssh -L), and that the Gateway is listening on the host/port. For loopback-only Gateways, use an SSH LocalForward to expose 127.0.0.1:18789 locally.
Invalid token: the TUI will fail the handshake. Confirm the token source (SecretRef, env var, or explicit --token) and run openclaw gateway status or consult the Gateway logs to validate tokens.
Workspace not inferred: ensure the current directory is a workspace (contains workspace bootstrap files and a configured agent). If not, provide --session.
Restricted environments: if SecretRef providers (exec/file) are unavailable in the shell, prefer --token or run the TUI from an environment that can resolve secrets.
Warning: avoid pasting long-lived tokens into shared shells or terminal logs. When possible use short-lived tokens, SSH tunnels, or environment-based SecretRef providers instead of embedding secrets directly on the command line.
Quick reference: common CLI options
Control surfaces authenticate to the Gateway the same way: by resolving a token or password from the environment, a SecretRef, or an explicit CLI flag. The common flags below let you control which endpoint and credentials the Dashboard (browser UI) or the TUI (terminal UI) use, and whether the browser opens automatically. Keep tokens private: passing them on a shared shell command or in scripts can expose credentials in process lists or shell history.
The following examples show the canonical invocations. They are runnable shell commands.
Text examples (Dashboard — prevents automatic browser open)
openclaw dashboard
openclaw dashboard --no-open
Text examples (TUI — explicit endpoint, token, and session usage)
openclaw tui
openclaw tui --url ws://127.0.0.1:18789 --token <token>
openclaw tui --session main --deliver
## when run inside an agent workspace, infers that agent automatically
openclaw tui --session bugfix
Quick-reference flags and behaviors
--no-open (dashboard)
Effect: Prevents the dashboard command from opening the default web browser.
Use case: Remote shells, CI scripts, or when you prefer to copy the provided URL/token into another machine.
Applicable: Dashboard only.
--url (dashboard / TUI)
Effect: Explicit WebSocket/HTTP endpoint to connect to (example: ws://127.0.0.1:18789).
Use case: Connect a local control surface to a remote Gateway via an SSH tunnel or when multiple Gateways run on different ports.
Applicable: Both Dashboard (affects which Gateway control UI opens) and TUI.
--token (dashboard / TUI)
Effect: Provide a Gateway token on the command line instead of relying on default resolution (env, SecretRef, or stored session).
Security note: Passing tokens on the CLI can leak to shell history and process lists. Prefer environment variables, SecretRef, or interactive entry where possible.
Applicable: Both Dashboard and TUI.
--session (TUI)
Effect: Target a named agent session when launching the TUI (e.g., --session main).
Behavior: If you run openclaw tui inside an agent workspace, the TUI will try to infer the agent automatically and select that workspace’s session unless you override with --session.
Applicable: TUI only.
--deliver (TUI)
Effect: When present, instructs the TUI to deliver the run/output to the selected session immediately (useful for invoking runs or sending prepared messages).
Use case: CLI-driven flows or automation that should push output into session history.
Applicable: TUI only.
Practical notes and pitfalls
If you need a persistent, scriptable invocation without browser popups, combine openclaw dashboard --no-open with --url and --token to open a dashboard hosted on a remote machine and copy the returned URL into a secure browser session.
For remote Gateway access, prefer an SSH LocalForward or Tailscale Serve to avoid exposing Gateway to public networks. Then use --url ws://127.0.0.1:18789 (or appropriate forwarded port).
Workspace inference is convenient but can surprise automation. Explicitly pass --session when your script must target a named session rather than the current workspace.
When troubleshooting auth failures: verify token resolution precedence (CLI flags override env and SecretRef), ensure the Gateway is reachable at the URL you provided, and avoid passing tokens in shared logs.
Keep this reference handy when launching either control surface: the flags are small but change behavior across interfaces, and the security trade-offs (CLI token vs SecretRef/env) matter in production.
Troubleshooting and safety checklist
The immediate operational danger when using the Control UI (dashboard) or TUI is accidental exposure of gateway credentials. The CLI deliberately avoids that by default: when a SecretRef manages the gateway token, the dashboard command prints/copies/opens a non-tokenized URL and only passes a resolved token to the browser or client when the local environment has access to the secret. Treat SecretRef resolution like the CLI checking a keyring before handing credentials to a client — if the key is not present, the CLI will not bake it into a URL.
Why that matters
Tokenized URLs in logs or chat are a high-risk leak. Do not paste them.
Headless or remote hosts often lack the SecretRef provider (env/file/exec) that your desktop has; the CLI will therefore show a non-tokenized URL and require explicit authentication.
Quick checklist to triage failures and stay safe
Verify the CLI and Gateway:
Confirm the CLI is available: openclaw --version
Check gateway health and reachable status: openclaw gateway status (or gateway health/probe)
Confirm SecretRef resolution sources:
Determine whether gateway.auth.token is provided via environment, file, or exec helper. If your secret provider is tied to your workstation (e.g., an agent that sets an env var or an exec hook), it won’t resolve on a headless server.
If the dashboard prints a non-tokenized URL, do not paste it. Prefer copy/paste into a trusted browser or open it with the local CLI on a machine that holds the secret.
One-off or emergency access:
Use openclaw dashboard --url <base> --token <TOKEN> to provide explicit auth from a trusted local environment (avoid embedding tokens in shared logs).
For TUI, pass --token similarly or use --session to attach to a session when running inside a workspace.
Headless hosts:
Use --no-open to prevent the CLI from attempting to open a browser on the server; instead copy the non-tokenized URL or provide an explicit --token from a secure channel.
TUI-specific notes The TUI resolves gateway auth SecretRefs the same way the dashboard does: it will consult environment variables, file-backed secrets, and exec-provider helpers when available. When you run the TUI from inside an agent workspace, it will infer and auto-select the workspace’s session context (session inference). That makes workflows faster, but it also means session-level permissions and secrets from that workspace will be used — ensure you trust the workspace before launching the TUI.
When to prefer explicit --token vs. SecretRef
Use SecretRef-based resolution for daily use on the machine that owns the secrets. It’s safer and avoids exposing tokens.
Use --token only for short-lived, supervised operations (one-off debugging, headless sessions). Never embed tokenized URLs into public channels.
Analogy to remember Think of SecretRef resolution as the CLI peeking into a locked keyring and only handing a single-use key to the browser if the keyring is present. If it can’t open the keyring, it will hand you a sealed link (non-tokenized URL) instead — you must either open it from a machine with the keyring or supply the key explicitly.
Quick recovery steps if dashboard/TUI won’t authenticate
Run openclaw gateway status to ensure the Gateway is running.
Confirm the SecretRef provider is available on this host (env/file/exec).
Try explicit auth: openclaw dashboard --token <token> --no-open (or open locally with the token).
If in a workspace, cd into the workspace and relaunch TUI to let session inference pick up the right context.
If you suspect leakage, rotate the token via your auth provider and avoid sharing the old token.
Plugins and Skills: Safe CLI Workflows for OpenClaw
What Plugins and Skills Are (Quick Orientation)
Plugins are Gateway extensions that add runtime capabilities: new channels, provider adapters, tools, hooks, or UI integrations. They run inside the Gateway process and can change what the system can do (for example, add a Discord channel, register a new image-generation provider, or provide a tool that agents can call). Plugins arrive from several sources: bundled with the OpenClaw distribution, published on ClawHub or npm, delivered as archive bundles from a marketplace, or installed from a local path during development. Bundled plugins ship with openclaw; some of those are enabled by default. Non-bundled plugins must be enabled explicitly with openclaw plugins enable after installation.
Skills are workspace-side persona programs and guidance files that shape an agent’s behavior. A skill is typically a folder of markdown, OpenProse programs, and small metadata that the Gateway injects into an agent’s system prompt when the agent runs in that workspace. Skills are not Gateway binaries or runtime hooks — they are content and live in the active workspace’s skills/ directory. The openclaw skills search, install, and update commands talk to ClawHub and place installed skills into that skills/ folder for the currently selected workspace.
Key differences to remember:
Risk and scope: plugins execute code inside the Gateway and may require review or special security flags; skills are content that influence prompts and run within an agent’s context. Treat plugin installs as higher risk.
Storage: bundled plugins live with the installation; user-installed plugins are managed in the Gateway plugin store and enabled/disabled via the CLI. Skills install under the active workspace: <workspace-root>/skills/.
Sources: plugins can come from ClawHub, npm, marketplace archives, or local paths; skills use ClawHub as the canonical search/install source.
A practical checklist before installing:
Prefer pinned versions or exact bundle artifacts rather than floating tags.
Run openclaw plugins inspect (or openclaw skills inspect) to review manifest details before enabling.
Enable non-bundled plugins explicitly (openclaw plugins enable) and restart or reload the Gateway as instructed.
Treat workspace skill installs as part of workspace configuration — include them in workspace bootstrap (BOOTSTRAP.md) and version control the skills/ directory if you want reproducible agent behavior.
Later chapters cover plugin manifest requirements, validation rules, and marketplace semantics; treat this orientation as the mental model for safe, repeatable CLI workflows.
Plugin CLI Workflows — Install, Inspect, Enable, Update, Uninstall
Plugins are installed and managed with the openclaw plugins subcommands. Treat the plugin CLI as the single control surface for gateway plugins, hook packs, and compatible bundles: install from a variety of sources, inspect metadata, enable/disable for runtime use, update safely, and remove while optionally keeping files for forensic recovery.
A compact command reference (listing and common operations). Use these forms when following the examples below:
openclaw plugins list
openclaw plugins list --enabled
openclaw plugins list --verbose
openclaw plugins list --json
openclaw plugins install <path-or-spec>
openclaw plugins inspect <id>
openclaw plugins inspect <id> --json
openclaw plugins inspect --all
openclaw plugins info <id>
openclaw plugins enable <id>
openclaw plugins disable <id>
openclaw plugins uninstall <id>
openclaw plugins doctor
openclaw plugins update <id>
openclaw plugins update --all
openclaw plugins marketplace list <marketplace>
openclaw plugins marketplace list <marketplace> --json
Typical install → verify → enable sequence (numbered steps)
Install: run openclaw plugins install <spec>. Specs may be a ClawHub id, an npm package id, an archive path, or a local path.
Important: npm package specs are registry-only. Git, URL, or file-style npm specs and semver ranges are rejected. Install runs npm with --ignore-scripts to prevent arbitrary lifecycle scripts from running on your host.
If the bare npm package resolves to a prerelease, the installer aborts. You must explicitly opt into a prerelease by using an explicit prerelease tag (for example @beta or @rc) or an exact prerelease version.
Inspect: run openclaw plugins inspect <id> (or add --json for machine output) to check manifest, pluginApi/minGatewayVersion, and declared capabilities.
openclaw plugins inspect <id>
openclaw plugins inspect <id> --json
Enable: enable the plugin with openclaw plugins enable <id>.
Restart gateway if the plugin provides runtime hooks or additional HTTP/WS endpoints. Verify behavior in Control UI or with openclaw plugins list --enabled.
Overwrite, updates, and dry-run
Use --force when you want to overwrite an existing install in-place. --force reuses the same install target rather than creating a duplicate. This is deliberate when you need to replace files without changing the plugin id.
Preview updates with --dry-run before applying them. Update a single plugin or all installed plugins:
openclaw plugins update <id-or-npm-spec>
openclaw plugins update --all
openclaw plugins update <id-or-npm-spec> --dry-run
openclaw plugins update @openclaw/voice-call@beta
openclaw plugins update openclaw-codex-app-server --dangerously-force-unsafe-install
The --dangerously-force-unsafe-install flag bypasses some safety checks; avoid it unless you understand the risk.
Uninstall and diagnostics
Remove a plugin with optional dry-run or keep-files to retain on-disk artifacts for investigation:
openclaw plugins uninstall <id>
openclaw plugins uninstall <id> --dry-run
openclaw plugins uninstall <id> --keep-files
If installs or runtime validation fail, run openclaw plugins doctor to gather health information and suggest fixes. Use openclaw plugins doctor --fix when you accept automated repairs:
openclaw plugins doctorWarnings and operational notes
The installer intentionally prevents execution of package lifecycle scripts. This reduces supply-chain risk but also means some packages that rely on install scripts will need explicit, audited installation paths.
Bundled plugins that ship with your OpenClaw install take precedence over remote resolution when a bare id matches both; confirm which source will be installed by inspecting the candidate before enabling.
If an install aborts due to validation (manifest mismatch, minGatewayVersion, or prerelease), do not bypass checks without deliberate review. For recovery, inspect plugin files and run the doctor to restore consistent state.
Where Plugins Come From — Bundles, ClawHub, npm, and Marketplaces
OpenClaw can install plugins from several distinct sources—bundled, ClawHub, npm, marketplaces, or a local directory—and it resolves an ambiguous package name in a predictable order. Treat the available sources like app stores: a curated marketplace (ClawHub) first, then a general package registry (npm), with explicit flags to override that behavior.
When you run plugins list the CLI marks each entry's origin. A bundled, built-in plugin is shown as "Format: openclaw"; an installed bundle is "Format: bundle". Use the verbose listing to see bundle subtype (codex, claude, cursor) and the detected capabilities the bundle declares.
Install forms and examples
Bare name: OpenClaw treats a bare name as ClawHub-first, then npm fallback. To force ClawHub-only, prefix with clawhub:.
Marketplace installs preserve marketplace metadata (not an npm spec); use plugin@marketplace or --marketplace to select.
Local path installs use -l or pass a path directly.
Illustrative CLI examples (usage forms):
openclaw plugins install <package> # ClawHub first, then npm
openclaw plugins install clawhub:<package> # ClawHub only
openclaw plugins install <package> --force # overwrite existing install
openclaw plugins install <package> --pin # pin version
openclaw plugins install <package> --dangerously-force-unsafe-install
openclaw plugins install <path> # local path
openclaw plugins install <plugin>@<marketplace> # marketplace
openclaw plugins install <plugin> --marketplace <name> # marketplace (explicit)
openclaw plugins install <plugin> --marketplace https://github.com/<owner>/<repo>
ClawHub explicit installs and versions:
openclaw plugins install clawhub:openclaw-codex-app-server
openclaw plugins install clawhub:openclaw-codex-app-server@1.2.3
Bare install example:
openclaw plugins install openclaw-codex-app-serverMarketplace listing and shorthand:
openclaw plugins marketplace list <marketplace-name>
openclaw plugins install <plugin-name>@<marketplace-name>
Marketplace source variants:
openclaw plugins install <plugin-name> --marketplace <marketplace-name>
openclaw plugins install <plugin-name> --marketplace <owner/repo>
openclaw plugins install <plugin-name> --marketplace https://github.com/<owner>/<repo>
openclaw plugins install <plugin-name> --marketplace./my-marketplace
Local path shorthand:
openclaw plugins install -l./my-pluginFlags and constraints to remember
--pin applies only to npm installs. It is not supported with --marketplace.
--marketplace causes OpenClaw to consume marketplace metadata; installs may not map to an npm package spec.
--dangerously-force-unsafe-install is a last-resort override for scanner false positives. It does not bypass plugin before_install hook policy blocks or failures from required scans; it only permits continuation where the scanner flagged something unsafe but no policy hook blocked the flow.
Pitfalls
A bare name can pull a prerelease from ClawHub or npm; if you need a stable version, specify @<version> or use --pin (npm only).
Use explicit sources when provenance matters: clawhub: for curated packages, --marketplace for marketplace provenance, or -l for local development.
Plugin Format and Validation Rules
Native OpenClaw plugins are trusted code: the installer validates them up-front and will refuse to install packages that lack the required manifest or that fail schema validation. The single, non-negotiable manifest requirement is this: a native plugin MUST include an openclaw.plugin.json file containing an inline JSON Schema under the key configSchema — the schema may be the empty object if the plugin has no configurable fields, but it must be present. This inline schema is how the Gateway validates runtime configuration and exposes typed config in the Control UI.
Failing to provide a valid openclaw.plugin.json (missing file, malformed JSON, or an invalid configSchema) typically aborts installation. Treat such errors as intentional safety checks: validation prevents a plugin from being installed with unknown or unchecked configuration semantics. If an install aborts for manifest/schema problems, inspect the plugin package and run the doctor checks below to get actionable diagnostics and auto-fixes.
Before installing a plugin, verify these items in the plugin directory or archive:
openclaw.plugin.json exists at the package root and parses as JSON.
openclaw.plugin.json contains a top-level configSchema key whose value is a JSON Schema object ({} is acceptable).
package.json and the plugin entry points match the bundle type advertised (native vs bundle).
The package version is pinned (avoid using floating tags in production).
openclaw provides small CLI helpers to examine metadata and to run diagnostics. Use inspect to view metadata or machine-readable JSON:
openclaw plugins inspect <id>
openclaw plugins inspect <id> --json
If install validation fails, run the plugins doctor to surface problems and suggested fixes; the doctor command will report manifest errors and configuration mismatches:
openclaw plugins doctorSecurity notes and --force semantics:
Treat plugin installs like running code on the Gateway host. Prefer pinned versions, signed bundles, or vetted sources (ClawHub / internal registries).
openclaw plugins install may accept a --force flag in some flows; force will overwrite existing plugin content but does not bypass config-schema validation in normal operation. If a manifest is structurally invalid the install will still be blocked. When in doubt, run openclaw doctor and openclaw doctor --fix to repair common issues before forcing an overwrite.
If validation problems persist after fixes, extract the plugin, correct openclaw.plugin.json, and retry installation from the corrected local path or a republished archive.
Security and Safety Guidance for Installing Plugins
Installing a plugin is equivalent to running third-party code inside your Gateway. Treat every plugin install, update, or enable operation as an operational change that can affect runtime behavior, data flows, and host security. Prefer pinned, audited versions and use the CLI flags that enforce explicit intent.
Start with an inspection-first workflow
Inspect the plugin before enabling it. Use openclaw plugins inspect and review the plugin manifest for required capabilities (providers, tools, channel hooks) and any before_install hooks.
Run openclaw doctor and resolve validation failures before proceeding; config-validation errors typically abort installs but when they do appear, fix them with openclaw doctor --fix.
Pin versions and avoid implicit ranges
Use --pin to freeze the installed version so automated update flows don’t move you to a new, unreviewed release.
If you supply an npm spec that resolves to a prerelease, OpenClaw stops and requires you to opt-in explicitly. Install a prerelease only via an explicit prerelease tag (for example @beta or @rc) or an exact prerelease version.
Registry-only npm specs, safe dependency install
OpenClaw accepts npm specs only when they are registry (npm) entries. Git, URL, and file specs are rejected. Semver ranges that could resolve to unexpected newer releases are also rejected by default.
Any dependency installation is run with npm’s --ignore-scripts to avoid running upstream install scripts during plugin installation.
Dangerous-flag semantics and limits --dangerously-force-unsafe-install allows some installs to continue after scanner false positives, but it does not bypass policy blocks from before_install hooks or all scan failure classes. It is an opt-in that raises risk; do not use it as a routine shortcut. When you must use it, follow these steps:
Review the plugin code and manifest locally.
Install into a sandboxed Gateway (or dev workspace).
Pin the version and run a full verification (openclaw doctor --fix, run smoke tests).
If host-exec tools are involved, require approvals via openclaw approvals set.
Quick checklist before enabling a new plugin
openclaw plugins inspect <id>
Review manifest, required scopes, and tool types
Run openclaw doctor --fix
Install with --pin where appropriate
If you see scanner warnings, audit code; only use --dangerously-force-unsafe-install after sandboxed testing and team approval
Examples: install and update commands (illustrative command text)
openclaw plugins install <package> # ClawHub first, then npm
openclaw plugins install clawhub:<package> # ClawHub only
openclaw plugins install <package> --force # overwrite existing install
openclaw plugins install <package> --pin # pin version
openclaw plugins install <package> --dangerously-force-unsafe-install
openclaw plugins install <path> # local path
openclaw plugins install <plugin>@<marketplace> # marketplace
openclaw plugins install <plugin> --marketplace <name> # marketplace (explicit)
openclaw plugins install <plugin> --marketplace https://github.com/<owner>/<repo>
Update examples and preview
openclaw plugins update <id-or-npm-spec>
openclaw plugins update --all
openclaw plugins update <id-or-npm-spec> --dry-run
openclaw plugins update @openclaw/voice-call@beta
openclaw plugins update openclaw-codex-app-server --dangerously-force-unsafe-install
When in doubt, sandbox and require explicit approval. These controls—pinning, prerelease opt-in, registry-only specs, --ignore-scripts, and cautious use of --dangerously-force-unsafe-install—are your primary levers to reduce supply-chain and runtime risk.
Skills — Searching, Installing into Workspace, and Updates
Search for a skill on ClawHub, download it into your active workspace, and then inspect or update it — that is the common CLI flow for skills development. The CLI operates directly against ClawHub and writes the skill into the active workspace's skills/ directory, making it immediately available to workspace-scoped agents and tools.
Start by searching, inspect candidates in JSON for scripting, then install the chosen slug into your workspace. The following canonical commands show the typical sequence and the most useful flags (human and machine modes):
openclaw skills search "calendar"
openclaw skills search --limit 20 --json
openclaw skills install <slug>
openclaw skills install <slug> --version <version>
openclaw skills install <slug> --force
openclaw skills update <slug>
openclaw skills update --all
openclaw skills list
openclaw skills list --eligible
openclaw skills list --json
openclaw skills list --verbose
openclaw skills info <name>
openclaw skills info <name> --json
openclaw skills check
openclaw skills check --json
How the CLI flow maps to files and actions:
openclaw skills search queries ClawHub and returns matching skill metadata. Use --json for machine-readable output.
openclaw skills install downloads the bundle and creates a folder under the active workspace's skills/ directory (workspace must be selected or inferred). This is a local workspace install, not a gateway-side operation.
openclaw skills list/info/check operate on skills visible to the current workspace and render results to stdout. When you pass --json, the tool writes a JSON payload to stdout suitable for scripts or automation.
Worked example (human steps)
Confirm a candidate and its compatibility:
openclaw skills search "meeting" --limit 5
openclaw skills info author/meeting-skill --json # inspect version, deps
Install into your workspace:
openclaw skills install author/meeting-skill
Verify local install and metadata:
openclaw skills list --verbose
Note on overwrites and updates
--force: If a skills/ subfolder with the same slug already exists in the workspace, install --force will overwrite that folder. Use this to replace a local development copy, but back up any local changes first.
update --all: The command updates only tracked ClawHub installs in the active workspace. It will not attempt to update skills that were added manually or are unmanaged by ClawHub tracking.
Gateway-backed installs vs CLI installs The CLI route downloads and places files directly in your workspace. By contrast, gateway-backed skill installs use a different request path (skills.install) handled by the Gateway; those installs are appropriate when you want the Gateway to fetch, validate, and manage the skill centrally (useful for remote deployments or when workspace state is managed by a remote admin). Prefer CLI installs for local development and quick iteration; prefer gateway installs when you need centralized deployment, access control, or when the Gateway must enforce policy.
Eligibility listing
list --eligible shows skills that your workspace could accept (useful when authoring or sharing workspaces to ensure consumers can install without missing prerequisites).
Troubleshooting tips
If search returns unexpected results, retry with --limit and --json to capture raw metadata. If install fails, check workspace permissions and disk space; overwritten installs via --force can lose local edits — back up before forcing.
Troubleshooting: Plugins Doctor and Common Recovery Steps
A failed plugin or skill install can leave the gateway in a partially-configured state. Start by gathering machine-readable diagnostics, then follow a safe recovery sequence: inspect the offending package, fix validation errors, optionally reinstall, and restart the gateway. Always back up workspace skills and the ~/.openclaw directory before destructive actions.
First, run the plugin-level health check to let OpenClaw validate installed plugin bundles and their configuration. This prints human-focused diagnostics; use it as the initial probe.
openclaw plugins doctorIf the doctor flags a specific plugin, inspect its metadata and validation output. The inspect command can produce JSON for automation pipelines.
openclaw plugins inspect <id>
openclaw plugins inspect <id> --json
Common recovery checklist
Back up ~/.openclaw/workspace/skills and ~/.openclaw before making changes.
Run openclaw plugins doctor to get a baseline.
Inspect the offending plugin with --json and save the output for review or support.
If validation failures point to config problems, run the system doctor with automatic fixes:
openclaw doctor --fix
If an install aborted or left files behind, consider reinstalling the plugin. Use --dry-run to preview removals or updates before applying them.
When safe, re-enable the plugin and restart the gateway:
openclaw gateway restart
re-run openclaw plugins doctor and openclaw doctor to confirm.
Security warning: treat plugin installs like running third-party code. Prefer pinned versions (exact versions or git commit refs). If a plugin requests elevated behavior (hooks, tools, providers), audit its manifest and code before enabling. If config validation repeatedly fails, do not bypass checks carelessly—use openclaw doctor --fix and re-inspect results.
Hook packs and hook visibility Hook packs that expose openclaw.hooks arrive via plugins install. Prefer configuring hook visibility and per-hook enablement through openclaw hooks rather than repeatedly installing packages to toggle behavior.
Skills quick inspection and machine-readable outputs The skills CLI shows local skills visible to the current workspace and writes rendered info to stdout. Use --json for automation. Common commands:
openclaw skills search "calendar"
openclaw skills search --limit 20 --json
openclaw skills install <slug>
openclaw skills install <slug> --version <version>
openclaw skills install <slug> --force
openclaw skills update <slug>
openclaw skills update --all
openclaw skills list
openclaw skills list --eligible
openclaw skills list --json
openclaw skills list --verbose
openclaw skills info <name>
openclaw skills info <name> --json
openclaw skills check
openclaw skills check --json
If a skill install is the cause, run openclaw skills check and inspect the workspace skills directory backup before edits. When in doubt, revert from backup rather than force-deleting files. After recovery, re-run doctor checks and verify gateway health.
Compact CLI Reference — Commands and Flag Cheat Sheet
OpenClaw exposes a compact, script-friendly CLI surface for managing plugins (bundles, native plugins, marketplace sources) and workspace skills. Use the commands below as a one‑page cheat sheet for automation and quick recall. Short notes first:
Installing a bare package name tries ClawHub first, then npm as a fallback. Prefix with clawhub: to force ClawHub-only installs.
plugins list output indicates whether an item is Format: openclaw or Format: bundle. Use --verbose to reveal bundle subtype (codex, claude, cursor) and detected bundle capabilities.
Skill inspection/listing commands operate against the current workspace. By default they render human-friendly output to stdout; add --json to emit machine-readable payload for scripting.
Plugins — common commands and flags (copy-paste ready)
openclaw plugins list
openclaw plugins list --enabled
openclaw plugins list --verbose
openclaw plugins list --json
openclaw plugins install <path-or-spec>
openclaw plugins inspect <id>
openclaw plugins inspect <id> --json
openclaw plugins inspect --all
openclaw plugins info <id>
openclaw plugins enable <id>
openclaw plugins disable <id>
openclaw plugins uninstall <id>
openclaw plugins doctor
openclaw plugins update <id>
openclaw plugins update --all
openclaw plugins marketplace list <marketplace>
openclaw plugins marketplace list <marketplace> --json
Install variants and important flags
openclaw plugins install <package> # ClawHub first, then npm
openclaw plugins install clawhub:<package> # ClawHub only
openclaw plugins install <package> --force # overwrite existing install
openclaw plugins install <package> --pin # pin version
openclaw plugins install <package> --dangerously-force-unsafe-install
openclaw plugins install <path> # local path
openclaw plugins install <plugin>@<marketplace> # marketplace
openclaw plugins install <plugin> --marketplace <name> # marketplace (explicit)
openclaw plugins install <plugin> --marketplace https://github.com/<owner>/<repo>
Skills — search, install, inspect (workspace-scoped)
openclaw skills search "calendar"
openclaw skills search --limit 20 --json
openclaw skills install <slug>
openclaw skills install <slug> --version <version>
openclaw skills install <slug> --force
openclaw skills update <slug>
openclaw skills update --all
openclaw skills list
openclaw skills list --eligible
openclaw skills list --json
openclaw skills list --verbose
openclaw skills info <name>
openclaw skills info <name> --json
openclaw skills check
openclaw skills check --json
Key flags and behaviors to script safely
--json: emits machine-readable payloads for list/inspect/search; use for CI and automation.
--verbose: adds detected metadata (bundle subtype, capabilities) helpful for audits.
--force: overwrite an existing install or workspace skill—use in scripted updates only when intentional.
--pin: record the installed plugin version to prevent automatic update drift.
--dangerously-force-unsafe-install: bypasses manifest/security checks — reserved for trusted local installs; treat as destructive.
--keep-files / --dry-run: include where supported in higher-level flows to preview changes (refer to the specific subcommand help).
Troubleshooting tips
If install fails, run openclaw plugins doctor to reveal manifest/compatibility problems.
Bundles must include the expected bundle manifest fields; verbose inspect shows missing or rejected capabilities.
For reproducible workspace state, commit workspace/skills/ contents and pin plugin versions after successful installs.
This sheet collects the exact commands you'll use in scripts and runbooks. Rely on --json outputs for CI integration and always prefer clawhub:<name> when you want to avoid npm fallback ambiguity.
Operational Tools: Approvals, Automation, Nodes, Sandboxes
Execution Approvals and Local Exec Policy
OpenClaw treats host approvals as the authoritative enforcement point for any request to run code on a host. A local "requested" tools.exec policy expresses what an agent or user intends, but it cannot override the host approvals file. When an exec request is evaluated the system merges three things: the requested tools.exec values (local intent), any per-node or per-gateway approvals in the host approvals file, and the effective result that determines whether the run proceeds, is allowed without prompt, or triggers an interactive approval flow. Always inspect the host approvals file when an exec behaves differently than you expect.
Start by inspecting current state. The exec-policy convenience command shows the local requested exec settings in a human table and can output JSON for automation. Use approvals get to fetch the host-side approvals (current machine, a node, or the gateway):
openclaw exec-policy show
openclaw exec-policy show --json

openclaw exec-policy preset yolo
openclaw exec-policy preset cautious --json

openclaw exec-policy set --host gateway --security full --ask off --ask-fallback full
openclaw approvals get
openclaw approvals get --node <id|name|ip>
openclaw approvals get --gatewayTo change a host approvals file, replace it with JSON5 via openclaw approvals set. You must choose either --file or --stdin (not both). The command accepts JSON5, so you can use comments and trailing commas when authoring locally:
openclaw approvals set --file./exec-approvals.json
openclaw approvals set --stdin <<'EOF'
{ version: 1, defaults: { security: "full", ask: "off" } }
EOF
openclaw approvals set --node <id|name|ip> --file./exec-approvals.json
openclaw approvals set --gateway --file./exec-approvals.json
To configure a host to never prompt on exec approvals (the risky "YOLO" mode), set defaults to disable asks and raise security to full. This is destructive from a security standpoint—back up the current approvals file before applying:
openclaw approvals set --stdin <<'EOF'
{
 version: 1,
 defaults: {
 security: "full",
 ask: "off",
 askFallback: "full"
 }
}
EOF
You can target a specific node similarly:
openclaw approvals set --node <id|name|ip> --stdin <<'EOF'
{
 version: 1,
 defaults: {
 security: "full",
 ask: "off",
 askFallback: "full"
 }
}
EOF
After changing host approvals you will often want the local requested policy to match intent. The openclaw config set commands update local tools.exec.* values:
openclaw config set tools.exec.host gateway
openclaw config set tools.exec.security full
openclaw config set tools.exec.ask off
For convenience, exec-policy presets sync both local requested config and the local approvals file. The yolo preset applies the never-prompt behavior locally; use it only after backing up host approvals and ensuring you understand the increased risk:
openclaw exec-policy preset yoloAllowlist management lets you pre-authorize specific paths or patterns so runs matching them bypass prompts. You can scope entries to a specific agent, node, or the full host:
openclaw approvals allowlist add "~/Projects/**/bin/rg"
openclaw approvals allowlist add --agent main --node <id|name|ip> "/usr/bin/uptime"
openclaw approvals allowlist add --agent "*" "/usr/bin/uname"

openclaw approvals allowlist remove "~/Projects/**/bin/rg"
Quick checklist before applying broad changes (especially YOLO):
Back up current approvals: copy the existing approvals JSON from the host or use openclaw approvals get > approvals-backup.json.
Inspect effective policy: run openclaw approvals get and openclaw exec-policy show --json.
Apply narrow allowlist entries first to reduce blast radius.
If you must apply YOLO, document and timebox the change and restrict network access to the host while active.
Troubleshooting tip: if an exec is still prompting unexpectedly, first check the host approvals file you set on the host (openclaw approvals get --node or --gateway). Then confirm local requested tools.exec. with openclaw exec-policy show or openclaw config get tools.exec.. The host approvals file is the final authority; resolve mismatches there.
Browser Automation: Profiles, Snapshots, and Ref-based UI Automation
Start by creating or choosing a browser profile, then start the control session, list tabs, and navigate. The CLI surface requires an explicit profile when you want a named profile; use --browser-profile to target it. If starting reports "not reachable after start", stop and verify the Chrome DevTools Protocol (CDP) endpoint is reachable — navigation failures after a successful start often indicate SSRF navigation policy blocks, not the browser itself.
Basic lifecycle and quickstart
openclaw browser profiles
openclaw browser --browser-profile openclaw start
openclaw browser --browser-profile openclaw open https://example.com
openclaw browser --browser-profile openclaw snapshot
Profile management and drivers
Profiles may be managed (OpenClaw launches and controls the browser), remote (provides a CDP URL), or existing-session (attaches to a user-run browser). Use existing-session when you must operate against an already running browser, but note limitations: some element-level operations (CSS element screenshots) may not be supported with existing-session drivers.
Create/list/delete profiles with create-profile, profiles and delete-profile; always name and select profiles via --browser-profile.
Commands for profile creation and use
openclaw browser profiles
openclaw browser create-profile --name work --color "#FF5A36"
openclaw browser create-profile --name chrome-live --driver existing-session
openclaw browser create-profile --name remote --cdp-url https://browser-host.example.com
openclaw browser delete-profile --name work
If the browser subcommand is missing OpenClaw supports a bundled browser plugin. If your ~/.openclaw/openclaw.json contains a plugins.allow array, the bundled plugin must be present there to enable the CLI subcommand. Example openclaw.json excerpt (strict JSON):
{
 "plugins": {
 "allow": ["telegram", "browser"]
 }
}
Minimal readiness flow
openclaw browser --browser-profile openclaw start
openclaw browser --browser-profile openclaw tabs
openclaw browser --browser-profile openclaw open https://example.com
Snapshot -> ref workflow Take a snapshot to materialize element refs (identifiers). Use those refs for click/type/evaluate and other ref-based actions. This is the canonical pattern: snapshot produces refs → click/type/evaluate use refs.
openclaw browser snapshotRef-based interactions and example automation sequence
openclaw browser navigate https://example.com
openclaw browser click <ref>
openclaw browser type <ref> "hello"
openclaw browser press Enter
openclaw browser wait --text "Done"
openclaw browser evaluate --fn '(el) => el.textContent' --ref <ref>
Minimal recipe: start profile, snapshot, click a login button by ref, then evaluate text from a result node.
Tabs and tab lifecycle
openclaw browser tabs
openclaw browser tab new
openclaw browser tab select 2
openclaw browser tab close 2
openclaw browser open https://docs.openclaw.ai
openclaw browser focus <targetId>
openclaw browser close <targetId>
Screenshots, refs and limitations
--full-page applies only to whole-page screenshots. It cannot be combined with --ref or --element.
openclaw browser screenshot
openclaw browser screenshot --full-page
openclaw browser screenshot --ref e12
Files, dialogs and storage
openclaw browser upload /tmp/openclaw/uploads/file.pdf --ref <ref>
openclaw browser waitfordownload
openclaw browser download <ref> report.pdf
openclaw browser dialog --accept
openclaw browser cookies
openclaw browser cookies set session abc123 --url https://example.com
openclaw browser cookies clear
openclaw browser storage local get
openclaw browser storage local set token abc123
openclaw browser storage session clear
Emulation and overrides
openclaw browser resize 1280 720
openclaw browser set viewport 1280 720
openclaw browser set offline on
openclaw browser set media dark
openclaw browser set timezone Europe/London
openclaw browser set locale en-GB
openclaw browser set geo 51.5074 -0.1278 --accuracy 25
openclaw browser set device "iPhone 14"
openclaw browser set headers '{"x-test":"1"}'
openclaw browser set credentials myuser mypass
Debugging and tracing Use console capture, response body filtering, request filters and trace export when navigation or script execution fails. Traces are useful to diagnose SSRF/blocking or network request rejections.
openclaw browser console --level error
openclaw browser pdf
openclaw browser responsebody "**/api"
openclaw browser highlight <ref>
openclaw browser errors --clear
openclaw browser requests --filter api
openclaw browser trace start
openclaw browser trace stop --out trace.zip
Troubleshooting checklist for navigation failures
Check CDP readiness: confirm the CDP endpoint is reachable and the browser process is running.
If start reports "not reachable after start": inspect the browser logs and run openclaw browser tabs to confirm control connection.
If navigation connects but pages fail to load: review SSRF navigation policy; use request and responsebody capture to find blocked URLs.
If element screenshots fail on existing-session profiles: switch to a managed/remote CDP profile.
When to use existing-session vs managed/remote
existing-session: attach to a user's browser; good for interactive debugging and using the user's profile, but may lack some automated element features.
remote (--cdp-url): use when you control a headless or remote browser endpoint.
managed (default): OpenClaw launches and manages browser lifecycle; best for repeatable automation.
Keep these commands and patterns handy when authoring automation steps: create/select a profile, start, snapshot to get refs, act by ref, and use tracing/requests capture when behavior is unexpected.
Cron Jobs: Isolated Sessions, Delivery, Scheduling, and Retention
Scheduled jobs in OpenClaw run as ordinary agent sessions, but they have a few special semantics you must account for when designing reliable cron workflows: delivery defaults, one-shot lifecycle, timezone interpretation, how runs are enqueued and observed, model selection for isolated runs, failure routing, and retention controls.
By default, an isolated cron job created with --session isolated will announce its output. That is, isolated cron add implicitly behaves as if --announce was provided. If you want the job to run silently and keep results internal to OpenClaw (for example, to feed a webhook or write to storage without posting), edit the job to disable delivery with --no-deliver:
openclaw cron edit <job-id> --no-deliverOne-shot jobs scheduled with --at are deleted after a successful run by default. If you need to keep the job record (and its session data) for auditing or debugging, enable retention with --keep-after-run.
Timezone rule for one-shot jobs: if you pass an --at datetime without an explicit numeric offset, OpenClaw treats it as UTC. Provide --tz <iana> to interpret that wall-clock time in a specific timezone (for example America/Los_Angeles).
Creating a lightweight isolated job example — the job uses a sparse "light-context" (minimal bootstrap) and will not announce results:
openclaw cron add \
 --name "Lightweight morning brief" \
 --cron "0 7 * * *" \
 --session isolated \
 --message "Summarize overnight updates." \
 --light-context \
 --no-deliver
If you want that morning brief announced to Slack instead, edit delivery targets and announce:
openclaw cron edit <job-id> --announce --channel slack --to "channel:C1234567890"Or target a Telegram user:
openclaw cron edit <job-id> --announce --channel telegram --to "123456789"Common listing and run commands you will use for inspection and manual enqueue:
openclaw cron list
openclaw cron show <job-id>
openclaw cron run <job-id>
openclaw cron run <job-id> --due
openclaw cron runs --id <job-id> --limit 50
A manual openclaw cron run returns immediately when the run is queued; a successful enqueue looks like { ok: true, enqueued: true, runId }. Use openclaw cron runs --id <job-id> to follow the eventual outcome and view run logs.
Model selection for isolated cron runs follows a precedence chain: a Gmail-hook override (if present) is consulted first, then any explicit --model on the job, then the stored cron-session model override, and finally the agent or workspace default selection. This lets you force a particular model for sensitive or cost-sensitive cron workloads while still supporting global updates.
Failure notifications resolve in the following order: delivery.failureDestination for the job, then global cron.failureDestination, and if neither is set OpenClaw will fall back to the job’s primary announce target. Configure a dedicated failure destination when you need alerts separate from routine announcements.
Retention and pruning are configurable: cron.sessionRetention controls pruning of completed isolated run sessions; cron.runLog.* settings control how run JSONL files are rotated/pruned. When upgrading OpenClaw, run openclaw doctor --fix to normalize legacy cron fields and migrate older delivery aliases and job formats. Practical checklist before enabling production cron jobs:
Confirm announce vs --no-deliver behavior for isolated jobs.
For one-shot tasks, decide keep-after-run if you need post-run inspection.
Set --tz for local wall-clock one-shot schedules.
Configure failureDestination if alerts must be separate.
Verify retention policy so logs and sessions do not overwhelm disk.
Task Flows: Quick CLI Reference
OpenClaw’s Task Flow commands are organized under the tasks command group — there is no top-level flows binary. Treat flows as a subcommand surface of openclaw tasks; that is how the CLI locates the task subsystem, applies workspace/context isolation, and returns machine-friendly output modes.
The primary flow operations you will use from the shell are:
openclaw tasks flow list [--json]
openclaw tasks flow show <lookup>
openclaw tasks flow cancel <lookup>
The snippet above is a canonical usage synopsis. Use --json when you need structured output for automation or piping into jq.
What each command does
openclaw tasks flow list
Lists active and recent flows. With --json it emits a machine-parseable array including flow id, state, start time, and brief metadata.
openclaw tasks flow show <lookup>
Show full details for a flow. <lookup> accepts the canonical flow id or any lookup string the tasks subsystem supports (name, workspace-scoped id). The output includes step state, inputs, and linked runs or child tasks.
openclaw tasks flow cancel <lookup>
Attempts a graceful cancellation of the named flow. The task system marks the flow as cancelled and signals running steps to stop. Cancellation is cooperative — external adapters or long-running tool calls may still finish or leave side effects.
Common operator use-case You notice a long-running scheduled flow that appears stuck (e.g., a cron-triggered Task Flow stuck on an external exec or a browser automation step hanging). Inspect the flow, then cancel it to unblock resources:
List recent flows to find the id:
openclaw tasks flow list --json | jq '.[] | select(.state=="running")'
Inspect the candidate flow for context and attached resources:
openclaw tasks flow show <flow-id>
Cancel the flow to stop further steps and mark it cancelled:
openclaw tasks flow cancel <flow-id>
Operational notes and cautions
Cancellation is cooperative. If a flow step has already produced external side effects (provisioned resources, sent messages, or invoked exec on a node), those side effects are not automatically rolled back. Always inspect the flow show output and adapter logs after cancel.
Use --json for automation. Scripts should treat cancel as a best-effort signal and implement their own cleanup steps if needed.
For scheduled flows (cron), cancelling a single run does not disable the cron job. Remove or edit the cron entry if you need to stop future runs.
Where to go next This short reference covers the commands you’ll reach for during normal operation. For full Task Flow concepts, step debugging, approval interactions, and examples of program definitions and cron-triggered flows, consult the Automation & Task Flow chapter and the tasks CLI reference.
Node Host Operation: Running, Installing, and Pairing Headless Nodes
A headless node lets a remote machine act as a local executor for the Gateway: it opens a WebSocket to the Gateway, advertises capabilities (system.run/system.which), and—unless disabled—also advertises a browser proxy so the Gateway can route browser automation through that host.
Start vs install. For interactive testing or debugging run the node in the foreground. For production, register the node as a per-user background service so it restarts on login and survives shell exits.
Usage examples (foreground start and service install):
openclaw node run --host <gateway-host> --port 18789openclaw node install --host <gateway-host> --port 18789Once installed, manage the service with the node subcommands:
openclaw node status
openclaw node stop
openclaw node restart
openclaw node uninstall
Browser proxy advertisement. By default a node advertises nodeHost.browserProxy to the Gateway. If you need to prevent browser automation from routing through that host (for security, headless container restrictions, or firewall concerns) disable the proxy in the node configuration. Place a local JSON config snippet like this under the node's config:
{
 "nodeHost": {
 "browserProxy": {
 "enabled": false
 }
 }
}
Warning: disabling the browser proxy prevents the Gateway from using that node for browser-based automation and screenshots.
Gateway authentication resolution for node commands follows a strict precedence:
Environment variables OPENCLAWGATEWAYTOKEN / OPENCLAWGATEWAYPASSWORD are checked first.
Next, local CLI/config values gateway.auth.token / gateway.auth.password are consulted.
If gateway.mode is remote, additional remote-client fields may be eligible per remote-client policies.
Critical: if gateway.auth.token or gateway.auth.password are configured via a SecretRef and that SecretRef cannot be resolved at runtime, authentication fails closed — the node will not fallback to a remote or unauthenticated mode. Ensure SecretRefs are resolvable from the node environment.
Pairing lifecycle. The first time a node connects it does not become immediately trusted. The Gateway creates a pending device pairing request with role: node. An operator must approve that request on the Gateway to allow the node to act. Use these commands to list and approve pairing requests:
openclaw devices list
openclaw devices approve <requestId>
Local identity and approvals. After approval the node stores its identity locally at ~/.openclaw/node.json (contains node id, token, display name, and gateway connection info). Execution protection is enforced locally: system.run requests arriving at the node are checked against the node’s local exec approvals (for example ~/.openclaw/exec-approvals.json). The Gateway prepares a canonical systemRunPlan at approval time; that canonical plan is what the node enforces when executing. In short, a system.run will only execute if the local approvals allow the prepared systemRunPlan.
Checklist to install a node as a service
Verify Gateway reachability from the intended host: tcp/connect to Gateway host:port.
Provide auth: export OPENCLAWGATEWAYTOKEN or configure gateway.auth.token in local config (avoid unresolved SecretRefs).
Run and test foreground: openclaw node run --host <gateway> --port 18789 and confirm a pending device appears in openclaw devices list.
Approve the device: openclaw devices approve <requestId>.
Install as service: openclaw node install --host <gateway> --port 18789 and confirm openclaw node status shows running.
Common failure modes
Unresolved SecretRef for gateway auth: node fails closed and will not connect — replace with resolved token or set env var.
Firewall or NAT blocking outbound WebSocket to Gateway host/port.
Browser proxy disabled unintentionally — browser automation requests will fail for this node.
Missing or incorrect local exec-approvals.json causes system.run to be rejected on the node even when the Gateway requested execution.
Follow these rules and checks to get a headless node reliably connected, paired, and safely gated for remote execution.
Managing Paired Nodes: nodes CLI and Remote Invokes
Start by inspecting what nodes the Gateway knows about and which are currently reachable. The nodes CLI prints separate tables for paired nodes and pending pair requests so you can triage connectivity and approvals quickly.
Usage examples (command synopsis for quick copy/paste):
openclaw nodes list
openclaw nodes list --connected
openclaw nodes list --last-connected 24h
openclaw nodes pending
openclaw nodes approve <requestId>
openclaw nodes reject <requestId>
openclaw nodes rename --node <id|name|ip> --name <displayName>
openclaw nodes status
openclaw nodes status --connected
openclaw nodes status --last-connected 24h
When to use the filters
--connected shows only nodes with a current active connection. Use it when you need to target live hosts.
--last-connected <duration> filters nodes by the time since their last successful connection (examples: 24h, 7d). This helps find stale companions you may want to prune or re-pair.
Pending approvals and scope rules openclaw nodes pending lists pairing requests that require operator approval. The act of running openclaw nodes pending only requires the pairing scope (you can list requests without elevated privileges). However, approving a pending request with openclaw nodes approve <requestId> inherits any additional scopes requested by the node. For example, a request that asks to register an admin-level capability (such as system administration hooks) will require you to have the corresponding admin approval scope to accept it. Always inspect the pending request details before approving; the CLI will surface the requested scopes and capabilities.
Renaming and status checks Use openclaw nodes rename to set a human-friendly name (you can reference id, name, or IP with --node). openclaw nodes status is a concise probe of node health and connection metadata; the same --connected and --last-connected filters apply.
Remote invokes: calling node capabilities To invoke a capability exposed by a paired node, use openclaw nodes invoke with a JSON params payload. This is an RPC-style call to the node’s registered commands:
openclaw nodes invoke --node <id|name|ip> --command <command> --params <json>Behavior and important constraints
The default invoke timeout is 15000 ms (15 seconds). Use --invoke-timeout <ms> to increase or decrease this per-call.
You may provide --idempotency-key to make the request idempotent where the node honors that header.
For security and policy reasons, certain commands are blocked from nodes.invoke. Notably, system.run and system.run.prepare are not allowed via nodes.invoke. Those operations represent shell execution on the node and must instead be performed through the exec tool routed to the node host (exec with host=node), which enforces exec approvals and elevated-mode policies.
The node will return structured error information if a command is unknown, not permitted by policy, or if the call times out. Treat permission errors as configuration/approval problems rather than transient failures.
Example: harmless capability invocation Assume a node exposes a capability pingEcho that echoes back a message. A typical call:
openclaw nodes invoke --node my-node --command pingEcho --params '{"message":"hello"}' --invoke-timeout 5000Successful response: the node returns the capability’s JSON result on stdout. If you see an error like "commandnotallowed" or "forbidden", verify the node’s registered capabilities, the pending/approved scopes, and consult openclaw nodes pending for any missing approvals. If you see "timeout", increase --invoke-timeout or investigate node connectivity with openclaw nodes status --connected.
Quick checklist before invoking:
Confirm node is connected (openclaw nodes list --connected).
Confirm the capability exists and is approved on the node.
Use --invoke-timeout when calling longer-running capabilities.
For shell execution on a node, use exec tool with host=node (not nodes.invoke) so exec approvals are enforced.
Sandbox Management: Explain, List, Recreate, and Backend Considerations
OpenClaw sandboxes are the runtime isolation used for tools that execute code or control external processes. The CLI gives three essential controls: explain to inspect the effective sandbox policy, list to discover active runtimes, and recreate to force sandboxes to be torn down and re-created with updated configuration. Use explain before changing anything; use recreate only when you need updated images, changed backend targets, or altered SSH/OpenShell identities — recreate deletes the canonical workspace and reseeds it on next run.
Run this to inspect effective sandbox settings for the global defaults or a specific session/agent. Use --json for automation.
openclaw sandbox explain
openclaw sandbox explain --session agent:main:main
openclaw sandbox explain --agent work
openclaw sandbox explain --json
Explain shows the effective mode (off, non-main, all), scope (session, agent, shared), backend (docker, ssh, openshell), what workspace path the sandbox sees, the sandbox tool policy, and whether elevated gates are required — plus the config paths you can edit to fix issues.
List will show each runtime name, status, backend, matching config label, age, idle time, and associated session or agent. Use --browser to show only browser-type sandbox containers and --json for machine-readable output.
openclaw sandbox list
openclaw sandbox list --browser # List only browser containers
openclaw sandbox list --json # JSON output
Recreate is destructive: it removes the running sandboxes so OpenClaw will create fresh runtimes the next time a run needs them. Scopes: --all, --session, --agent, and --browser. Use --force to skip the confirmation prompt.
openclaw sandbox recreate --all # Recreate all containers
openclaw sandbox recreate --session main # Specific session
openclaw sandbox recreate --agent mybot # Specific agent
openclaw sandbox recreate --browser # Only browser containers
openclaw sandbox recreate --all --force # Skip confirmation
Operator checklist before recreate
Backup any data in remote canonical workspaces (especially for SSH/OpenShell targets).
Confirm target scope (agent or session) to avoid wide disruption.
Notify users of imminent restart if sandboxes host long-running instrumented browsers or tests.
Use --force only after confirming backups and scope.
Common workflows
Update Docker image and apply it:
# Pull new image
docker pull openclaw-sandbox:latest
docker tag openclaw-sandbox:latest openclaw-sandbox:bookworm-slim

## Update config to use new image
## Edit config: agents.defaults.sandbox.docker.image (or agents.list[].sandbox.docker.image)

## Recreate containers
openclaw sandbox recreate --all
Edit sandbox keys then recreate:
# Edit config: agents.defaults.sandbox.* (or agents.list[].sandbox.*)

## Recreate to apply new config
openclaw sandbox recreate --all
SSH and OpenShell changes that require recreate
SSH: changing backend, ssh.target, ssh.workspaceRoot, identityFile / certificateFile / knownHostsFile, or the inline identityData/knownHostsData requires recreate. Recreate deletes the remote canonical workspace and reseeds it.
# Edit config:
## - agents.defaults.sandbox.backend
## - agents.defaults.sandbox.ssh.target
## - agents.defaults.sandbox.ssh.workspaceRoot
## - agents.defaults.sandbox.ssh.identityFile / certificateFile / knownHostsFile
## - agents.defaults.sandbox.ssh.identityData / certificateData / knownHostsData

openclaw sandbox recreate --all
OpenShell: changing backend or the plugin's from, mode, or policy keys requires recreate and will delete/ reseed the canonical remote workspace.
# Edit config:
## - agents.defaults.sandbox.backend
## - plugins.entries.openshell.config.from
## - plugins.entries.openshell.config.mode
## - plugins.entries.openshell.config.policy

openclaw sandbox recreate --all
Default sandbox configuration keys (copy into your config and edit safely). This is valid JSON for copy/paste into a.json configuration file:
{
 "agents": {
 "defaults": {
 "sandbox": {
 "mode": "all",
 "backend": "docker",
 "scope": "agent",
 "docker": {
 "image": "openclaw-sandbox:bookworm-slim",
 "containerPrefix": "openclaw-sbx-"
 },
 "prune": {
 "idleHours": 24,
 "maxAgeDays": 7
 }
 }
 }
 }
}
Practical note: running recreate does not wait for current runs to finish — it force-removes runtime artifacts so new runs start cleanly with the updated configuration. That immediate removal is why backups and narrow scoping are important.
Bridges and Utility CLI Workflows
ACP Bridge (openclaw acp)
Open a thin stdio relay to a Gateway when an editor or IDE speaks ACP but cannot (or should not) connect directly. The acp bridge accepts ACP frames on stdin/stdout, forwards them over a Gateway WebSocket, and maps ACP session identifiers to OpenClaw session keys. Use it when you want your editor to drive an OpenClaw session without running a full ACP-native runtime inside the editor.
The bridge is a relay, not a full client runtime. It replays stored user and assistant text when loadSession requests map to an existing Gateway session, but it does not reconstruct historic tool calls, terminal streams, or richer ACP-native event types. Choose openclaw acp for editor-to-Gateway prompt delivery and streaming updates; choose openclaw mcp serve when an external MCP client needs direct, channel-style conversations with OpenClaw.
Quickstart: connect to a remote Gateway
Preferred for local process safety: pass a token file rather than an inline token.
The --session flag binds this acp process to a Gateway session key. Use --reset-session to clear the key before the first prompt (useful for starting fresh conversation state).
Run examples (text — CLI examples you can paste into a shell):
openclaw acp

## Remote Gateway
openclaw acp --url wss://gateway-host:18789 --token <token>

## Remote Gateway (token from file)
openclaw acp --url wss://gateway-host:18789 --token-file ~/.openclaw/gateway.token

## Attach to an existing session key
openclaw acp --session agent:main:main

## Attach by label (must already exist)
openclaw acp --session-label "support inbox"

## Reset the session key before the first prompt
openclaw acp --session agent:main:main --reset-session
Client/Server spawn mode
The client subcommand spawns a local bridge process that runs the acp handler. This is useful when your editor expects a client command to spawn the bridge for each session or project.
You can override the server command and pass server args. The examples below show both pointing a spawned bridge at a remote Gateway and overriding the command (default: openclaw).
Run examples:
openclaw acp client

## Point the spawned bridge at a remote Gateway
openclaw acp client --server-args --url wss://gateway-host:18789 --token-file ~/.openclaw/gateway.token

## Override the server command (default: openclaw)
openclaw acp client --server "node" --server-args openclaw.mjs acp --url ws://127.0.0.1:19001
Persistent session and one-shot helpers (acpx)
Use acpx for quick one-shot requests or to create persistent named sessions that your editor or scripts can reuse.
# One-shot request into your default OpenClaw ACP session
acpx openclaw exec "Summarize the active OpenClaw session state."

## Persistent named session for follow-up turns
acpx openclaw sessions ensure --name codex-bridge
acpx openclaw -s codex-bridge --cwd /path/to/repo \
 "Ask my OpenClaw work agent for recent context relevant to this repo."
Persisting Gateway connection settings
Instead of passing URL and token on each command, you can store them in OpenClaw config. Prefer storing a token in a file and referencing it to avoid process-list leakage.
openclaw config set gateway.remote.url wss://gateway-host:18789
openclaw config set gateway.remote.token <token>
Embedding acp in agent-server configs
Use these JSON fragments when configuring an agent server that should launch the acp bridge. These are strict JSON examples suitable for a.json configuration file.
Minimal custom agent_servers entry:
{
 "agent_servers": {
 "OpenClaw ACP": {
 "type": "custom",
 "command": "openclaw",
 "args": ["acp"],
 "env": {}
 }
 }
}
Agent server with explicit connection args:
{
 "agent_servers": {
 "OpenClaw ACP": {
 "type": "custom",
 "command": "openclaw",
 "args": [
 "acp",
 "--url",
 "wss://gateway-host:18789",
 "--token",
 "<token>",
 "--session",
 "agent:design:main"
 ],
 "env": {}
 }
 }
}
Agent entry that sets environment overrides and runs acp (strict JSON):
{
 "agents": {
 "openclaw": {
 "command": "env OPENCLAW_HIDE_BANNER=1 OPENCLAW_SUPPRESS_NOTES=1 openclaw acp --url ws://127.0.0.1:18789 --token-file ~/.openclaw/gateway.token --session agent:main:main"
 }
 }
}
Session metadata payload (useful for programmatic session controls):
{
 "_meta": {
 "sessionKey": "agent:main:main",
 "sessionLabel": "support inbox",
 "resetSession": true
 }
}
Supported vs unsupported features (practical checklist)
Supported: stdin/stdout ACP frames -> Gateway, mapping ACP sessions to Gateway session keys, replaying text history for loadSession, streaming assistant token updates, exposing a small set of session knobs (thought level, tool verbosity, reasoning verbosity).
Unsupported or partial: per-session MCP servers, ACP client filesystem methods, ACP terminal sessions (tty), full session plans/thought streaming semantics, reconstruction of historic tool calls or structured tool outputs, full ACP-native configuration surfaces.
Operational cautions and security
Warning: passing --token on a command line can expose the token via ps/pgrep. Prefer --token-file and filesystem permissions to protect the token.
Warning: if multiple ACP clients share the same Gateway session key, event routing and cancel delivery are best-effort; expect cross-talk in edge cases. For strict isolation, use distinct session keys per client.
When embedding tokens into JSON configs or agent server args, treat the config file as a secret and restrict filesystem permissions. Avoid checked-in configs containing plaintext tokens.
Analogy to set expectations
Think of acp as a thin relay: it forwards ACP messages to a Gateway (thin relay), not a full client runtime that replays every interactive subsystem or emulates terminals (full client runtime).
Troubleshooting checklist
Authentication failure: verify gateway.remote.url, token file path and permissions; try openclaw gateway status or openclaw gateway probe to validate connectivity.
Missing session or unexpected empty history: ensure the session key exists (agent sessions may need creation via acpx sessions ensure) and check whether the session was reset.
Unexpected history replay: the bridge replays stored user/assistant text only. If you rely on tool-call history or file diffs, expect gaps.
Banner/noise in spawned clients: suppress with OPENCLAWHIDEBANNER=1 and OPENCLAWSUPPRESSNOTES=1 when launching the bridge for programmatic clients.
Summary Use openclaw acp to let editors talk ACP to OpenClaw without running a heavyweight client. Prefer token files over inline tokens, use distinct session keys for isolation, and remember the bridge is a relay — not a full ACP-native runtime.
MCP Serve Bridge (openclaw mcp serve) and MCP Server Registry
MCP serve is a short-lived stdio bridge that lets an MCP client speak MCP against an OpenClaw Gateway. The bridge runs as a child process (openclaw mcp serve), opens a WebSocket to a Gateway (local or remote), and translates MCP RPCs to Gateway operations so an MCP client can list conversations, read transcripts, poll live events, and send messages routed through OpenClaw-backed channels.
Start and auth patterns
Running the bridge with no flags connects to the local Gateway instance on the default loopback port:
# Local Gateway
openclaw mcp serve
To point the bridge at a remote Gateway, pass a WebSocket URL and authenticate with a token or password file:
## Remote Gateway
openclaw mcp serve --url wss://gateway-host:18789 --token-file ~/.openclaw/gateway.token

## Remote Gateway with password auth
openclaw mcp serve --url wss://gateway-host:18789 --password-file ~/.openclaw/gateway.password
Use --verbose for more logging. Claude-specific channel push notifications can be disabled if you do not want ephemeral pushes by setting --claude-channel-mode off:
## Enable verbose bridge logs
openclaw mcp serve --verbose

## Disable Claude-specific push notifications
openclaw mcp serve --claude-channel-mode off
When to run the serve bridge Use openclaw mcp serve when an MCP client (for example Codex or Claude Code) needs direct access to OpenClaw-managed conversations across channel backends, or when you prefer a single MCP server that surfaces all channel backends to a client. Typical deployments either (a) spawn the bridge per-client on the same host as the client, or (b) run a managed instance that connects to a (possibly remote) Gateway.
Lifecycle and ephemeral event queue The bridge maintains an in-memory live event queue while connected. An MCP client typically spawns the serve bridge and keeps its stdio session open; as long as that stdio session exists the bridge holds live events and can push Claude-specific notifications. When the client disconnects, serve exits and the live queue is discarded. Relying on push notifications for durable delivery is unsafe: older transcript history must be read from persistent transcripts via messages_read rather than from the ephemeral events queue.
Client modes and behavior
Generic MCP client mode uses only standard MCP tools and is appropriate when the client can poll for events and fetch history. Prefer this for portability and long-lived workflows.
Claude Code mode enables a Claude-specific channel adapter that provides push-style notifications and extra adapter behavior. Toggle this with --claude-channel-mode; set it to off to avoid pushes.
Exposed MCP tools and which to use The bridge exposes these MCP tools:
conversations_list — enumerate available routed conversations
conversation_get — fetch conversation metadata
messages_read — read historical transcript entries (durable)
attachments_fetch — retrieve attachment blobs
eventspoll / eventswait — near-real-time event polling or long-poll wait
messages_send — send a message back through the same routed channel
permissionslistopen / permissions_respond — query/respond to permission requests
Guidance: use messagesread for older history and eventspoll/eventswait for near-real-time client delivery. messagessend requires an existing conversation route; the message will be sent through the same route recorded on that conversation session.
Registering persistent MCP servers You can register command-based or URL-based MCP servers in OpenClaw config so clients discover and run them. The following is a configuration snippet (valid JSON) that registers an openclaw command-based server:
{
 "mcpServers": {
 "openclaw": {
 "command": "openclaw",
 "args": [
 "mcp",
 "serve",
 "--url",
 "wss://gateway-host:18789",
 "--token-file",
 "/path/to/gateway.token"
 ]
 }
 }
}
A more compact runtime config under mcp.servers might look like:
{
 "mcp": {
 "servers": {
 "context7": {
 "command": "uvx",
 "args": ["context7-mcp"]
 },
 "docs": {
 "url": "https://mcp.example.com"
 }
 }
 }
}
You can include URL entries with custom headers and streamable transports (streamable-http) when your server supports streaming; streaming transports need server-side support for a long-lived HTTP connection and appropriate timeouts:
{
 "mcp": {
 "servers": {
 "streaming-tools": {
 "url": "https://mcp.example.com/stream",
 "transport": "streamable-http",
 "connectionTimeoutMs": 10000,
 "headers": {
 "Authorization": "Bearer <token>"
 }
 }
 }
 }
}
CLI management and quick registry commands Use the openclaw mcp CLI to manage outbound MCP server definitions:
openclaw mcp list
openclaw mcp show context7 --json
openclaw mcp set context7 '{"command":"uvx","args":["context7-mcp"]}'
openclaw mcp set docs '{"url":"https://mcp.example.com"}'
openclaw mcp unset context7
Troubleshooting and tests Connectivity failures are commonly caused by incorrect URL, missing token/password file, or firewall/port issues. If you maintain tests for MCP channels, run the project test job:
pnpm test:docker:mcp-channelsIf push notifications appear missing, confirm the client keeps serve's stdio open and check that --claude-channel-mode is not disabled. For streaming transports, verify the remote endpoint supports long-lived HTTP streams and honors the configured connectionTimeoutMs.
Memory-Wiki Management (openclaw wiki)
The memory-wiki is a compiled, provenance-aware knowledge store that the memory-wiki plugin exposes to agents. It gathers authored source pages, imported memory artifacts, and generated syntheses into a managed vault. The CLI subcommand openclaw wiki inspects and operates that vault: check its health, ingest sources, compile stable artifacts, search with provenance, and perform controlled edits.
Begin every operation by checking status. Run openclaw wiki status to learn the vault mode (workspace-backed, bridge-backed, or local), the active cache path, and whether Obsidian helpers are available on PATH. If status reports unexpected modes or a missing cache path, stop and run the doctor step next.
The doctor step surfaces common problems such as a missing vault layout, absent public memory artifacts when the gateway is running in bridge mode, or a configured Obsidian helper that cannot be found on PATH. Run openclaw wiki doctor and resolve reported issues before making bulk changes; doctor is the safety gate for layout and configuration inconsistencies.
Typical safe operation order
wiki status
wiki doctor (fix issues)
wiki init (only if you need a starter vault)
wiki ingest (bring content into the source layer)
wiki compile (rebuild caches and compiled artifacts)
wiki lint (validate source and generated sections)
wiki search / wiki get to inspect pages
wiki apply for controlled mutations
The following compact command batch shows the common sequence and a set of useful operations (presented as runnable CLI examples):
openclaw wiki status
openclaw wiki doctor
openclaw wiki init
openclaw wiki ingest./notes/alpha.md
openclaw wiki compile
openclaw wiki lint
openclaw wiki search "alpha"
openclaw wiki get entity.alpha --from 1 --lines 80

openclaw wiki apply synthesis "Alpha Summary" \
 --body "Short synthesis body" \
 --source-id source.alpha

openclaw wiki apply metadata entity.alpha \
 --source-id source.alpha \
 --status review \
 --question "Still active?"

openclaw wiki bridge import
openclaw wiki unsafe-local import

openclaw wiki obsidian status
openclaw wiki obsidian search "alpha"
openclaw wiki obsidian open syntheses/alpha-summary.md
openclaw wiki obsidian command workspace:quick-switcher
openclaw wiki obsidian daily
Ingest and provenance
wiki ingest adds content into the vault's source layer. Ingested pages carry provenance metadata in frontmatter so you can trace original URL or source id.
URL-based ingest is gated by the ingest.allowUrlIngest configuration. If that flag is false, the CLI will reject remote URL ingestion—this protects operators from accidental mass pulls.
Compilation and compiled artifacts
wiki compile rebuilds indexes, related-block cross-references, dashboards, syntheses, and compiled digests. Stable artifacts are written under.openclaw-wiki/cache inside the workspace (or the gateway workspace path). Representative outputs include agent-digest.json and claims.jsonl — expect these files after a successful compile.
Search and selection semantics
wiki search respects the wiki's search.backend and search.corpus settings; its ranking is provenance-aware and tuned for wiki identity. When you want a broader, best-effort recall across shared memory, follow up with openclaw memory search (if available). Use wiki search + wiki get when you need page identity and provenance preserved.
Bridge import and unsafe-local import
wiki bridge import pulls public memory artifacts exported by the active memory plugin into bridge-backed source pages. Use this when bridge mode depends on newly exported artifacts.
wiki unsafe-local import reads from configured local paths on the same machine only. It is experimental and same-machine-only: do not use it to ingest untrusted content. It bypasses some provenance protections—exercise caution.
Applying changes
Prefer openclaw wiki apply for mutations to managed or generated sections. apply records source-id and intent and preserves provenance metadata; manual edits to generated sections can be overwritten by later compiles. The two apply examples above show a synthesis creation and metadata update—both include a source-id to tie the change to an origin.
Obsidian helpers
If obsidian.useOfficialCli is enabled, the obsidian subcommands (status, search, open, command, daily) require the official Obsidian CLI to be on PATH. The CLI assists integration with a local Obsidian workspace (opening files, running workspace commands). If the helper is missing, openclaw wiki status or doctor will call it out.
Quick get examples
openclaw wiki get entity.alpha
openclaw wiki get syntheses/alpha-summary.md --from 1 --lines 80
Operational tips and warnings
Run wiki doctor before destructive operations and before bulk imports. It catches layout mismatches and missing dependencies.
Run wiki lint after ingest and before relying on low-confidence sections; lint surfaces structural problems that might degrade agent reasoning.
After bulk imports or bridge imports, run wiki compile to produce fresh artifacts (agent-digest.json, claims.jsonl) that agents will read.
Avoid using unsafe-local import on production gateways exposed to untrusted users—it's explicitly experimental and same-machine only.
These commands and rules give a compact runbook for maintaining a safe, provenance-aware wiki vault that agents can rely on.
Shell Completion (openclaw completion)
The completion generator prints the full shell completion script to stdout by default so you can inspect it or pipe it where you like. You can also cache the generated script in the OpenClaw state directory or append an install block into your shell profile so the shell loads the cached file on startup.
Text examples (runnable CLI invocations):
openclaw completion
openclaw completion --shell zsh
openclaw completion --install
openclaw completion --shell fish --install
openclaw completion --write-state
openclaw completion --shell bash --write-state
Behavior and flags you need to know
Default (no flags): prints the completion script to stdout. Useful for quick inspection or piping into a file.
--shell <zsh|bash|fish|powershell>: target a particular shell flavor. Completion generation eagerly loads the command tree so nested subcommands and flags are included in the generated script.
--write-state: write the generated script into $OPENCLAWSTATEDIR/completions (rather than printing). This caches a canonical copy that --install will reference. If OPENCLAWSTATEDIR is not set, the CLI uses its configured state directory.
--install: append a small "OpenClaw Completion" block to the user's shell profile that sources the cached script under $OPENCLAWSTATEDIR/completions. The command will prompt for confirmation before modifying your profile unless you also pass --yes to skip prompts.
--yes: non-interactive confirmation, used with --install when scripting or provisioning.
Why use write-state + install Write-state places a stable file under the OpenClaw state folder; install simply adds a short assigned material to your shell profile that points to that cached file. This keeps the profile change minimal and lets future completions be updated by writing a new cache file without re-editing the profile.
Safety and recovery --install modifies your shell profile. Inspect the change before restarting your shell. The install block is delimited; to remove it, delete the lines between the BEGIN/END markers. Example (zsh/bash): run
awk 'BEGIN{p=1} /# BEGIN OpenClaw Completion/{p=0;next} /# END OpenClaw Completion/{p=1;next} p' ~/.zshrc > ~/.zshrc.tmp && mv ~/.zshrc.tmp ~/.zshrcAdjust the filename for bash (~/.bashrc) or fish (your fish config file). Always back up your profile before automated edits:
cp ~/.zshrc ~/.zshrc.backupSupported shells (quick reference)
zsh — use --shell zsh
bash — use --shell bash
fish — use --shell fish
PowerShell — use --shell powershell
Tips
Use --write-state in provisioning scripts, then --install --yes when configuring user shells non-interactively.
If you customize your profile locations, pass the correct shell and inspect $OPENCLAWSTATEDIR/completions after running --write-state.
DNS Helpers (openclaw dns setup)
OpenClaw ships a small DNS helper to plan or apply a wide-area discovery topology that pairs Tailscale routing with a CoreDNS zone. The command has two distinct modes: safe planning (default) and an applying mode that changes system state. Use planning to review the recommended configuration; use apply only when you understand and accept the host changes.
Without --apply the command only prints a plan and never touches system files or services. Running the planner is the recommended first step so you can validate the target domain, zone contents, and required platform prerequisites.
--apply is currently implemented for macOS only and assumes you manage CoreDNS with Homebrew. When you pass --apply OpenClaw will:
bootstrap a zone file for the chosen domain if it does not exist,
ensure the CoreDNS import stanza referencing that zone is present in the Corefile,
restart the coredns brew service so the new zone takes effect.
--apply performs privileged operations (file write, brew service restart) and will typically require sudo. Back up your existing CoreDNS configuration and zone files before applying; the command may restart the coredns service and briefly interrupt name resolution.
If you omit --domain the helper reads discovery.wideArea.domain from your configuration and uses that value in the plan or applied changes. Validate the domain value ahead of time to avoid unexpected zone edits.
Minimal checklist for macOS --apply
Homebrew installed.
CoreDNS installed via brew (brew install coredns).
You have sudo privileges.
Back up /usr/local/etc/coredns/Corefile (or the Homebrew location on your system).
Confirm discovery.wideArea.domain or pass --domain explicitly.
Example invocations (illustrative CLI text output; the planner mode is safe):
openclaw dns setup
openclaw dns setup --domain openclaw.internal
openclaw dns setup --apply
For production global DNS, or if you use an external managed DNS provider, prefer manual integration or your provider's APIs rather than relying on the local --apply flow; use OpenClaw’s planner as a reference when performing those manual changes.
Live Docs Search (openclaw docs)
OpenClaw exposes a short, focused CLI for quick lookups against the live documentation index. Running the command with no arguments opens the web-hosted search entrypoint so you can browse and interact with the full docs UI. When you provide a query, the CLI sends that text as a single search request to the live docs index — multi-word queries are not split into multiple requests.
Before using this command, ensure your machine can reach the live docs endpoint (network access, proxy rules, and any gateway auth required). Permission or token requirements for the docs endpoint follow your deployment's access controls; if you see an authentication error, confirm the same credentials you use for other openclaw CLI actions or the Control UI.
The following canonical examples show common usages. This block is illustrative command-usage text you can paste into a shell; for multi-word queries wrap the query in quotes if your shell would otherwise split it.
openclaw docs
openclaw docs "browser existing-session"
openclaw docs "sandbox allowHostControl"
openclaw docs "gateway token secretref"
Notes and tips:
openclaw docs with no arguments opens the live docs search entrypoint in your default browser (or prints the URL when running in a headless environment).
Multi-word queries (for example: gateway token secretref) are sent as a single search string to the index. Quoting the query ensures the shell passes the entire phrase unchanged.
Use concise, intent-focused phrases; the index favors tokens and key terms (e.g., "gateway token secretref") over long natural-language paragraphs.
If you prefer the web interface, the Control UI includes the same search capability; use the CLI when you want a quick one-shot lookup from a terminal or when scripting help lookups.
If you run into networking or permission issues, confirm openclaw status and gateway availability (openclaw gateway status / openclaw doctor) before troubleshooting doc index access.
Legacy Alias: clawbot
Older automation and community guides sometimes invoke OpenClaw via the historical clawbot command namespace. That alias is retained only for backwards compatibility; it is not a separate binary or feature set. The modern, canonical CLI exposes those actions at top level under openclaw, and new scripts should call the top-level commands directly.
Functionally the most common compatibility mapping you’ll encounter is:
# legacy
openclaw clawbot qr

# modern equivalent (preferred)
openclaw qr
The gateway, onboarding, pairing, and device flows are identical once you invoke the top-level command; openclaw clawbot <sub> simply forwards to the new entrypoint. Relying on the alias in production scripts postpones an inevitable migration and can hide intent when reading automation.
Migration checklist
Search your repository, CI manifests, and deployment scripts for occurrences of
openclaw clawbot.Replace with the top-level form (for example
openclaw qr), and run the command locally to verify behavior and exit codes.Update any wrapper scripts or Makefile targets that expose the legacy form so downstream users invoke the canonical command.
If you maintain published documentation or community recipes, update examples to reduce future confusion.
If you must keep the legacy form temporarily (large mono-repos, third-party tooling), wrap your CI changes with a small compatibility test: run both the legacy and modern commands in a smoke test and assert equivalent output/exit status before completing the rollout. Prefer a timeboxed migration plan to remove the alias dependency and keep scripts predictable and future-proof.
Internal Data Flow: Rendering, Envelopes, Protocols, and Observability
Chapter Overview and How to Use This Internals Chapter
OpenClaw treats a message as a small pipeline: parse rich text into a structured intermediate representation (IR), split large bodies into chunks, render those chunks into channel-specific markup, wrap the rendered output in an envelope with delivery metadata (timestamps, timezone-aware formatting), validate and transmit frames using the Gateway protocol schemas, and finally emit UX signals and telemetry such as typing indicators and usage counters. Follow that pipeline when you need to implement or extend formatting, delivery, or observability: changes generally belong in one of the stages and should avoid crossing responsibilities (for example, do not inject channel-specific markup before IR chunking).
Why this ordering matters: the IR stage centralizes semantic structure (mentions, code fences, attachments, embeds) so every channel renderer can make consistent decisions about escape rules and capability fallbacks. Chunking occurs next because many channels have message-size or preview constraints; chunk boundaries must be decided before channel rendering so each chunk can be rendered independently. Envelopes and timezone-aware formatting are separate because timestamps and source metadata are delivery-layer concerns that must not alter the conversational IR. Protocol schema validation is last in the producer chain: it catches contract mistakes before the Gateway sends frames or persists events. Typing indicators and usage accounting are orthogonal signals derived from the run lifecycle and should be emitted where state transitions occur (run enqueue, start-of-stream, end-of-run).
Concrete extension points you will encounter later in this chapter:
markdownToIR(input: string): canonical parser that produces the Markdown IR. Implementations must preserve idempotent structure: mentions -> Mention nodes, code -> Code nodes, images -> Media nodes.
chunkMarkdownIR(ir, options): splits an IR tree into logical chunks using token/byte budgeting and identifierPolicy for session continuity.
renderMarkdownWithMarkers(chunk, channel, markers): per-channel renderer that accepts an IR chunk and marker hints (e.g., fallback alt text), and returns channel-safe markup plus structured attachments.
Envelope formatting options: envelope.timestamp formatting, timezone offset handling, and optional client-visible timezone display. Be careful: store timestamps in UTC; format for display at envelope emission time using the intended viewer timezone.
Protocol schema registry (TypeBox-driven): schemas for Gateway WS frames, request/response shapes, and event envelopes. Use pnpm protocol:check to validate local changes against the canonical registry during development.
TypingMode configuration: agents.defaults.typingMode and typingIntervalSeconds control how typing indicators are emitted (none, fixed-interval, progressive). The runtime emits typing events on run enqueue and stream progress.
Usage and /status hooks: counters for cacheRead/cacheWrite, token accounting per provider, and /usage snapshot endpoints. Usage hooks are called at provider response and on run completion to accumulate cost and token metrics.
Quick implementation checklist
Start by parsing into Markdown IR; confirm round-trip semantics for basic constructs.
Add chunking tuned to your target channels’ size limits.
Implement a renderer for each channel that consumes IR chunks and returns safe markup + attachments.
Wrap rendered output in an envelope; format timestamps from stored UTC and include timezone metadata as needed.
Validate outbound frames with the TypeBox schemas and run pnpm protocol:check in CI.
Wire typingMode and usage counters at run lifecycle boundaries, not inside renderers.
Warnings
Do not mix display-time timezone formatting into stored transcripts; use UTC internally and format only on delivery.
Failing schema validation is the canonical failure mode for protocol regressions—treat pnpm protocol:check failures as blocking.
Markdown Intermediate Representation and Channel Rendering
Agents and tools produce Markdown, but a Gateway must render that same content across platforms with different capabilities and APIs. OpenClaw solves this by parsing Markdown once into a small, shared intermediate representation (IR) that preserves the original source text and records formatting and link spans. Renderers then map that IR to the target channel format instead of reparsing Markdown per-channel.
Here is a tiny Markdown input used by agents and tools (illustrative text):
Hello **world** — see [docs](https://docs.openclaw.ai).The Markdown parser produces an IR object that separates text from annotated spans. Treat this JSON as the canonical IR structure (illustrative; produced by markdownToIR):
{
 "text": "Hello world — see docs.",
 "styles": [{ "start": 6, "end": 11, "style": "bold" }],
 "links": [{ "start": 19, "end": 23, "href": "https://docs.openclaw.ai" }]
}
Key IR rules and practical consequences
Single-source parse: Markdown is parsed once into IR (text + spans). Channel renderers read the IR, not the original Markdown, so behavior is consistent across channels and easier to test.
Offsets use UTF-16 code units. This is deliberate: Signal’s style ranges and some mobile APIs index in UTF-16. If you index using JavaScript code points or byte offsets you will misalign spans for characters outside the BMP (surrogate pairs). Think of UTF-16 like fixed-width “cells” for some APIs—counting must match the API’s unit.
Autolink is disabled during parse. The parser does not turn bare URLs into link spans. That avoids double-linking when channel renderers apply their own link formatting; renderers are responsible for rendering link spans according to channel rules.
Chunking and span preservation
Chunking happens on the IR.text, before rendering. That guarantees inline formatting spans are not accidentally split across chunks. When the text is split, spans that cross a chunk boundary are sliced into per-chunk spans; the renderer must reopen those styles at the start of the following chunk so visual formatting is continuous across deliveries (e.g., when gateway chunks long messages into multiple outbound pieces).
Per-channel rendering differences and gotchas
Slack: maps IR to mrkdwn tokens (preserve angle-bracket tokens like <...> for mentions/links). Slack requires special escaping rules; do not escape the entire rendered string blindly or you may break mentions.
Telegram: renders via HTML tags. Escape user content outside allowed tags; unescaped < or & will break rendering. Use the renderer helper that emits only safe tags for bold/italic/a/code.
Signal: cannot carry HTML—we render plain text and deliver an accompanying array of style ranges using UTF-16 offsets (hence the IR choice). Spoiler markers (||spoiler||) are parsed only for Signal and produce SPOILER style ranges; other channels treat them as literal text.
Tables: conversion is per-channel/account. Use one of three modes: code (convert tables into fenced code blocks), bullets (flatten rows into bullet lists), or off (leave Markdown tables untouched). Example config fragment:
channels:
 discord:
 markdown:
 tables: code
 accounts:
 work:
 markdown:
 tables: off
Checklist for adding or updating a renderer
Parse once: call markdownToIR(...) to obtain the IR.
Chunk: call chunkMarkdownIR(...) to split the IR.text while preserving and slicing spans.
Implement renderMarkdownWithMarkers(...) for the channel: map styles/links to the channel format, reopen sliced spans across chunks, and apply channel-specific escaping rules.
Wire the renderer into the channel outbound adapter and add delivery tests that exercise chunking.
Tests you must add
Preserve trailing newlines for fenced code blocks.
Validate UTF-16 offsets for Signal-style ranges (include surrogate-pair examples).
Ensure spoilers render as SPOILER ranges in Signal and as literal text elsewhere.
Verify links are not double-linked (autolink disabled by parser).
Warnings
Do not assume JS string index equals API index; always convert to UTF-16 offsets when producing Signal ranges.
Improper escaping can break Telegram HTML or neutralize Slack tokens; use channel helpers rather than raw replace.
Remember chunking occurs before rendering—implementations that chunk rendered text risk splitting inline markup.
Following this pipeline keeps formatting consistent, reduces per-channel parsing bugs, and makes tests straightforward: assert IR correctness once, then verify per-channel render outputs and delivery semantics.
Message Envelopes and Timezone Handling
OpenClaw records every inbound message inside a host-local envelope that supplies a compact, human-readable timestamp and minimal routing hints. That envelope is produced by the Gateway before the message reaches the agent or is stored in the session transcript; by default the timestamp carries minute precision so transcripts and model inputs have a stable, readable time anchor.
A typical raw envelope looks like this (illustrative text output that you will see in logs or transcripts):
[Provider... 2026-01-05 16:26 PST] message text
You can control how those envelopes are formatted via agents.defaults. The relevant configuration keys and allowed values are:
agents.defaults.envelopeTimezone: "utc" | "local" | "user" | any valid IANA timezone string (for example "America/Chicago"). "local" uses the host runtime timezone. "user" instructs OpenClaw to format the envelope using the workspace/user timezone (see agents.defaults.userTimezone below).
agents.defaults.envelopeTimestamp: "on" | "off" — whether to include the absolute timestamp portion.
agents.defaults.envelopeElapsed: "on" | "off" — whether to append an elapsed-time suffix like "+2m" for recent follow-ups.
A copy-pastable example that sets the three envelope options:
{
"agents": {
"defaults": {
"envelopeTimezone": "local",
"envelopeTimestamp": "on",
"envelopeElapsed": "on"
}
}
}Examples of envelope variants show how these settings look in practice.
Default local timezone formatting:
[Signal Alice +1555 2026-01-18 00:19 PST] helloFixed IANA/GMT-style timezone label:
[Signal Alice +1555 2026-01-18 06:19 GMT+1] helloElapsed suffix with ISO UTC timestamp (useful for precise logs and tooling):
[Signal Alice +1555 +2m 2026-01-18T05:19Z] follow-upTool integrations and provider adapters normalize provider timestamps. When you read from a tool, OpenClaw returns the provider's raw timestamp fields and also attaches two normalized fields for consistent downstream use:
timestampMs — epoch milliseconds in UTC (number).
timestampUtc — ISO 8601 UTC string (e.g., "2026-01-18T05:19:00Z").
For programmatic logic prefer timestampMs or timestampUtc rather than parsing the envelope text; they avoid ambiguity across providers and daylight-saving boundaries.
Set agents.defaults.userTimezone when you want the model to reason explicitly in a user's local timezone. Example:
{
"agents": {
"defaults": {
"userTimezone": "America/Chicago"
}
}
}Warning: choosing envelopeTimezone: "user" requires that agents.defaults.userTimezone be set. If userTimezone is unset and you request "user" formatting, OpenClaw will fall back to resolving the host timezone at runtime without modifying configuration — the envelope will still be generated, but it may not reflect the true user's preferred timezone.
Finally, the system prompt given to agents includes a "Current Date & Time" section that displays local time and timezone. That display respects agents.defaults.timeFormat, which can be "auto" (default), "12", or "24" to control am/pm versus 24-hour formatting. Choose "user" or an explicit IANA timezone when you need the agent to plan or schedule actions relative to the user's local clock; prefer host-local or UTC when transcripts must remain tied to the server's canonical timeline.
TypeBox Schemas and the Gateway WebSocket Protocol
Client and Gateway exchange a small set of well-typed frames: the client must open the conversation with a connect request, the server replies with a hello-ok, the server may then emit events, and the client may issue further requests. The sequence below shows the minimal handshake and a simple health probe.
Client Gateway
|---- req:connect -------->|
|<---- res:hello-ok --------|
|<---- event:tick ----------|
|---- req:health ---------->|
|<---- res:health ----------|A valid connect frame is strict JSON. Send this first; the Gateway will reject or ignore other frames until connect succeeds.
{
"type": "req",
"id": "c1",
"method": "connect",
"params": {
"minProtocol": 3,
"maxProtocol": 3,
"client": {
"id": "openclaw-macos",
"displayName": "macos",
"version": "1.0.0",
"platform": "macos 15.1",
"mode": "ui",
"instanceId": "A1B2"
}
}
}A successful hello-ok response contains protocol negotiation results, a conservative features list, and runtime policy hints. The "features" object advertises methods and events via listGatewayMethods()/GATEWAY_EVENTS but intentionally omits auxiliary helpers implemented by the server; treat it as a capability hint, not a complete API surface.
{
"type": "res",
"id": "c1",
"ok": true,
"payload": {
"type": "hello-ok",
"protocol": 3,
"server": { "version": "dev", "connId": "ws-1" },
"features": { "methods": ["health"], "events": ["tick"] },
"snapshot": {
"presence": [],
"health": {},
"stateVersion": { "presence": 0, "health": 0 },
"uptimeMs": 0
},
"policy": { "maxPayload": 1048576, "maxBufferedBytes": 1048576, "tickIntervalMs": 30000 }
}
}After connect you can request health:
{ "type": "req", "id": "r1", "method": "health" }And receive a response:
{ "type": "res", "id": "r1", "ok": true, "payload": { "ok": true } }Server events follow the event frame shape:
{ "type": "event", "event": "tick", "payload": { "ts": 1730000000 }, "seq": 12 }Minimal Node.js client (runnable) that performs connect then health. This example omits reconnection and robust error handling; use it as a starting template.
import { WebSocket } from "ws";
const ws = new WebSocket("ws://127.0.0.1:18789");
ws.on("open", () => {
ws.send(
JSON.stringify({
type: "req",
id: "c1",
method: "connect",
params: {
minProtocol: 3,
maxProtocol: 3,
client: {
id: "cli",
displayName: "example",
version: "dev",
platform: "node",
mode: "cli"
}
}
})
);
});
ws.on("message", (data) => {
const msg = JSON.parse(String(data));
if (msg.type === "res" && msg.id === "c1" && msg.ok) {
ws.send(JSON.stringify({ type: "req", id: "h1", method: "health" }));
}
if (msg.type === "res" && msg.id === "h1") {
console.log("health:", msg.payload);
ws.close();
}
});Schemas for all frame payloads live in TypeBox. TypeBox is the TypeScript-first source of truth: it generates JSON Schema, TypeScript Static<> types, and is compiled to AJV validators at runtime. Example TypeBox method schemas (illustrative):
export const SystemEchoParamsSchema = Type.Object(
{ text: NonEmptyString },
{ additionalProperties: false }
);
export const SystemEchoResultSchema = Type.Object(
{ ok: Type.Boolean(), text: NonEmptyString },
{ additionalProperties: false }
);Those schemas are exported into the protocol registry:
SystemEchoParams: SystemEchoParamsSchema,
SystemEchoResult: SystemEchoResultSchema,You obtain TypeScript types via Static<>:
export type SystemEchoParams = Static<typeof SystemEchoParamsSchema>;
export type SystemEchoResult = Static<typeof SystemEchoResultSchema>;At runtime compile AJV validators from the TypeBox schema and use them for inbound validation before handler logic touches the data:
export const validateSystemEchoParams = ajv.compile<SystemEchoParams>(SystemEchoParamsSchema);A request handler validates params and responds. Handlers are wired into the registry keyed by method name:
export const systemHandlers: GatewayRequestHandlers = {
"system.echo": ({ params, respond }) => {
const text = String(params.text ?? "");
respond(true, { ok: true, text });
}
};Developer pipeline: run generators and verify committed outputs with:
pnpm protocol:checkThis runs pnpm protocol:gen (produces dist/protocol.schema.json) and pnpm protocol:gen:swift (produces macOS Swift models) and ensures generated artifacts match source control.
Checklist — adding a new RPC:
Add TypeBox param/result schemas and export them in the protocol map.
Add Static<> aliases if you want compile-time types.
Run pnpm protocol:check and commit generated artifacts.
Implement and register the handler; validate params with AJV before use.
Add unit tests for schema validation, handler behavior, and a small integration test that performs connect → request → response.
Warnings: both client and server perform AJV validation. Never assume unvalidated payloads are safe; schema mismatches should be rejected with clear res frames. The features list in hello-ok is intentionally conservative—use it for capability discovery, not as a complete contract.
Typing Indicators: Modes, Interactions, and Overrides
OpenClaw decides when to show typing activity based on a small set of configuration keys and run-time signals. If you do not set a typingMode, the gateway preserves legacy behavior that treats direct and mentioned group chats more aggressively than other group contexts: direct chats and group chats where the agent is explicitly mentioned cause typing to start immediately; group chats without a mention begin typing only when the agent begins streaming message text. Heartbeat or housekeeping runs never emit typing.
Choose an explicit typingMode to remove ambiguity. Set agents.defaults.typingMode to one of these four values: "never", "message", "thinking", or "instant". The ordering below describes how early typing can fire (earliest → latest):
never → message → thinking → instant
never: never show typing.
message: start typing when message text begins streaming from the run (but see the silent-reply caveat below).
thinking: begin typing only when the run emits reasoning deltas (requires streaming reasoning; see next section).
instant: always show typing immediately as the run starts.
Example: set the agent-global typing behavior and the refresh cadence. This is a JSON configuration snippet suitable for your agents.defaults block.
{
"agent": {
"typingMode": "thinking",
"typingIntervalSeconds": 6
}
}Thinking mode has a concrete dependency: it only triggers typing when the run produces reasoning deltas. That behavior requires the run to emit deltas (for example, the provider or runtime must be configured with reasoningLevel: "stream"). If your model or provider does not stream reasoning information, thinking mode will not start typing at all.
Message-mode suppression for silent-only replies Message mode normally begins typing when message text streams. However, if the outgoing payload is exactly the configured silent token (case-insensitive exact match), OpenClaw suppresses typing for that reply. This prevents ephemeral “typing” when the agent’s reply intentionally contains only a silent marker. Ensure your silent token handling uses exact token strings and remember the match is case-insensitive.
Typing indicator refresh cadence typingIntervalSeconds controls how frequently the gateway refreshes the typing indicator once it’s active; it does not affect when typing starts. The default is 6 seconds. You can override both mode and interval at the session level to tailor UX for long-running flows.
Example: a session override (JSON) that forces message-mode and shortens the refresh tick.
{
"session": {
"typingMode": "message",
"typingIntervalSeconds": 4
}
}Operational notes and quick checklist
If typing never appears: check agents.defaults.typingMode and any session-level override; ensure the session hasn’t set typingMode:"never".
If thinking mode never starts: verify the run emits reasoning deltas (set reasoningLevel:"stream" where applicable) and confirm your provider supports streaming those deltas.
If typing appears but you expect silence: confirm the reply payload is not the silent token (case-insensitive exact match).
Test both direct chats and group chats; legacy default behaviour treats mention-starts and direct chats differently from unmentioned group chats.
Remember heartbeat/maintenance runs intentionally disable typing.
Use explicit typingMode and per-session overrides to get predictable UX across channels and to avoid surprising typing bursts in group conversations.
Provider Usage Tracking and Display
OpenClaw treats provider-reported usage as authoritative: it polls whatever usage or quota endpoints a provider exposes and surfaces that data directly to users. It does not try to infer or estimate dollar costs from token counts or from other signals; if you need cost estimation, do it outside the Gateway or add a provider-specific estimator that you control. This design keeps the Gateway’s usage UI tied to what the provider actually knows about the account and avoids accidental misbilling advice.
Provider adapters may report usage in different shapes: some return "consumed" counts, some return "remaining" quota, and others provide a raw window or token balance. OpenClaw normalizes those variants into a single, human-friendly presentation: an X% left window. The X% is computed from the provider-supplied fields, not from derived estimates. When a provider reports both total and used, OpenClaw calculates percent-left = max(0, min(100, (total - used) / total * 100)). When the provider supplies only "remaining" or a window value, OpenClaw maps that to the same percent-left semantics so the UI always shows a consistent "X% left" indicator.
You will see usage surfaced in three primary places:
In-chat quick status commands: slash-style or message commands such as /status, /usage, and /usage cost return the normalized percent window and the raw fields when available.
CLI and machine-friendly outputs: openclaw status --usage and related commands include the percent-left and the provider raw fields in JSON mode (use --json to capture raw provider fields).
macOS menu bar and Control UI: when a provider supports a usage push or when periodic polling is enabled, the menu bar shows the percent-left and a short tooltip with provider name and last-updated timestamp.
Credential resolution interacts with usage reporting. OpenClaw prefers an auth-profile (OAuth/token stored in auth-profiles.json or equivalent provider auth storage). If no auth-profile exists, it falls back to environment variables or explicit config keys. Implementers: ensure your provider adapter retrieves credentials using the same resolution order so usage queries are performed against the same effective identity that the Gateway uses for requests and billing. This avoids surprises where the displayed usage belongs to a different credential than the one actually being used for API calls.
Warning: providers are inconsistent. Some vendors (notably certain lightweight or private providers) invert percent semantics — for example an upstream "usagePercent" field might actually represent percent remaining rather than percent used. Verify provider semantics and add a small adapter-level conversion if needed. For integrators adding a new provider adapter, expose a usage() method that returns both raw provider fields and a canonical percentLeft number; let the Gateway’s usage-normalization layer prefer adapter-supplied normalization when available and fall back to generic computations otherwise.
Bringing It Together: Extension Checklist and Troubleshooting Pointers
Make a small, repeatable plan for each change you might make. The following checklists are ordered so you can edit, validate, and roll back safely. Each checklist ends with one or two minimal tests you can run locally to catch the common mistakes described earlier.
Channel renderer (add or modify)
Update renderer implementation and registration: place code under your plugin or built-in renderer module and call api.registerChannelRenderer(...) with the same renderer id and capability shape.
Respect Markdown IR → channel renderer contract: accept the Markdown IR node shapes and return the channel-native formatted string (or an array of parts for rich channels).
Add unit tests that convert representative Markdown IR nodes (links, code blocks, inline styles, images) and assert expected outputs for the target platform.
Deploy to a dev Gateway: openclaw gateway restart (or run gateway:watch in dev).
Minimal validation tests:
Run the renderer unit tests.
Send a small test message through the Gateway (via the Control UI or a test client) and verify the rendered output appears correctly in the target channel or transcript.
Envelope and timezone changes (timestamps, timezone formatting)
Keep the envelope structure stable: preserve envelope.timestamp, envelope.tz (if present), and the canonical ISO timestamp format used in transcripts.
When changing timezone display or normalization rules, update both: (a) envelope formatting code (for outgoing messages and logs) and (b) session write path so persisted transcripts remain parsable.
Add a migration or compatibility check if you change the persisted timestamp shape.
Minimal validation tests:
Restart Gateway (openclaw gateway restart) and send messages from clients in different timezones; inspect ~/.openclaw/agents/<agentId>/sessions/<sessionId>.jsonl and confirm timestamps are ISO and consistent.
Use openclaw doctor to ensure no config diagnostics report timestamp/schema errors.
Protocol method additions (Gateway WS / HTTP RPC)
Add TypeBox schema for the new request and response types; register the schema in the protocol catalog.
Implement handler wired into the Gateway frame router and ensure AJV validation runs in the handler path.
Run the repository protocol verifier: pnpm protocol:check (this validates schema changes and regenerates protocol artifacts).
Minimal validation tests:
Run pnpm protocol:check locally and fix any schema mismatches.
Start a dev Gateway and exercise the method via a WS client; assert the request/responses pass validation and appear in logs.
Typing indicator changes (UX signals)
Configure agents.defaults.typingMode and typingIntervalSeconds in config; ensure channel renderers and client adapters honor typing start/stop events.
If changing emit cadence, keep the throttle/jitter rules conservative to avoid flooding channels.
Minimal validation tests:
Update config, restart Gateway, and trigger a long-running response; observe typing start/stop events in the Control UI or paired client.
Verify typing events are present in Gateway logs and do not exceed configured rate limits.
Usage adapter / telemetry changes (token counts, cost)
Add adapter that implements /usage footprint snapshots and emits the same footprint envelope used by existing providers.
Ensure token-count math follows the canonical provider model ref (provider/model) and that /usage exposes tokens and cost fields expected by the dashboard.
Minimal validation tests:
Run a few model calls under the dev Gateway and confirm /status and /usage endpoints include your adapter’s data.
Validate ingestion in any downstream dashboards or tests that expect the numeric fields.
Final warnings and CI guardrails
Do not commit regenerated protocol artifacts lightly. Always run pnpm protocol:check after changing schemas, commit the generated artifacts, and include protocol:check in CI so schema drift is rejected early.
When changing persisted formats (transcripts, envelopes), add a compatibility test and back up state (~/.openclaw) before deploying to production.
Use openclaw doctor after restarting the Gateway to catch common runtime misconfigurations before users notice regressions.
Project Credits, Naming, and Legal Attribution
Why This Project Is Named OpenClaw
The name OpenClaw is a portmanteau: CLAW + TARDIS. It deliberately evokes the idea of a compact, service-like machine that moves through time and space—playfully imagined as a “time-and-space machine for a space lobster.” The intent is mnemonic and light-hearted rather than literal: the brand signals a gateway that connects many timelines of conversation, tooling, and channels while remaining concise and distinctive.
That playful origin informs the project's tone: helpful, slightly whimsical, and focused on extensibility and portability. The name is intended to be memorable for operators and contributors, and to provide a common emblem for documentation, tooling, and the mascot artwork that sometimes appears in the project’s README and credits.
Below is a compact credits summary and guidance for locating the authoritative roster and legal details.
Credits (summary)
Core contributor roles are reflected here; the full, authoritative list of collaborators and their affiliations is maintained in the repository’s CONTRIBUTORS.md and in project release notes.
High-level roles you will find in the roster:
Maintainers: gatekeepers of releases, CI, and project direction.
Core engineers: implement runtime, agents, tooling, and provider integrations.
Docs and UX: author documentation, onboarding flows, and dashboard assets.
Community and triage: handle issues, community plugins, and support.
Third‑party contributors: plugins, providers, and community extensions.
Quick reference (where to find more)
For the up-to-date contributor list and per-release acknowledgements: see CONTRIBUTORS.md and the release notes for each tag.
Release cadence and lane definitions are documented in the Release Policy (Chapter 39). Consult that chapter for versioning, attribution per-release, and the stable/beta/dev release lanes.
Scheduling and timezone coordination guidance used by the project’s CI and release maintainers is recorded in the project’s contributor/coordination docs (see CONTRIBUTING.md or the repository’s scheduling notes).
Legal & short quote
License: The project is released under the license declared at the repository root (LICENSE). Always confirm the LICENSE file in the source tree for the precise terms that apply to your copy or fork.
Short project quote often shown in credits: “A small gateway with wide reach.” This is an informal tagline used in documentation headers and is not a legal statement.
Warning about license assumptions
Do not assume third‑party plugins or bundled assets inherit the project's main license. Many plugins, provider integrations, or artwork have independent licensing. Always check the license declared with each plugin or asset before reuse or redistribution.
Where to go next
If you want operational detail about release timing, version tags, and promotion rules, read Chapter 39, Release Policy. For contributor onboarding and timezone/scheduling notes, consult CONTRIBUTING.md and the project’s coordination documents in the repository.
Core Contributors and Roles
A concise, authoritative roster makes it easy to credit the people and ideas behind OpenClaw without implying formal job assignments. The short role descriptions that follow are informal attributions of contribution and responsibility: they name who drove particular features, experiments, or design directions, and they are not a substitute for corporate titles, legal responsibility, or operational on-call ownership.
Project name and mascot The project's name and mascot grew from an inside joke: “Clawd” — the space lobster — became the playful identity around which the project coalesced and eventually inspired the name OpenClaw. That informal origin reflects the project’s culture: pragmatic engineering with a streak of humor.
Core contributors (compact roster)
Peter Steinberger (@steipete) — lobster whisperer. Credited as the creator and a primary originator of the project vision and initial codebase.
Mario Zechner (@badlogicc) — Pi creator, security pen tester. Credited for the Pi companion concept and early security-oriented hardening and testing.
Clawd — The space lobster who demanded a better name. The mascot and naming inspiration; a cultural touchstone rather than an individual contributor.
Maxim Vovshin (@Hyaxia) — Blogwatcher skill. Credited for the Blogwatcher skill contribution.
Nacho Iacovino (@nachoiacovino) — Location parsing (Telegram and WhatsApp). Credited for location-parsing work and channel-specific parsing improvements.
Vincent Koc (@vincentkoc) — Agents, Telemetry, Hooks, Security. Credited for substantial work on agents, telemetry pipelines, hooks, and security-related features.
How to read this roster Each entry is one sentence and intentionally terse for quick scanning. The handle in parentheses is the contributor’s public alias used in project discussions and commits. The short role string that follows is a compact attribution of contribution area; it is not a legal assignment of responsibility and should not be used as evidence of authority for operations, security decisions, or licensing disputes.
Warning about informal attributions These role descriptions are informal and concise by design. They are intended to acknowledge and point readers to who contributed core ideas and components, not to document formal ownership, liability, or operational on-call responsibilities. For any legal, security, or operational question, consult the repository’s governance documents (CONTRIBUTING.md, CODEOFCONDUCT.md) and the project’s LICENSE file.
Licensing and further attributions The project’s license and full contributor list live in the project repository. Consult the top-level LICENSE and contributors or AUTHORS files for the canonical legal text and an exhaustive contributor history. If you need to quote, redistribute, or fork the project for a commercial product, rely on the LICENSE file for the authoritative license text.
Cross-references and next steps
Release policy and versioning: see Release Policy (chapter 39) for release lanes, tag conventions, and versioning semantics used by the project.
Timezone and contributor coordination: consult CONTRIBUTING.md for guidance on timezone conventions, preferred working hours, and synchronous vs. asynchronous coordination practices when interacting with core contributors.
Legal and governance: consult LICENSE and CONTRIBUTING.md for legal usage, attribution requirements, and procedures for adding or removing contributors.
If you need to contact a credited contributor about a specific feature, search the project’s issue tracker, pull request history, or commit log to find the relevant discussion thread; those artifacts provide the operational context and rationale behind the credited work.
License, Quote, and Related References
OpenClaw is released under the MIT License.
That statement is definitive here; it does not interpret the license or provide legal advice. For the authoritative, current license text and any contributor license agreement references, check the repository root (LICENSE) and project CONTRIBUTING or legal files before relying on the license for redistribution or commercial decisions. Warning: license terms and contributor agreements in the repository are the legal source — do not assume this summary replaces them.
A short, lightly tongue-in-cheek line that appears in the project's credits is reproduced here for historical and cultural context: “We are all just playing with our own prompts.” — (An AI, probably high on tokens)
This quote is optional flavor included in the original credits material; it is not a technical claim and is reproduced exactly as an attribution of the original text.
Related documentation referenced by the Credits section
Timezones — consult the project’s Timezones documentation for guidance on timestamp handling, scheduling behavior, and cron/heartbeat coordination across deployments. This material clarifies how the Gateway records and displays times and how jobs are scheduled in multi-region setups.
Release Policy (see Release Policy, ch039) — describes release lanes (stable, beta, dev), tag conventions, and the CI gating and promotion rules used by the project. Refer to that chapter when planning upgrades, pinning versions, or following the project’s update cadence.
If you need to cite or redistribute OpenClaw, point people to the repository’s LICENSE file and to the Release Policy chapter for versioning expectations. If contributors or organizations require a signed contributor agreement, check the repository for any Contributor License Agreement (CLA) or DCO references before accepting or submitting code.
Release Lanes, Branching, and CI Test Gating
Release lanes, version tags, and naming conventions
Releases are split into three public lanes—stable, beta, and dev—and each lane has clear semantics for versioning, publishing, and downstream packaging. Treat the lane as the primary signal for consumers and automation: stable means a published, supportable build; beta is a prerelease for validation; dev is a rolling integration snapshot.
Version and tag rules
Stable versions use a calendar-style format: YYYY.M.D and are tagged in git as vYYYY.M.D (for example v2026.5.12). Do not zero-pad month or day (write 2026.5.9, not 2026.05.09). If a post-release correction is required, append a numeric correction suffix: YYYY.M.D-N (for example v2026.5.12-1). Beta prereleases use the pattern YYYY.M.D-beta.N (for example 2026.5.12-beta.1).
Git tags are treated as a source-of-truth snapshot. Avoid rewriting or force-pushing tags; use the correction-suffix pattern for any post-publish fixes so consumers and package registries see a monotonic, auditable history.
Publishing and dist-tags
Stable releases publish the npm package and the macOS app as a coordinated ship when possible. By default, stable npm releases are published with the beta dist-tag on npm unless the release workflow explicitly targets the latest tag. This default protects users from accidental immediate promotion while enabling controlled promotion to npm latest.
Beta lane artifacts are published as prerelease npm packages (beta dist-tag). In normal practice, the npm beta publish happens first for validation. Building, signing, and notarizing the macOS app is reserved for stable releases unless maintainers request a special beta mac build.
Release cadence and branching practice
The project follows a beta-first cadence: a stable release must be cut only after the corresponding beta has completed validation. This reduces the risk that a release jumps directly to stable without real-world checks.
Maintainers normally create a release/YYYY.M.D branch from main for each stable candidate. That branch is the working area for release validation and any release-specific fixes; it lets main keep accepting new development without blocking the release flow.
Validation and runner placement
Non-mutating validation jobs and heavier checks can run on larger Blacksmith Linux runners. The actual publish and promotion steps (which mutate npm dist-tags and create signed macOS artifacts) are executed on GitHub-hosted runners to keep credential handling centralized and auditable.
The automated validation workflow runs a live test command that requires provider secrets: it runs OPENCLAWLIVETEST=1 OPENCLAWLIVECACHETEST=1 pnpm test:live:cache and uses both OPENAIAPIKEY and ANTHROPICAPI_KEY from workflow secrets to exercise multi-provider behavior.
CI test commands operators should know
pnpm test:force — kills any lingering gateway processes that hold the default control port, then runs the full Vitest suite on an isolated gateway port (useful when port contention or stale processes cause flaky failures).
There are dedicated pnpm targets for channels, extensions, performance import profiling, changed-mode benchmarking, and CPU/heap profiling of runner and main thread; use these focused targets when your change affects a specific subsystem.
Warning: releases are visible and consumable as soon as they are promoted. Prefer the beta-first flow and branch-based release validation to avoid needing tag rewrites. When a fix is required after a tag is published, create a corrected release with the -N suffix rather than force-updating an existing tag.
Branching model and how maintainers cut releases
Keep work on main flowing while you validate and polish a release by cutting an immutable release branch. The practical pattern OpenClaw maintainers use is to create a release/YYYY.M.D branch off main for each public stable release. That branch is the place to land last-minute release fixes, run the full validation suite, and iterate on preflight failures without blocking ongoing development on main.
Why a release branch? It decouples release validation from ongoing merging. CI runs, secrets, and workflow logic are scoped to trusted refs; by operating from a controlled release branch you can (a) reproduce the exact commit being validated, (b) push follow-up commits to fix preflight failures, and (c) keep main open for new work.
Key constraints for dispatching release checks
Only two workflow refs are allowed to dispatch release checks and promotions: the main workflow ref or a release/YYYY.M.D workflow ref. This keeps which runners and secrets can run release-critical logic under administrative control.
Do not attempt to promote or publish from arbitrary forks, tags on forks, or detached refs. Use protected branches and repository-level protections so only intended refs may trigger publish workflows.
Validation-only commit-SHA mode (how and why) The CI accepts either a release tag or a full 40-character workflow-branch commit SHA as an input to the validation pipeline. The SHA path exists to let maintainers validate a specific build without pushing a tag. Important constraints on this mode:
The workflow only accepts the current workflow-branch HEAD when supplied as a 40-char SHA. If you point the workflow at an older commit SHA from the branch, it will run validation but treat it as validation-only: such runs cannot be promoted into a real npm publish.
The SHA path is explicitly validation-only. It lets you run the full preflight (tests, lint, integration checks) without creating a tag or incrementing the published version. This is useful for reproducing failures, long-running live checks, or gating a build candidate before tagging.
Preflight-then-promote publish model Publishing to npm uses a two-step, auditable flow:
Run a preflight which produces a preflightrunid. The preflight performs full validation: tests, packaging checks, live provider smoke tests when applicable.
A later promote/publish action is permitted only if it references the same main or release/YYYY.M.D branch that produced the successful preflightrunid. In other words, promotion requires provenance: the publish must originate from the same trusted ref that passed preflight.
Operational checklist for maintainers
Create release branch: git checkout -b release/YYYY.M.D main
Push the branch and run preflight: dispatch the preflight workflow from the release branch (or run the SHA validation if you prefer not to tag yet)
Iterate fixes on the release branch until preflightrunid is green
Promote/publish only from the same main or release branch that produced the successful preflightrunid
Warning: Secrets and accidental promotions Never permit untrusted refs to run promotion jobs. Detached-SHA or fork-triggered workflows must be limited to validation-only and not hold publish secrets. Configure protected branches, required approvals, and runner/secret scoping to prevent accidental or malicious publishes.
Preflight checks and artifact requirements
A release must validate types, architecture constraints, and that the built artifacts match what npm will publish. Keep the short npm publish path tightly focused on artifacts and deterministic checks; run the slower, live/runtime checks separately so they don't block publishing.
Run these local preflight steps, in order, before attempting a tagged release or opening a release PR:
Verify types and static architecture/import-cycle rules:
pnpm check:test-types
pnpm check:architectureThese checks catch type regressions and import/architecture violations early, outside the faster publish gate.
Produce the distributable bundles that npm will publish:
pnpm build && pnpm ui:buildEnsure dist/* and the Control UI bundle exist. The release pack validation reads the on-disk artifacts, so a successful build is required before validating the package layout.
Run the repository release checks that look at the built artifacts:
pnpm release:checkThis command is required before every tagged release. The release checks are executed in CI via a manual workflow named "OpenClaw Release Checks" and must pass in CI even though they are separately gated from publish.
The release validation model is intentionally split. The npm publish path is kept short and artifact-focused so maintainers can perform a quick, low-latency publish after local preflight. Slower live checks—cross-OS install verification, runtime upgrades, and token-based dist-tag mutation—run in a separate workflow on special runners and do not block the actual npm publish step. Cross-OS and runtime validation are dispatched from a private workflow which invokes a reusable public workflow; that private workflow lives under the repository's private release workflows and calls the public reusable workflow for cross-OS checks.
Before approval (i.e., as the final local gate), run the RELEASE_TAG-based npm preflight script so the published package will be validated against the intended tag:
RELEASE_TAG=vYYYY.M.D node --import tsx scripts/openclaw-npm-release-check.tsThis script performs non-mutating checks keyed to the tag. The npm publish preflight no longer waits on the separate release-checks lane.
After you run npm publish, always verify the published tarball can be installed from the registry in a clean environment. Run the post-publish verification:
node --import tsx scripts/openclaw-npm-postpublish-verify.ts YYYY.M.DThis script installs the just-published package into a temporary prefix and validates the install path, ensuring the published artifacts and entrypoints behave as expected.
Operational warnings and runner guidance:
Token-based npm dist-tag mutation and promotion logic is implemented in the private release workflows; sensitive token mutations must run on GitHub-hosted runners with appropriate secrets. Non-mutating, heavier runtime checks may run on larger private runners.
Never run publish/promotion steps from untrusted forks or runners because they require elevated tokens. Use the private workflow and the documented RELEASE_TAG/postpublish scripts for reproducible verification.
CI test lanes, change-aware sharding, and shard timing
Keep CI work proportional to the change. The repository scopes test work by turning a git diff into a set of architectural "lanes" and then running only the relevant Vitest projects. That keeps fast feedback for small edits and reserves heavyweight suites for changes touching core runtime or configuration.
Use pnpm changed:lanes to see what CI will run for a branch. It compares your branch against origin/main and prints the architectural lanes implied by the changed files. For a quick local check run:
pnpm changed:lanes
This helps you predict CI cost before you push.
The core gating commands are pnpm test:changed and pnpm check:changed. pnpm test:changed expands changed git paths into scoped Vitest lanes when the diff touches routable source or test files; for example, a change to src/plugins/plugin-sdk/* will map to the plugin-sdk light lane instead of the full runtime suite. If your change touches repository configuration or setup files (build scripts, root config, workspace manifests), the tooling conservatively falls back to running the native root projects (the full set), because config changes can affect many lanes.
pnpm check:changed is a smart preflight gate used by CI to decide which lanes to run. Locally you can run:
pnpm check:changed
It will scope the work to relevant lanes (core, extensions, typecheck/tests, etc.) and will fail fast if a mandatory lane is missing or if the change requires root-level verification.
pnpm test: is the general test entry. If you pass explicit file or directory targets to pnpm test:, those targets are routed through the corresponding scoped Vitest lanes, so you can exercise a single project efficiently. Untargeted pnpm test runs the fixed shard groups: the repo’s shard grouping expands to leaf configs so the test runner can execute shards in parallel across runners. This is the behavior the CI relies on for balanced parallelism.
Shard balancing is self-adjusting. Full and extension shard runs record local timing data into update.artifacts/vitest-shard-timings.json; CI uses this artifact to place slow tests across different shards so total wall time is reduced. If you want to ignore those timings (for debugging or reproducible shard layout), set:
OPENCLAWTESTPROJECTS_TIMINGS=0
before running the shard updates; that disables writing/consuming the timing artifact.
Some test families are intentionally light-weight. Files under plugin-sdk and many commands tests route to dedicated light lanes so helper edits (documentation, small plugin changes) avoid rerunning heavy, runtime-backed suites. As an operator or maintainer, this mapping explains why a tiny change in a plugin triggers a tiny job while touching agent core files triggers the heavy lanes.
Two Vitest defaults matter for how these lanes run in parallel: pool is set to "threads" and isolate is false. That enables a shared, non-isolated runner across repo configs and avoids per-test-process costs while still giving strong parallelism.
Operational benefit: change-aware scoping reduces runner consumption, gives faster feedback on trivial edits, and produces more predictable CI run times because slow tests are spread using real timing data. If CI behavior looks unexpected, first run pnpm changed:lanes and pnpm check:changed locally to confirm the lanes the system derives from your diff.
Gateway, live provider, and Docker integration tests
Gateway and provider integration tests are intentionally opt-in. They exercise live networking, provider APIs, and multi-process behavior that fast unit suites avoid. Use them when validating releases or reproducing issues that only appear with real models, WebSocket multiplexing, or paired nodes.
Enable gateway integration tests by setting OPENCLAWTESTINCLUDE_GATEWAY=1 when invoking the test runner. You can add that environment variable to a normal run of the test suite or call the focused gateway target:
# include gateway tests in the normal test run
OPENCLAW_TEST_INCLUDE_GATEWAY=1 pnpm test
# or run the dedicated gateway test target (also gated by the same env)
OPENCLAW_TEST_INCLUDE_GATEWAY=1 pnpm test:gatewayEnd-to-end gateway smoke tests that bring up multiple Gateway instances, exercise the WS/HTTP multiplexing and node pairing use pnpm test:e2e. Two knobs help tune these runs: OPENCLAWE2EWORKERS sets the number of parallel workers, and OPENCLAWE2EVERBOSE enables more verbose logging useful for debugging failing flows.
Live provider tests are more sensitive: they require real provider credentials and explicit opt-in to avoid accidental runs that burn quota. The test runner skips live tests by default. To unskip and run provider-backed integration tests, set LIVE=1 (or use a provider-specific environment flag like PROVIDERNAMELIVETEST=1) and ensure the required API keys are present in the environment. The repository also recognizes OPENCLAWLIVETEST and OPENCLAWLIVECACHE_TEST for validation runs that interact with provider caching behavior. Example:
Populate provider credentials in your shell (e.g., export OPENAIAPIKEY=...).
Opt into live execution: LIVE=1 pnpm test:live
pnpm test:live will fail if provider credentials are missing or if a provider-specific live flag remains unset. Treat these runs as destructive from a quota and cost perspective.
Docker-based test lanes bring a full, proxied Gateway+UI stack into a container environment and are used for end-to-end onboarding and QR/pairing flows. One maintained onboarding helper script orchestrates those Docker flows; it is intended to be invoked by maintainers or CI that has appropriate images and keys. The repository exposes both raw scripts and pnpm shortcuts for common flows. The onboarding script referenced by the Docker lanes is:
scripts/e2e/onboard-docker.shA convenient pnpm alias exists to run the Docker QR flow locally:
pnpm test:docker:qrThere is also a pnpm test:docker:openwebui lane that starts a Dockerized OpenClaw and an external Open WebUI image, performs a sign-in against the UI, verifies /api/models, and exercises a proxied chat through /api/chat/completions. These Docker lanes require Docker running locally, a valid live model key, and network access to pull the external Open WebUI image; they will fail if any prerequisite is missing.
Warning: these heavier lanes can consume provider quota, start privileged containers, and alter state. Run them in a controlled environment with correct credentials and, when appropriate, isolated Docker networks or throwaway workspaces. Keep these tests out of default pre-merge runs; they are intended for release validation, maintainers' checks, and targeted troubleshooting.
Vendoring Device Models and Building RPC Adapters
What this chapter covers
OpenClaw needs two small but critical guarantees: reproducible device-name data for companion apps, and robust, observable adapters for integrating external tooling. This chapter solves those problems by (1) vendoring the macOS device-model JSON so builds are deterministic, auditable, and offline-verifiable; and (2) documenting the two canonical adapter patterns OpenClaw expects — an HTTP daemon adapter and a stdio child adapter — including the minimal RPC surface, lifecycle expectations, and operational hardening.
Why vendored device data matters
Apple model identifiers (e.g., MacBookPro15,2) are raw and change over time. The macOS companion maps these to friendly names using an upstream device-model JSON. If that JSON is fetched at build or runtime from an ever-moving upstream, releases become non-deterministic and builds can break when the upstream format changes.
Vendoring pins the JSON to a specific commit/URL in source control. That makes macOS builds reproducible, enables checksum verification, and simplifies audits when users ask which device-name mapping produced a given build.
Practical vendoring workflow (overview)
Fetch the upstream JSON at a known commit (curl + raw URL), store it under your repo (e.g., resources/vendored/devices.json), and commit the file with the upstream commit hash recorded in the commit message or a metadata file.
Verify locally: run the macOS build (swift toolchain) or a lightweight lookup script that loads resources/vendored/devices.json and maps a few representative model IDs.
On update: choose a target upstream commit, fetch, checksum (sha256), run the lookup tests, and then commit. Record the upstream commit and checksum so future reviewers can verify provenance.
Tooling required: network access to fetch upstream, curl/git for pinning, and the Swift/Xcode toolchain to build and verify the macOS app. Keep the vendored file small and documented; do not rely on runtime remote fetch in production builds.
Two RPC adapter patterns OpenClaw integrates external CLIs and services using JSON-RPC; two patterns cover most needs:
HTTP daemon adapter (Pattern A)
Adapter runs as a long-lived HTTP(S) daemon exposing a minimal JSON-RPC-compatible HTTP API and health endpoints. It may use SSE for server events.
Use when the external tool is naturally server-like, needs connection reuse, or exposes long-lived sessions (browsers, device daemons).
Expectations: /health endpoint, graceful shutdown on SIGTERM, request timeouts, idempotent endpoints for retries, structured JSON logging, and backpressure-aware request handling.
stdio child-process adapter (Pattern B)
OpenClaw launches the adapter as a child process and communicates over stdin/stdout with framed JSON-RPC messages.
Use for CLI utilities, language runtimes, or adapters that are simpler to author as single-process programs.
Expectations: strict framing (one JSON message per line or length-prefixed), deterministic exit codes (0 success, non-zero failure), and well-defined reconnection behavior when the child dies.
Core RPC surface (implement or map)
runEmbeddedPiAgent / subscribeEmbeddedPiSession / createAgentSession: session lifecycle and short-lived execution hooks.
sessions_spawn: spawn sub-agents or background work.
plugins.registerProvider, api.registerTool, api.registerChannel: capability registration hooks for adapters that provide providers, tools, or channels.
Gateway WebSocket API: req/res/event frames and connect handshake are the canonical framing model; adapters that bridge to the Gateway should respect these semantics.
Adapter lifecycle and resiliency checklist
Health: expose /health or respond to a ping RPC; Gateway and supervisors probe it.
Startup: fail fast on config errors; log provenance/version/commit.
Backoff: implement exponential retry with jitter for upstream calls; cap retries and surface failures.
Shutdown: handle SIGTERM gracefully, drain inflight work, and exit with clear codes.
Observability: structured logs (JSON), metrics (uptime, error counts, request duration), and traceable request IDs.
Security: validate and sanitize inputs, use least-privilege credentials, and prefer loopback-only binding unless a proxy is required.
How the rest of the chapter maps to tasks
Vendoring: step-by-step fetch, pin, checksum, commit, and verify in the macOS build.
Adapter implementation: example HTTP daemon and stdio child reference skeletons, mapping of required RPC methods, and framing examples.
Hardening: supervisory patterns, restart semantics, and operational runbook snippets for diagnosing adapter failures.
With these guarantees in place you get deterministic companion builds and adapters that fail in predictable, observable ways — both are essential for stable production Gateway deployments. The following sections walk through the vendoring commands and two concrete adapter skeletons with runnable examples and verification steps.
Vendoring Apple device identifiers for the macOS app
The macOS companion app resolves raw Apple model identifiers (for example, MacBookPro16,1 or iPhone12,3) into human‑readable device names by shipping a small, vendored database of JSON files. Vendoring ensures builds are deterministic, avoids runtime dependency on an external API, and makes the app reproducible and auditable: the exact upstream commit used is recorded in the repository and the files live under the app resources folder so the Swift package embeds them at build time.
Where the files live
Destination path in the repository: apps/macos/Sources/OpenClaw/Resources/DeviceModels/
Two files are used: ios-device-identifiers.json and mac-device-identifiers.json
Upstream source and license The data is sourced from the MIT‑licensed repository kyle-seongwoo-jun/apple-device-identifiers. Because the project is MIT licensed, include or confirm the upstream LICENSE alongside the JSON files so your vendored copy retains the correct attribution in the repo.
How to update (copy-paste recipe) The following shell snippet is a copy-pasteable recipe to pin and fetch specific upstream commits. Treat the two variables as the commit SHAs you want to pin. This is runnable shell (curl) intended to write the JSON files directly into the macOS app resources directory.
IOS_COMMIT="<commit sha for ios-device-identifiers.json>"
MAC_COMMIT="<commit sha for mac-device-identifiers.json>"
curl -fsSL "https://raw.githubusercontent.com/kyle-seongwoo-jun/apple-device-identifiers/${IOS_COMMIT}/ios-device-identifiers.json" \
-o apps/macos/Sources/OpenClaw/Resources/DeviceModels/ios-device-identifiers.json
curl -fsSL "https://raw.githubusercontent.com/kyle-seongwoo-jun/apple-device-identifiers/${MAC_COMMIT}/mac-device-identifiers.json" \
-o apps/macos/Sources/OpenClaw/Resources/DeviceModels/mac-device-identifiers.jsonWhy pin commit SHAs Pointing to a commit SHA (not a branch or tag) guarantees the exact bytes you fetch will remain the same later. That prevents upstream drift: future changes in the remote repository cannot silently change names or formats used by your build. Record the SHAs in the repository’s CHANGELOG or a nearby README so another developer can reproduce the exact state.
Verify the LICENSE After fetching the JSON files, fetch the upstream LICENSE file from the same repository and commit it alongside your vendored data, or at minimum check that the upstream file declares the MIT license. This preserves attribution and confirms you’re allowed to redistribute the data.
Build verification Run a local Swift package build to make sure embedding the resources produces no compile-time warnings or errors:
swift build --package-path apps/macosWhat swift build verifies
The Resource bundle is found and packaged by the SwiftPM target.
There are no JSON parsing or resource path assumptions in code that would break because of a different content layout.
Typical errors you might see:
"Resource not found" — indicates wrong destination path; confirm files exist at apps/macos/Sources/OpenClaw/Resources/DeviceModels/.
Swift compile warnings about unexpected resource content are rare, but treat any warnings as potential future breakage; resolve by inspecting code that reads the JSON files.
If the package target fails to find the files, confirm they are staged/committed and that the package manifest’s resources declarations still match.
Common failure modes and quick diagnostics
404 when downloading raw files: curl exits non‑zero due to -f. Confirm the commit SHA is valid and that the path in the repository exists at that commit. Open the URL in a browser to inspect the raw file and commit tree if needed.
Network or transient curl failures: curl will fail non‑zero on network errors. Retry after confirming network connectivity or use a different network. Consider using a CI runner with cached copies for reproducible builds.
Bad JSON formatting: upstream commits may contain unexpected changes; run a quick validator (jq. file.json) before committing to ensure the file is valid JSON.
LICENSE mismatch: if upstream license changes, pause and review legal/attribution implications before committing the new data.
Checklist for a safe update
Choose the desired commit SHAs for ios-device-identifiers.json and mac-device-identifiers.json.
Run the curl commands above to write files into apps/macos/Sources/OpenClaw/Resources/DeviceModels/.
Fetch and verify the upstream LICENSE file matches MIT license and add it to the repository or update attribution documentation.
Validate the JSON files (e.g., jq. path/to/file.json).
Run swift build --package-path apps/macos and confirm a clean build with no warnings.
Commit the JSON files, LICENSE, and a short note recording the SHAs used and rationale for the update.
Operational note Because the resources are vendored, keep updates deliberate and infrequent—only when you need new device identifiers or fixes. Always pin to SHAs and verify locally (and in CI) so builds remain reproducible and auditable.
Adapter patterns: HTTP daemon and stdio child
Adapters expose a simple JSON-RPC surface that lets the Gateway treat an external CLI or service as a first-class channel provider. There are two practical integration patterns to choose from. One is an HTTP daemon: the adapter runs as a networked process, exposes endpoints (including an event stream and a health probe) and OpenClaw talks to it over HTTP/S. The other is a stdio child-process: OpenClaw launches the adapter as a child and communicates with line-delimited JSON on stdin/stdout. Pick the pattern that matches the adapter’s operational model and your deployment constraints.
Why two patterns? The HTTP daemon is the natural match when the adapter already expects a TCP port or offers an SSE/HTTP event stream (common in daemons like signal-cli). It’s easy to probe, reuse, and run on a separate host. The stdio child pattern is ideal for lightweight, single-host adapters where you want minimal surface area (no port to bind, no firewall rules). Many legacy CLIs can be wrapped as a child without changing their internals.
Pattern A — HTTP daemon (when to use)
Typical shape: an HTTP server exposing an SSE event stream and a health/probe endpoint.
Example: signal-cli runs as a daemon, exposes /api/v1/events (SSE) for incoming messages and /api/v1/check for health. OpenClaw subscribes to events and issues HTTP send requests.
Operational note: OpenClaw can and should own lifecycle when configured (e.g., channels.signal.autoStart=true). When the Gateway owns the process it can start/stop the daemon to keep provider lifecycle consistent with the Gateway and to ensure credentials, ports, and user approvals are aligned.
Advantages: networked separation, clear health probing, easy remote deployment and scaling, SSE fits natural push-stream semantics.
Pitfalls to avoid: port collisions on multi-adapter hosts, insufficiently guarded public bindings (always prefer loopback unless explicitly exposing), and relying on event delivery without a documented retry/backoff policy.
Pattern B — stdio child-process (when to use)
Typical shape: OpenClaw launches the external CLI as a child process and communicates via line-delimited JSON over stdin/stdout (JSON-RPC or simple framed messages).
Example: legacy imsg wrapped as a child; messages and commands pass as textual JSON lines. No TCP port is required.
Advantages: no port management, simpler permission & firewall surface, single-host simplicity.
Pitfalls to avoid: unbuffered stdout causing blocking reads, child processes that daemonize themselves (losing stdin/stdout), and forgetting to implement graceful shutdown hooks so children terminate cleanly on Gateway restart.
Core RPC methods (compact checklist)
watch.subscribe — start delivering events/notifications. Notifications normally carry method "message" when new inbound messages arrive.
watch.unsubscribe — stop delivering events.
send — instruct adapter to deliver an outbound message to a chat/contact.
chats.list — return known chats/threads for probe, diagnostics, and admin UIs.
Brief purpose of each:
watch.subscribe/watch.unsubscribe implement event stream lifecycle: when the Gateway wants live notifications, it subscribes; when a provider is being drained or the Gateway is stopping, it unsubscribes.
send is the essential outbound path the Gateway calls to post messages, attachments, or perform actions like typing indicators.
chats.list is used for probes and diagnostics (discovering stable chat identifiers the provider can use).
Adapter lifecycle and resiliency rules Treat adapters as cooperative workers with clear lifecycle boundaries:
Gateway owns the process when appropriate. Start and stop adapters with the same lifecycle as the provider configuration. This avoids orphaned processes and stale port bindings.
Health probes are mandatory for HTTP daemons. Expose a /health or /api/v1/check returning simple success so the Gateway can detect and restart failing adapters.
RPC clients must be resilient: implement request timeouts, retry with backoff, and restart the adapter client if the remote process exits or the connection breaks.
Prefer stable identifiers. Use persistent chatid or threadid returned by the provider rather than display names or ephemeral titles. Stable IDs are the grounding for session and memory mappings.
Implement graceful shutdown: handle SIGTERM, drain subscriptions, return appropriate unsubscribe acknowledgements, and flush outbound queues. Never rely on abrupt process termination.
Monitor and restart. If an adapter exits, the Gateway should detect that exit and restart according to configured retry policy rather than silently dropping the provider.
Avoid blocking reads. For stdio adapters, use non-blocking or line-buffered reads and clearly documented framing rules (e.g., newline-delimited JSON).
Tie ownership to provider lifecycle flags. If a channel has autoStart behavior (channels.<name>.autoStart=true), the Gateway should own start/stop and ensure credentials are present before starting.
Operational recommendations
For new iMessage integrations, prefer BlueBubbles over the legacy imsg stdio approach. BlueBubbles provides a more robust networked server model and avoids many edge cases of local CLI wrappers.
Run HTTP daemons bound to 127.0.0.1 by default. Only open to broader networks when necessary and authorized.
Use chats.list as part of health and diagnostics checks to confirm adapter identity stability and mapping correctness.
Record and log adapter lifecycle events (start, stop, restart, health failures) to make operational triage straightforward.
Analogy to remember Think of the adapter as a co-worker who needs clear on/off boundaries and stable file names: you want the Gateway to know exactly when this co-worker is working, how to ask them to stop, and which persistent labels (IDs) they use for ongoing conversations. Without those, collaboration breaks, state fragments, and recovery becomes guesswork.
Quick checklist before implementing an adapter
Choose Pattern A or B based on existing adapter design and host constraints.
Implement watch.subscribe/watch.unsubscribe, send, chats.list.
Add a /health (HTTP) or health RPC method and graceful shutdown handling.
Ensure stable IDs are returned and used.
Add timeouts, retries, and a restart policy for adapter exits.
Run HTTP daemons on loopback by default; prefer BlueBubbles for new iMessage work.
Following these patterns keeps integrations predictable and operationally manageable. The Gateway’s ability to own processes and the adapter’s adherence to a small, stable RPC surface are the cornerstone of reliable channel integrations.
Operational checklist and next steps
Treat vendoring device-model data and wiring an RPC adapter as a single maintenance task with two goals: produce a deterministic, verifiable macOS build that maps Apple model identifiers reliably, and expose a resilient adapter surface that the Gateway can call without surprising failures.
Start by pinning and verifying the device-model database you will vendor. Pick the exact commit SHA from the upstream device-model JSON repo to ensure reproducible builds. Fetch only the files you need (model-map JSON and LICENSE) with curl and verify the commit date/author in the upstream repository before copying them into your app’s vendor directory. Always include the upstream LICENSE alongside the vendored JSON so license checks succeed during packaging.
Before publishing or merging any vendored change run the macOS build and a minimal runtime smoke test. For Swift-based companion builds:
run swift build to ensure the project compiles with the vendored JSON in place,
run the app’s unit tests that exercise the model-name mapping,
exercise the control path that reads the vendored JSON at runtime (the mapping layer should return stable, human-friendly names for known identifiers).
Choose the RPC adapter pattern that fits your integration constraints. Use an HTTP daemon adapter when the external process can serve HTTP with a health endpoint and SSE/event streaming. Use a stdio child-process JSON-RPC adapter when you prefer process isolation and simpler deployment (the Gateway spawns and monitors the child). Either pattern must implement the same core RPC surface that OpenClaw expects for messaging and lifecycle operations.
Checklist (do these steps and mark them off)
Pick commit SHAs for vendored device-model files; record them in the change description.
Fetch files with curl (or git archive) and include LICENSE next to JSON.
Verify commit metadata upstream (author/date) and append a short vendor note in your repo.
Run swift build (or your platform build) and all unit tests that touch the mapping code.
Add a small smoke test that resolves several canonical Apple identifiers to friendly names at runtime.
Choose adapter pattern: HTTP daemon vs stdio child; document rationale.
Implement required RPC methods (message send/receive, connect/handshake, health ping, graceful shutdown).
Add a /health or equivalent probe for HTTP adapters; implement periodic health checks and restart logic for stdio children.
Prefer stable session/agent IDs and deterministic message envelopes so logs and replay correlate.
Provide backoff and retry caps for transient failures; surface detailed error logs for non-transient errors.
Test end-to-end with the Gateway: connect, send an inbound message, verify delivery, simulate adapter restart.
Commit vendored files and adapter code; open a CI run that includes build + runtime smoke tests.
Warnings and operational notes
Overwriting vendored files without picking a SHA breaks reproducibility and makes rollbacks harder—avoid editing vendored JSON in-place; prefer replacing with a new pinned SHA and a small changelog entry.
Destructive operations (removing vendored data or wholesale renames) require a backup and a passing CI build before merging.
Always commit the vendored files and run CI build+smoke tests; do not rely on local-only verification.
Next steps: after this checklist passes in CI, tag the change with the vendored-commit reference and deploy to a staging Gateway for a day-long soak test before rolling to production.
Runtime, Providers, and Pi Integration Reference
API Usage and Cost Reporting
OpenClaw spends provider keys any time it makes requests to an external model or media/embedding service. The obvious places are core chat responses and explicit tool calls that invoke a provider-backed model. Less obvious but equally important consumers are media understanding (speech-to-text, image/video analysis), image and video generation, and remote embedding APIs used for memory or semantic search.
Quick checklist — features that can consume provider quota:
Agent model responses (chat/completions).
Tool calls that proxy to a model provider (search, code-execution helpers that call models).
Memory embeddings and semantic search.
Media understanding: audio transcription, image/video captioning, or visual analysis.
Image and video generation.
Plugin or skill processes that export provider credentials into their environment.
Inspecting usage and cost
openclaw status: shows the current session model, context usage, and last response tokens. When a session used API-key auth for the last reply, status will also include an estimated dollar cost for that reply.
openclaw usage full: appends an estimated dollar-cost footer to every reply when OpenClaw is operating with API-key authenticated models. This is intended for operator-level visibility of per-message cost.
openclaw usage tokens: reports token counts only (no dollar conversion).
These are snapshots and operator tools, not accounting ledgers: status reports and the usage probes present local estimates and quota snapshots; subscription-style or hosted providers may bill outside what OpenClaw can observe or display.
CLI JSON normalization OpenClaw normalizes provider statistics in its JSON outputs. The implementation maps provider stats.cached to a canonical cacheRead field. When a provider reports both total input tokens and cached tokens, OpenClaw computes effective input tokens as stats.input_tokens - stats.cached. This mirrors behavior needed for providers (like Gemini CLI) that separately report cached token counts so the CLI can reason about what the Gateway actually billed for.
Where credentials come from OpenClaw discovers provider credentials in this order:
auth profiles (auth-profiles.json).
Environment variables (process env; provider-specific names).
Config entries such as models.providers.*.apiKey, plugin or memorySearch provider keys.
Skill or plugin process environment exports (when a skill intentionally injects creds).
This discovery order is applied when resolving both inference calls and quota/usage hooks.
Provider quirks and quota windows Some providers expose quota hooks; OpenClaw will use provider-specific quota hooks when available to populate usage windows. If hooks are absent, OpenClaw falls back to matching OAuth/API-key credentials from auth profiles, env, or config to estimate quota. Watch for provider-specific quirks — MiniMax, for example, reports usagepercent as remaining quota; OpenClaw inverts that value before presenting it. If a provider returns modelremains, OpenClaw prefers the chat-model entry and derives window labels from the returned timestamps.
Media and model selection notes Image generation may choose a default provider when agents.defaults.imageGenerationModel is unset. Video generation requires an explicit agents.defaults.videoGenerationModel. MemorySearch.provider (or similar memory config) controls which embedding API is used; if set to "openai" OpenClaw will call the OpenAI embeddings API and consume that key.
Operator caution Estimated costs and quota snapshots are useful but not authoritative. Hosted subscriptions, pooled billing, or third-party resellers can bill outside the Gateway’s visibility. Treat openclaw status --usage and channels list quota fields as operational guidance; for billing reconciliation consult provider consoles and raw provider-side reports.
Date, Time, and Message Envelopes
OpenClaw records and displays time with two goals: preserve the provider’s raw timestamps for fidelity, and render stable, human-readable envelopes that you can configure without breaking prompt caching. By default OpenClaw stamps transport and envelope lines using the host-local clock; the rendered envelope is intended for human reading and does not alter the original provider payload.
Provider timestamps are preserved in tool and channel payloads. In addition, OpenClaw adds normalized helper fields so downstream consumers can choose a canonical form:
timestampMs — epoch milliseconds (Number).
timestampUtc — ISO 8601 UTC string (e.g., "2026-01-18T05:19:00Z").
Control the envelope display and timezone via agents.defaults. The relevant keys are envelopeTimezone, envelopeTimestamp, envelopeElapsed, userTimezone, and timeFormat. Use an explicit IANA timezone (e.g., "America/Chicago") for deterministic display; "user" lets the UI show the user’s timezone when known, otherwise it falls back to the host timezone.
Example: default human-readable envelope (host-local timestamp)
[Provider... 2026-01-05 16:26 PST] message textConfiguration example (strict JSON) that controls envelope timezone, whether absolute timestamps appear, and whether elapsed suffixes show:
{
"agents": {
"defaults": {
"envelopeTimezone": "local",
"envelopeTimestamp": "on",
"envelopeElapsed": "on"
}
}
}You will commonly see channel envelopes like the WhatsApp examples below. The first shows the default host-local rendering; the second shows userTimezone rendering when set.
Host-local (default) WhatsApp envelope:
[WhatsApp +1555 2026-01-18 00:19 PST] helloWhen agents.defaults.userTimezone is configured, envelopes use that zone label:
[WhatsApp +1555 2026-01-18 00:19 CST] helloElapsed suffixes and ISO UTC inclusion appear like this:
[WhatsApp +1555 +30s 2026-01-18T05:19Z] follow-upSystem prompts and caching stability When OpenClaw knows the user timezone, the system prompt includes only the timezone identifier (not the current clock time) to avoid invalidating cached prompts. Example:
Time zone: America/ChicagoWarning: embedding full clock timestamps in system prompts will change the prompt content on every run and make prompt caching ineffective. Prefer the timezone-only approach for stable behavior.
Queued system events follow the same timezone selection rules as message envelopes. Example:
System: [2026-01-12 12:19:17 PST] Model switched.timeFormat behavior timeFormat:"auto" inspects OS preferences (on macOS and Windows) to choose 12h/24h for rendered clocks; the detected value is cached per process. You can also force "12" or "24" if you need consistency across hosts.
Troubleshooting checklist
If envelope times look wrong, check agents.defaults.envelopeTimezone and agents.defaults.userTimezone.
If you need deterministic timestamps across deployments, set envelopeTimezone to an explicit IANA string or "utc".
For programmatic processing, rely on timestampMs or timestampUtc rather than parsing envelope text.
Memory and Embedding Configuration (memorySearch & QMD)
OpenClaw stores the runtime memory-search defaults under agents.defaults.memorySearch in your openclaw.json. That is where you pick the embedding provider, model, hybrid search tuning, filesystem ingestion paths, and QMD backend options. Note: the active memory feature toggle and the memory-core sub-agent config live under plugins.entries.active-memory (or plugins.entries.memory-core), not under memorySearch.
Provider selection and auto-detection OpenClaw will auto-select the first available provider using this order: local (when local.modelPath is present), GitHub Copilot (when a Copilot token resolves), OpenAI, Gemini, Voyage, Mistral, then Bedrock. Ollama is supported but is not auto-detected—you must set provider: "ollama" explicitly when you want it.
Remote overrides and API keys Remote embedding endpoints can be configured with remote.baseUrl, remote.apiKey and remote.headers inside memorySearch to point at OpenAI-compatible proxies. Bedrock is special: it uses the AWS SDK credential chain (environment, shared credentials, instance/role) and does not accept an API key in memorySearch. When using Bedrock from an EC2 instance or container with an instance role, set provider: "bedrock" and the model ID; ensure the role has bedrock:InvokeModel permissions (example IAM statement below). Changing a Gemini model or its outputDimensionality forces a full reindex.
Example: remote OpenAI-compatible endpoint (openclaw.json)
{
"agents": {
"defaults": {
"memorySearch": {
"provider": "openai",
"model": "text-embedding-3-small",
"remote": {
"baseUrl": "https://api.example.com/v1/",
"apiKey": "YOUR_KEY"
}
}
}
}
}Example: Bedrock provider selection
{
"agents": {
"defaults": {
"memorySearch": {
"provider": "bedrock",
"model": "amazon.titan-embed-text-v2:0"
}
}
}
}Minimal IAM statement for Bedrock
{
"Effect": "Allow",
"Action": "bedrock:InvokeModel",
"Resource": "*"
}ARN format example for a Bedrock model
arn:aws:bedrock:*::foundation-model/amazon.titan-embed-text-v2:0Hybrid query tuning Hybrid ranking mixes vector and lexical signals. Configure weights and optional MMR and temporal decay to tune recall vs precision. Sensible defaults bias vectors (e.g., vectorWeight: 0.7). Changing these values alters ranking behavior; test before pushing to production.
Hybrid tuning example
{
"agents": {
"defaults": {
"memorySearch": {
"query": {
"hybrid": {
"vectorWeight": 0.7,
"textWeight": 0.3,
"mmr": { "enabled": true, "lambda": 0.7 },
"temporalDecay": { "enabled": true, "halfLifeDays": 30 }
}
}
}
}
}
}Filesystem ingestion (extraPaths) Add local directories to be indexed with extraPaths. Ensure OpenClaw has read access; inaccessible paths will appear in logs and silently skip ingestion for that path.
extraPaths example
{
"agents": {
"defaults": {
"memorySearch": {
"extraPaths": ["../team-docs", "/srv/shared-notes"]
}
}
}
}QMD backend and scope rules QMD options control includeDefaultMemory, indexing cadence, debounce, result limits and per-chat scope rules. Use default: "deny" plus allow rules to restrict what is indexed or returned.
QMD scope example
{
"memory": {
"qmd": {
"scope": {
"default": "deny",
"rules": [{ "action": "allow", "match": { "chatType": "direct" } }]
}
}
}
}Comprehensive QMD snippet (fields explained)
{
"memory": {
"backend": "qmd",
"citations": "auto",
"qmd": {
"includeDefaultMemory": true,
"update": { "interval": "5m", "debounceMs": 15000 },
"limits": { "maxResults": 6, "timeoutMs": 4000 },
"scope": {
"default": "deny",
"rules": [{ "action": "allow", "match": { "chatType": "direct" } }]
},
"paths": [{ "name": "docs", "path": "~/notes", "pattern": "**/*.md" }]
}
}
}Dreaming (background ingestion) Enable dreaming under plugins.entries.memory-core.config.dreaming to schedule background enrichment of memory (cron frequency). Results and errors are visible in the memory-core plugin logs.
Dreaming config example
{
"plugins": {
"entries": {
"memory-core": {
"config": {
"dreaming": {
"enabled": true,
"frequency": "0 3 * * *"
}
}
}
}
}
}Operational warnings and troubleshooting
Codex/OAuth tokens for chat/completions do not authorize embedding calls; embeddings must use provider-specific embedding credentials.
Missing or invalid API keys result in failed index updates—check gateway logs and plugin logs for remote API errors.
Changing Gemini model/outputDimensionality will reindex; plan for the reindex cost and disk usage.
If extraPaths are unreadable, ingestion will skip them and log permissions errors under the gateway/plugin log stream.
Where to look Memory, indexing and dreaming activity is logged by the memory-core (or active-memory) plugin; gateway doctor and openclaw logs surface provider auth/connection failures.
Pi Integration Architecture (embedded AgentSession)
Embedding the pi coding agent directly gives OpenClaw tight control over resources, tools, session files, and streaming. Instead of spawning pi as a separate process or using RPC, OpenClaw instantiates pi's AgentSession via createAgentSession. That choice enables shared resource loaders, file-backed sessions, dynamic extension loading (compaction safeguards, context pruning), and in-process tool adaptation — all required to coordinate multi-channel delivery, compaction, and provider failover.
The pi integration depends on pinned pi packages; include these versions in your dependency manifest:
{
"@mariozechner/pi-agent-core": "0.64.0",
"@mariozechner/pi-ai": "0.64.0",
"@mariozechner/pi-coding-agent": "0.64.0",
"@mariozechner/pi-tui": "0.64.0"
}Project layout (pi-embedded-runner subsystem). Inspect these files when debugging embedded runs:
src/agents/
├── pi-embedded-runner.ts # Re-exports from pi-embedded-runner/
├── pi-embedded-runner/
│ ├── run.ts # Main entry: runEmbeddedPiAgent()
│ ├── run/...
│ ├── compact.ts # Manual/auto compaction logic
│ ├── extensions.ts # Load pi extensions for embedded runs
│ ├── model.ts # Model resolution via ModelRegistry
│ ├── session-manager-init.ts # Session file initialization
│ ├── system-prompt.ts # System prompt builder
│ ├── pi-tools.ts # createOpenClawCodingTools()
│ ├── pi-tool-definition-adapter.ts # AgentTool -> ToolDefinition adapter
│ └──...High-level runtime sequence
Prewarm the session file and open a file-backed SessionManager.
Initialize a DefaultResourceLoader and call resourceLoader.reload() so workspace/skills/settings are available.
Resolve model/auth via ModelRegistry and AuthStorage; set a runtime API key on authStorage when needed.
Call createAgentSession with built-in and custom tools (customTools are AnyAgentTool adapted to pi ToolDefinition).
Attach subscriptions via subscribeEmbeddedPiSession to receive streamed reasoning, tool outputs, partial blocks, and final block replies.
Call session.prompt(...) to start the run.
Post-process streaming chunks (chunking, strip internal tags, consume reply directives) and forward to channels.
Trigger compaction programmatically as required and unload extensions on shutdown.
Example: runEmbeddedPiAgent usage (typical calling pattern)
import { runEmbeddedPiAgent } from "./agents/pi-embedded-runner.js";
const result = await runEmbeddedPiAgent({
sessionId: "user-123",
sessionKey: "main:whatsapp:+1234567890",
sessionFile: "/path/to/session.jsonl",
workspaceDir: "/path/to/workspace",
config: openclawConfig,
prompt: "Hello, how are you?",
provider: "anthropic",
model: "claude-sonnet-4-6",
timeoutMs: 120_000,
runId: "run-abc",
onBlockReply: async (payload) => {
await sendToChannel(payload.text, payload.mediaUrls);
},
});Create an AgentSession (resource loader, session manager, system prompt override)
import {
createAgentSession,
DefaultResourceLoader,
SessionManager,
SettingsManager,
} from "@mariozechner/pi-coding-agent";
const resourceLoader = new DefaultResourceLoader({
cwd: resolvedWorkspace,
agentDir,
settingsManager,
additionalExtensionPaths,
});
await resourceLoader.reload();
const { session } = await createAgentSession({
cwd: resolvedWorkspace,
agentDir,
authStorage: params.authStorage,
modelRegistry: params.modelRegistry,
model: params.model,
thinkingLevel: mapThinkingLevel(params.thinkLevel),
tools: builtInTools,
customTools: allCustomTools,
sessionManager,
settingsManager,
resourceLoader,
});
applySystemPromptOverrideToSession(session, systemPromptOverride);Attach subscriptions to stream outputs and events
const subscription = subscribeEmbeddedPiSession({
session: activeSession,
runId: params.runId,
verboseLevel: params.verboseLevel,
reasoningMode: params.reasoningLevel,
toolResultFormat: params.toolResultFormat,
onToolResult: params.onToolResult,
onReasoningStream: params.onReasoningStream,
onBlockReply: params.onBlockReply,
onPartialReply: params.onPartialReply,
onAgentEvent: params.onAgentEvent,
});Tool adaptation and registration
export function toToolDefinitions(tools: AnyAgentTool[]): ToolDefinition[] {
return tools.map((tool) => ({
name: tool.name,
label: tool.label ?? name,
description: tool.description ?? "",
parameters: tool.parameters,
execute: async (toolCallId, params, onUpdate, _ctx, signal) => {
return await tool.execute(toolCallId, params, signal, onUpdate);
},
}));
}
export function splitSdkTools(options: { tools: AnyAgentTool[]; sandboxEnabled: boolean }) {
return {
builtInTools: [], // Empty. We override everything
customTools: toToolDefinitions(options.tools),
};
}OpenClaw purposefully supplies an empty builtInTools to override pi defaults and registers converted custom tools instead.
Session file lifecycle and caching
await prewarmSessionFile(params.sessionFile);
sessionManager = SessionManager.open(params.sessionFile);
trackSessionManagerAccess(params.sessionFile);Session files live under ~/.openclaw/agents/<agentId>/sessions/ as append-only JSONL transcripts indexed by sessions.json. Prewarming ensures the session file exists and avoids race conditions when multiple runs target the same file.
Compaction and pruning Trigger compaction programmatically:
const compactResult = await compactEmbeddedPiSessionDirect({
sessionId, sessionFile, provider, model,...
});Compaction-safeguard and cache-ttl context pruning are activated dynamically:
if (resolveCompactionMode(params.cfg) === "safeguard") {
setCompactionSafeguardRuntime(params.sessionManager, { maxHistoryShare });
paths.push(resolvePiExtensionPath("compaction-safeguard"));
}
if (cfg?.agents?.defaults?.contextPruning?.mode === "cache-ttl") {
setContextPruningRuntime(params.sessionManager, {
settings,
contextWindowTokens,
isToolPrunable,
lastCacheTouchAt,
});
paths.push(resolvePiExtensionPath("context-pruning"));
}Warning: tune contextWindowTokens and lastCacheTouchAt carefully — overly-aggressive pruning or an improperly-sized context window will cause repeated "context overflow" errors.
Auth, model resolution, and profile rotation
const authStore = ensureAuthProfileStore(agentDir, { allowKeychainPrompt: false });
const profileOrder = resolveAuthProfileOrder({ cfg, store: authStore, provider, preferredProfile });
const { model, error, authStorage, modelRegistry } = resolveModel(
provider,
modelId,
agentDir,
config,
);
authStorage.setRuntimeApiKey(model.provider, apiKeyInfo.apiKey);When a profile fails, record the failure and rotate:
await markAuthProfileFailure({ store, profileId, reason, cfg, agentDir });
const rotated = await advanceAuthProfile();OpenClaw classifies assistant errors (overflow, compaction failure, auth, rate limit) via helper predicates and uses that classification to decide compaction attempts, profile rotation, model failover, or retry with alternate thinking levels:
if (fallbackConfigured && isFailoverErrorMessage(errorText)) {
throw new FailoverError(errorText, { reason: promptFailoverReason ?? "unknown", provider, model: modelId, profileId, status: resolveFailoverStatus(promptFailoverReason) });
}
const fallbackThinking = pickFallbackThinkingLevel({ message: errorText, attempted: attemptedThinking });
if (fallbackThinking) {
thinkLevel = fallbackThinking;
continue;
}Sandbox resolution
const sandbox = await resolveSandboxContext({
config: params.config,
sessionKey: sandboxSessionKey,
workspaceDir: resolvedWorkspace,
});
if (sandboxRoot) {
// Use sandboxed read/edit/write tools
// Exec runs in container
// Browser uses bridge URL
}When sandboxRoot is present, OpenClaw replaces file tools with sandboxed variants and runs execs in an isolated container or via a browser bridge.
Streaming, chunking and reply directives Instantiate an EmbeddedBlockChunker if configured:
const blockChunker = blockChunking ? new EmbeddedBlockChunker(blockChunking): null;Strip internal thinking/final tags and extract reply directives before sending to channels:
const stripBlockTags = (text: string, state: { thinking: boolean; final: boolean }) => {
// Strip <think>...</think> content
// If enforceFinalTag, only return <final>...</final> content
};
const { text: cleanedText, mediaUrls, audioAsVoice, replyToId } = consumeReplyDirectives(chunk);Ensure post-processing removes internal control tags and extracts media or reply targets. Streaming chunks can contain partial directives; consume them and only emit finalized content according to your channel delivery semantics.
Operational notes and troubleshooting checklist
Inspect session transcripts in ~/.openclaw/agents/<agentId>/sessions/ to correlate runs with log entries.
If you see "context overflow" errors, check contextWindowTokens and consider compactEmbeddedPiSessionDirect or enabling the compaction-safeguard extension.
For auth failures, examine auth-profiles.json and watch markAuthProfileFailure logs to see rotation decisions.
Use subscribeEmbeddedPiSession handlers to replay reasoning streams and tool outputs to channels; ensure you post-process chunks (strip tags, extract directives) before delivering.
This flow keeps the agent tightly coupled to OpenClaw's session and policy machinery while retaining failover, compaction, sandboxing, and per-channel system-prompt overrides.
Prompt Caching and Cache Retention
OpenClaw reports prompt-caching activity using two normalized counters so you can measure and reason about cache effectiveness: cacheRead (when a provider returned a cached prompt result) and cacheWrite (when OpenClaw created a new cache entry). These counters appear in runtime telemetry and in diagnostics logs; use them to verify whether your configuration is reducing tokens or merely shifting cost to cache creation.
Configure cache retention in three places; later entries override earlier ones:
Global defaults: agents.defaults.params
Per-model under defaults: agents.defaults.models["provider/model"].params
Per-agent: agents.list[].params
A global default example:
agents:
defaults:
params:
cacheRetention: "long" # none | short | longPer-model overrides let you tune retention for particular providers or models:
agents:
defaults:
models:
"anthropic/claude-opus-4-6":
params:
cacheRetention: "short" # none | short | longPer-agent overrides disable or tighten caching for sensitive workflows (alerts, audit):
agents:
list:
- id: "alerts"
params:
cacheRetention: "none"Why cache at all? Reusing unchanged prompt prefixes reduces tokens sent to providers and speeds responses. Cache writes cost whichever provider call creates the entry; cache reads avoid repeat token charges. Measure both cacheRead and cacheWrite to see the net effect.
Context pruning prevents oversized tool-result history from regenerating caches after idle gaps. Use cache-ttl pruning to expire stored context after a time window:
agents:
defaults:
contextPruning:
mode: "cache-ttl"
ttl: "1h"With cache-ttl, tool outputs older than ttl are pruned so a late request doesn’t reintroduce large context and force a fresh cacheWrite.
Keep caches warm with periodic heartbeats. A heartbeat sends lightweight activity to preserve cache windows and avoid repeated cache writes after idle:
agents:
defaults:
heartbeat:
every: "55m"A practical pattern: set long retention + heartbeat for research agents, and set cacheRetention: "none" for alert or high-assurance agents.
Provider telemetry differs. Anthropic exposes cachereadinputtokens and cachecreationinputtokens; OpenClaw maps these to cacheRead and cacheWrite. OpenAI exposes only cached token counts in some paths, so cacheWrite can remain zero on direct OpenAI hosts. As a convenience, OpenClaw seeds cacheRetention to "short" for Anthropic model refs when using Anthropic API-key auth profiles; for OpenAI hosts, promptcachekey routing is used and choosing cacheRetention: "long" sets promptcacheretention: "24h".
Enable detailed tracing when debugging cache behavior. This writes a JSONL trace (may include prompts/messages—see privacy warning):
diagnostics:
cacheTrace:
enabled: true
filePath: "~/.openclaw/logs/cache-trace.jsonl" # optional
includeMessages: false # default true
includePrompt: false # default true
includeSystem: false # default trueWarning: cacheTrace can record prompt text and messages. Treat the trace file as sensitive and rotate or redact before sharing.
Run live cache tests with the provided test harness:
OPENCLAW_LIVE_TEST=1 OPENCLAW_LIVE_CACHE_TEST=1 pnpm test:live:cacheInspect cacheRead/cacheWrite counters and the cacheTrace file to confirm your retention, ttl, and heartbeat choices are producing the intended token savings.
Rich Output Protocol and Embeds
Assistants can include rich, interactive content in messages by emitting an embed shortcode that points the Control UI at a pre-hosted canvas URL. The gateway and web UI treat these shortcodes not as literal text to show, but as delivery directives: the UI removes the shortcode from the visible transcript and renders the referenced canvas inline inside the assistant message surface.
Create an embed by authoring a self-closing shortcode with a stable reference (viewId) or explicit URL and an optional title. The minimal, canonical form looks like this (illustrative assistant output that the web UI will consume):
[embed ref="cv_123" title="Status" /]Rendering constraints and author rules
Only URL-backed embeds render. The Control UI requires either a reference that resolves to an URL-backed canvas (ref="...") or a direct url="..." attribute. Inline block HTML, JavaScript, or [view...]-style shortcodes without a URL backing are not rendered in new assistant output and should not be relied on.
The UI strips the shortcode from the visible text and injects a rendered view inline. If you need fallback text visible to non-web clients, include it separately in the message body (the shortcode is removed from visible text by the web UI).
Do not rely on presentview or other non-standard fields — presentview is ignored by the renderer. Only the normalized canvas preview shape is recognized.
Stored canvas block shape When an assistant message contains an embedded canvas, the runtime normalizes it into a canvas block object. This is what the Control UI reads from transcripts and uses to render. The example below is the canonical normalized form (stored in transcripts / session JSONL entries and acceptable to include in saved transcripts):
{
"type": "canvas",
"preview": {
"kind": "canvas",
"surface": "assistant_message",
"render": "url",
"viewId": "cv_123",
"url": "/__openclaw__/canvas/documents/cv_123/index.html",
"title": "Status",
"preferredHeight": 320
}
}Field notes
preview.render must be "url". That indicates the UI should embed an iframe/URL view. Other render modes are not supported for assistant-originated embeds.
viewId is an identifier you can reference with ref="...". The gateway must resolve that viewId to a URL (as in url above) for rendering to succeed.
url is the canonical location served by the gateway (often under /openclaw/canvas/...). It must be reachable by the Control UI.
title is used for accessibility and the small header the UI may show.
preferredHeight is a hint the UI uses when laying out the embed.
How to author and debug
Generate your canvas and host it under the gateway (or a reachable URL). Prefer the gateway’s canvas path so auth and routing work cleanly.
Emit the embed shortcode in assistant output with ref set to the canvas viewId (or url to the hosted page).
Inspect the session transcript (.jsonl entries under ~/.openclaw/agents/<agentId>/sessions/) to verify the stored canvas block contains preview.url and preview.render:"url". If the preview lacks a URL, the web UI will not render it.
Warning: avoid embedding unhosted HTML or relying on client-side HTML injection. Only URL-backed canvases are a reliable, supported path for rich assistant output.
SecretRef Credential Surface and Auth Profiles
Treat SecretRef as a safe way to point OpenClaw at static, user-provided secrets rather than embedding plaintext credentials in configs. OpenClaw accepts SecretRef targets for API keys, bearer tokens, TLS artifacts and similar fixed secrets — but it will not act as a vault for credentials that the runtime mints, rotates, or refreshes (for example OAuth refresh tokens or ephemeral provider credentials). Put simply: SecretRef = static user-supplied secrets only.
Which config fields accept SecretRef OpenClaw supports SecretRef for a broad set of configuration targets. Typical examples you will use with openclaw.json and the secrets commands (secrets configure / secrets apply / secrets audit) include provider and channel keys and tokens such as:
models.providers.*.apiKey (provider model API keys)
models.providers..headers. (custom header values used for provider auth)
channels.slack.botToken
channels.telegram.botToken
channels.whatsapp.accountToken (and other channel-specific tokens)
tools.web_search.apiKey
gateway.auth.token
TLS/key/cert artifacts referenced by transport or channel plugins
Use the secrets audit command to enumerate which config paths in your active snapshot are SecretRef-able and to validate that referenced secrets exist in your configured secret storage.
What is out of scope Do not place runtime-minted or rotating credentials under SecretRef. This explicitly includes OAuth refresh tokens or any credential the Gateway or a provider adapter is expected to rotate on its own. If you need to persist refresh/rotation state use the provider-specific auth-profile mechanisms described elsewhere; do not use SecretRef for those values.
OAuth auth-profile policy guard OpenClaw enforces a strict guard: an auth profile defined as auth.profiles.<id>.mode = "oauth" cannot be backed by SecretRef values for that same profile. If you put SecretRef inputs into an OAuth-mode profile, Gateway startup or a config reload will fail fast and log an actionable error describing the offending profile and path. Fixing the failure requires editing the config to remove the SecretRef (supply the OAuth flow-managed profile instead) or switching the profile mode to a supported static mode.
Marker persistence for SecretRef-managed providers When you configure a model provider via SecretRef (for example models.providers.<x>.apiKey referenced by SecretRef), OpenClaw persists non-secret "markers" into generated agent artifacts so the system knows which provider source is active. These markers live in workspace/bundled metadata such as agents/*/agent/models.json and in the runtime auth-profiles.json (inspect ~/.openclaw/auth-profiles.json on the host). Marker writes are source-authoritative — they reflect the active configuration snapshot and are overwritten from that snapshot on startup or reload.
Practical operator steps and trade-offs
To convert a plaintext key in openclaw.json to an env-backed SecretRef: replace the literal value with a SecretRef token (your secret store syntax) and run openclaw secrets apply to register/validate it. The CLI will describe missing secrets.
Trade-offs: SecretRef reduces accidental repo/backup leakage and centralizes secret rotation. However, because SecretRef is for static secrets, any credential that must be refreshed programmatically should remain managed via an auth-profile flow, not as a SecretRef.
Security warning Never store refresh tokens, ephemeral OAuth credentials, or runtime-generated keys under SecretRef. SecretRef is intended for static secrets that you control offline. Storing refresh material here bypasses the runtime’s rotation semantics and may cause both security and operational failures.
Token Accounting, Context Limits, and Image Handling
Model context is a scarce, billable resource: OpenClaw measures tokens (not characters) against provider-specific limits and reports normalized totals. For English prose, a useful rule of thumb is ~4 characters per token for OpenAI-style models; use that to estimate whether a long bootstrap or an attached document will push you toward the model's context cap.
Everything the model receives counts toward the context limit: system prompts and injected bootstrap text, the full conversation history (transcript entries), tool call inputs and tool outputs, attachments you pass as text/HTML, compaction summaries, and any provider wrapper text added by the runtime. OpenClaw exposes runtime knobs so you can bound these inputs.
Bootstrap truncation and total caps
Agents truncate large bootstraps at agents.defaults.bootstrapMaxChars (default 12000). This limit applies per bootstrap file to avoid feeding arbitrarily large persona files into the model.
The aggregate bootstrap injection across all bootstraps is capped by agents.defaults.bootstrapTotalMaxChars (default 60000). Use these to prevent a runaway workspace from consuming the model context before the conversation begins.
Runtime context limits OpenClaw surfaces finer-grained caps under agents.defaults.contextLimits, and you may override them per-agent at agents.list[].contextLimits. Typical keys include:
memoryGetMaxChars — how many characters are pulled when retrieving memory items.
memoryGetDefaultLines — default lines of context per memory item.
toolResultMaxChars — truncate tool outputs to this limit before appending to the transcript.
postCompactionMaxChars — cap the size of a session snapshot post-compaction.
Image handling Images are downscaled before provider calls to limit token/byte usage. The default maximum dimension is agents.defaults.imageMaxDimensionPx = 1200. Reduce this to save tokens and bandwidth; increase only when the task requires fine visual detail. Downscaling reduces visual fidelity but prevents large base64 blobs or long multimodal encodings from consuming model context.
Where per-model cost data lives OpenClaw keeps per-model pricing metadata under models.providers.<provider>.models[].cost. This lets /usage normalize costs across providers and model ref formats:
models.providers.<provider>.models[].costExample agent defaults and per-agent overrides The next two canonical examples show how to select a primary model, set model-specific params such as cacheRetention and heartbeat cadence, and override defaults per-agent.
agents:
defaults:
model:
primary: "anthropic/claude-opus-4-6"
models:
"anthropic/claude-opus-4-6":
params:
cacheRetention: "long"
heartbeat:
every: "55m"agents:
defaults:
model:
primary: "anthropic/claude-opus-4-6"
models:
"anthropic/claude-opus-4-6":
params:
cacheRetention: "long" # default baseline for most agents
list:
- id: "research"
default: true
heartbeat:
every: "55m" # keep long cache warm for deep sessions
- id: "alerts"
params:
cacheRetention: "none" # avoid cache writes for bursty notificationsInspecting current usage and cost Run the Gateway endpoints or CLI equivalents to inspect accounting:
/status — live token and session footprint snapshot.
/usage — local cost summary computed from session logs and normalized provider fields (inputtokens/prompttokens, outputtokens/completiontokens). Note: OAuth-managed providers may hide raw cost fields, so /usage can show partial cost information when the provider does not expose tokens to OpenClaw.
Practical sizing rules of thumb
Keep individual bootstrap files under 8–12k chars if you expect long sessions; rely on compaction for older history.
Limit image dimensions to 600–1200 px unless detail is essential.
Enable postCompactionMaxChars to bound the size of summaries you feed back to the model.
Warning: token limits are enforced per-model and per-run. Test aggressive configurations with /status and /usage before deploying agents that ingest large documents or many images.
Transcript Hygiene and In-Memory Sanitization
OpenClaw performs a last-mile cleanup of session data before constructing the model context. This “transcript hygiene” phase runs entirely in memory: it adjusts, sanitizes, and sometimes drops problematic turns so the request sent to a provider is well-formed. Hygiene does not overwrite the on-disk JSONL transcripts; persistent repair that edits files is a separate process and will back up the original file if it removes invalid lines.
Hygiene covers a predictable set of fixes and validations applied to the in-memory transcript used for context assembly. The scope includes:
tool-call id sanitization and normalization;
validating tool inputs and dropping obviously invalid argument shapes;
pairing tool-results with their originating calls and repairing mismatches where possible;
turn validation and ordering fixes (reordering or dropping out-of-order turns so the model sees a linear conversation);
thought_signature cleanup (removing or normalizing assistant reasoning signatures that would confuse providers);
sanitizing image payloads (downscale/recompress) to meet provider size limits and reduce token pressure;
tagging user-originated turns that were created by cross-session delivery with provenance markers.
Two operational rules you must remember: images are always sanitized, and empty assistant tool-call blocks are removed before building context. OpenClaw downscales or recompresses images to a configurable maximum side-length; the default is agents.defaults.imageMaxDimensionPx = 1200. This prevents provider-side rejection for oversized binaries and reduces the chance large image embeds push token/context usage over limits. Likewise, if an assistant block represents a tool-call but contains neither input nor arguments (a partially persisted/empty call), it is dropped to avoid provider rejection of malformed tool structures.
Cross-session messaging preserves provenance. When an agent uses sessionssend to inject a prompt into another session, OpenClaw persists the created turn with message.provenance.kind = "intersession" (the role remains "user"). During the in-memory rebuild the system prepends a short marker such as "[Inter-session message]" so the model receives clear provenance context without altering stored transcript data.
Provider implementations apply hygiene differently. Key differences to be aware of:
OpenAI: image sanitization + drop orphaned reasoning signatures.
Google: strict tool-call id sanitization, pairing repair, turn validation/ordering fixes.
Anthropic / Minimax: pairing repair and turn validation.
Mistral: enforces strict 9-character alphanumeric tool-call ids.
OpenRouter Gemini: strips non-base64 thought_signature values.
Other providers: default to image sanitization only.
Common hygiene examples and debugging tips
Image downscale flow: incoming image → check dimensions → if > agents.defaults.imageMaxDimensionPx, downscale and recompress to JPEG/PNG at safe quality → replace in-memory embed for context. If a provider rejects an image, first confirm the sanitized image size in gateway logs and the configured imageMaxDimensionPx.
Dropping orphaned tool-call block: a stored assistant block that has no input/args will be removed from the in-memory context. If a provider rejects a request citing invalid tool-call structure, examine the session’s JSONL for assistant blocks whose tool-call ids or payloads are missing; run openclaw doctor and inspect gateway logs for hygiene warnings.
When transcripts appear corrupted on-disk or you see repeated hygiene edits in logs, run the following checks: inspect ~/.openclaw/agents/<agentId>/sessions/ for the JSONL file and sessions.json index; look for malformed lines, backups (.bak) created by repair tools, and hygiene warnings in the gateway log. Use openclaw doctor to surface repair actions; remember that automatic on-disk repair can remove lines — always back up state before running destructive fixes.
Onboarding CLI Reference and Auth Profile Handling
OpenClaw's onboard command is conservative: when it finds an existing ~/.openclaw/openclaw.json it asks whether to Keep, Modify, or Reset that state. Re-running onboarding will not delete data unless you choose Reset interactively or pass --reset on the CLI. Use this behavior to safely reconfigure a host without unexpectedly destroying sessions or credentials.
Reset scopes and defaults
--reset (no scope) defaults to clearing configuration, credentials, and session data.
--reset-scope full also removes workspace data (destructive).
Always create a backup before any reset: tar -czf openclaw-state.tgz ~/.openclaw. Onboarding itself uses the system Trash when possible; it never runs rm -rf silently.
If onboarding encounters an invalid configuration or legacy keys it cannot reconcile it will stop and instruct you to run openclaw doctor first. Do not bypass this; doctor --repair will surface migration steps that prevent corrupted runtime state.
Non-interactive onboarding Two common non-interactive workflows are shown below. These are runnable shell examples.
A typical local onboarding that supplies an Anthropic API key, installs the daemon, and skips optional skill installation:
`text/shell openclaw onboard --non-interactive \ --mode local \ --auth-choice apiKey \ --anthropic-api-key "$ANTHROPICAPIKEY" \ --gateway-port 18789 \ --gateway-bind loopback \ --install-daemon \ --daemon-runtime node \ --skip-skills
If you want to skip provider auth but configure gateway authentication from an environment variable (headless gateway token setup):
```text/shell
export OPENCLAW_GATEWAY_TOKEN="your-token"
openclaw onboard --non-interactive \
--mode local \
--auth-choice skip \
--gateway-auth token \
--gateway-token-ref-env OPENCLAW_GATEWAY_TOKENAuth-profile storage and headless OAuth Auth profiles are stored per-agent at ~/.openclaw/agents/<agentId>/agent/auth-profiles.json. A legacy file ~/.openclaw/credentials/oauth.json is only used as an import source during migration. For server/headless OAuth flows: complete the OAuth handshake on a machine with a browser, then copy that agent's auth-profiles.json into the gateway host (preserve permissions). OnClaw will accept the copied auth-profiles.json for daemon use.
API key handling and provider defaults
Anthropic: onboarding will prompt for ANTHROPICAPIKEY if not present; the key is saved for daemon use and Anthropic is the preferred assistant choice in the wizard.
OpenAI/Codex: existing ~/.codex/auth.json may be reused; Codex-managed credentials stay managed by Codex and will be re-read/refreshed. Onboarding sets agents.defaults.model to openai-codex/gpt-5.4 for Codex OAuth flows and openai/gpt-5.4 for OpenAI API keys when the model is unset or matches openai/ or openai-codex/ patterns.
OPENCODE, Ollama, Vercel AI Gateway, Cloudflare AI Gateway, MiniMax, StepFun, Synthetic/Moonshot/Kimi: onboarding prompts or auto-writes provider-specific defaults (e.g., MiniMax-M2.7).
Storage mode for secrets By default API keys are written as plaintext auth-profile values. To store an environment-backed reference instead, use --secret-input-mode ref and pass keyRef: { source: "env", provider: "default", id: "OPENAIAPIKEY" } (CLI flags expose env-ref helpers like --gateway-token-ref-env shown above).
Creating agents non-interactively You can create agents and bindings without the wizard. Example: add an agent named work, set a workspace and model, bind WhatsApp business, and print machine-readable JSON:
`text/shell openclaw agents add work \ --workspace ~/.openclaw/workspace-work \ --model openai/gpt-5.4 \ --bind whatsapp:biz \ --non-interactive \ --json
Troubleshooting checklist
- If onboarding aborts with a legacy/invalid-key error: run openclaw doctor, then retry.
- Inspect ~/.openclaw/openclaw.json for the new config and ~/.openclaw/agents/<id>/agent/auth-profiles.json for credentials.
- For headless OAuth, ensure file ownership and mode allow the gateway process to read auth-profiles.json.
- If a model check warns about missing auth, either provide the provider key or choose Skip during onboarding and configure auth later.
Follow this cookbook to perform headless installs, audit produced files, and avoid accidental data loss during resets.Bootstrapping Agent Personas and Safe Defaults
Why workspace templates matter
Workspace templates are plain files the Gateway reads to shape an agent’s behavior, identity, and local environment. They provide the durable, human-editable signals the Gateway uses to bootstrap agent personas, schedule thin background tasks, and preserve continuity across restarts. The canonical workspace folder is ~/.openclaw/workspace — create it on a host with:
mkdir -p ~/.openclaw/workspaceTreat these rules as non-negotiable safety defaults: never store secrets or full directory dumps in workspace files; avoid issuing destructive commands from template-driven runs; and never send half‑baked replies to external messaging surfaces. Prefer the runtime-provided startup context over re-reading files manually; only surface file contents when explicitly asked.
What each template does and how to author it
AGENTS.md — Human-facing bootstrap instructions and defaults for agents in this workspace. Use it to document intended startup behavior, allowed tool usage, and memory policies. The Gateway reads this for bootstrapping; do not embed secrets. Keep policies explicit about destructive actions and approvals.
AGENTS.md template behavior — Startup tasks declared here run at session start. Favor runtime context values rather than reloading files yourself. If a startup task must send a message, invoke the message tool and then issue the exact silent token NOREPLY (case-insensitive: NOREPLY / no_reply) so the Gateway will not deliver intermediate text to external channels.
HEARTBEAT.md — Controls periodic checks or recurring light tasks. An empty HEARTBEAT.md disables heartbeats. Add single-line task descriptions or scripts that the Gateway will schedule; keep heavy work out of heartbeat jobs.
IDENTITY — A short YAML/plain file capturing name, creature type/vibe, emoji, and avatar. Store avatar images under the workspace (e.g., avatars/openclaw.png) and reference workspace-relative paths. This keeps avatars portable and avoids leaking host absolute paths.
SOUL.md — The personality and behavioral constraints: helpfulness, caution with external effects, when to escalate, and continuity rules. Update SOUL.md whenever the agent’s personality or permitted behaviors change.
TOOLS.md — Environment-specific notes: local camera names, SSH hosts, speaker/TTS prefs. Keep these out of shared skills; they are for local context only and may contain sensitive infra details.
USER — Editable template for the human the agent assists. Include Pronouns (optional), Timezone, and a living Notes/Context section. The Notes/Context field is explicitly intended to evolve: record projects, preferences, annoyances, and temporal cues — but respect privacy: collect information to help, not to build a dossier.
Follow these conventions and the Gateway will bootstrap agents predictably, preserve continuity, and avoid common privacy and safety mistakes.
Create and initialize your workspace
Create a stable workspace directory under your home and populate it with the canonical templates so the Gateway can bootstrap agents, persona guidance, and tool rosters.
Start by creating the workspace directory (idempotent — safe to run multiple times). On POSIX shells run:
mkdir -p ~/.openclaw/workspaceNext copy the reference templates into the workspace. The commands below expect you are working from a developer checkout where docs/reference/templates/ exists. These are plain file copies — if a file already exists they will overwrite it.
cp docs/reference/templates/AGENTS.md ~/.openclaw/workspace/AGENTS.md
cp docs/reference/templates/SOUL.md ~/.openclaw/workspace/SOUL.md
cp docs/reference/templates/TOOLS.md ~/.openclaw/workspace/TOOLS.mdIf you prefer a ready-made personal-assistant roster instead of the generic AGENTS.md, replace it with the provided default:
cp docs/reference/AGENTS.default.md ~/.openclaw/workspace/AGENTS.mdWarning: these cp operations will overwrite existing files without prompting. If you have a workspace already, back it up first (tar, rsync, or git). Never store credentials or secret keys in the workspace files — the workspace is intended for persona, skill descriptions, and tool metadata only.
To keep a local history and a simple backup, initialize a git repository and commit the templates:
cd ~/.openclaw/workspace
git init
git add AGENTS.md SOUL.md TOOLS.md
git commit -m "Add Clawd workspace"
## Optional: add a private remote and pushNote: Git requires user.name and user.email; set them locally if needed (git config user.name "..."). Avoid pushing workspace repositories to public remotes if they contain sensitive pointers or proprietary prompts.
After these steps the Gateway and CLI will find workspace-based skills, agent rosters, and tool manifests under ~/.openclaw/workspace. Customize AGENTS.md and SOUL.md to shape system prompts and agent identity; the next chapter shows the config snippets and runtime behaviors that read these files.
Configuring a custom workspace path
Point your agent to a different workspace when you need per-project isolation, larger disk allocations, or to share a workspace path outside the default user folder. OpenClaw reads the workspace path from the agent configuration; you can override the default by setting agents.defaults.workspace to a path of your choice. The example below is a configuration fragment (treat it as JSON configuration) you can save into your agent config via whatever configuration mechanism you use (CLI, interactive wizard, or config file). Where to save it depends on your deployment; see the configuration chapter for exact locations and CLI commands.
Save this snippet into your agent config (configuration is strict JSON):
{
"agents": {
"defaults": {
"workspace": "~/.openclaw/workspace"
}
}
}Notes and operational details
Expansion semantics: the tilde (~) is supported and expanded to the invoking user's home directory by OpenClaw when resolving workspace paths. Use absolute paths if you need an account-agnostic location (for example, a system service account), or a bind-mounted path in containerized deployments.
Placement: depending on how you manage OpenClaw config (openclaw config set, a config file supplied to the Gateway, or workspace-scoped bootstrap files), put this JSON fragment in the appropriate agent configuration payload. The configuration chapter documents the exact commands and file locations for CLI and daemon-managed setups.
Safety: keep secrets and long-lived credentials out of workspace files. Workspaces are intended for persona files, skills, tools metadata, session transcripts, and other workspace artifacts. Use SecretRef/auth-profiles for credentials.
Effects at runtime: changing agents.defaults.workspace affects where the Gateway creates agent directories, session transcripts, and skill/bootstrap files for agents that inherit defaults. Existing agents with explicit per-agent workspaces are not modified unless you update their individual config.
For full examples of per-agent overrides, workspace templates, and bootstrap workflows, consult the chapter on Agents and Session and the templates chapter.
AGENTS.md: startup behavior and memory rules
Treat the agent workspace as a source of durable facts, not as a live datastore to be polled by every agent startup. At process start the Gateway injects runtime-provided startup context into the agent: model choices, auth profile hints, workspace identity, and any recent heartbeat/last-check data it manages. Agent code and skills should prefer that injected context instead of re-reading workspace files unconditionally. Re-reading files at startup risks stale or conflicting state and can duplicate effort the Gateway already performs.
For simple metadata such as when external checks last ran, store a compact JSON map of timestamps. The Gateway and agent code read numeric epoch seconds and nulls consistently; null indicates "never checked." The example below is a copy-paste-safe JSON snippet showing the canonical shape for lastChecks metadata. Treat this as configuration persisted in the workspace.
{
"lastChecks": {
"email": 1703275200,
"calendar": 1703260800,
"weather": null
}
}Notes on the example
Values are integer epoch seconds (UTC). Use whole seconds for portability.
null means "no recorded check" or "uninitialized."
Keep this object small and topic-keyed; avoid embedding large state blobs here.
When to update memory
Do not write to workspace files on a periodic startup probe. Only persist updates when the agent is explicitly asked to "remember" something, or when an intentional task (a scheduled job or manual action) produces new facts.
If a user or skill requests a memory update (for example, "remember my timezone"), write that datum to the appropriate per-topic memory file (the workspace supports daily vs long-term memory placement). Choose daily for frequently changing info and long-term for stable identity facts.
Operational guidance checklist
Prefer Gateway-supplied startup context; read files only when an agent explicitly needs them.
On "remember" commands, persist only the minimal needed fields into the correct memory file.
Never store secrets, API keys, or private credentials in workspace template files or these metadata JSON blobs.
BOOT, BOOTSTRAP, and HEARTBEAT: startup and periodic tasks
Start the Gateway with explicit, minimal tasks that prepare the agent runtime and any external integrations it needs before accepting user traffic. Use the startup file to enumerate short, deterministic actions—service checks, cache priming, identity discovery—rather than long-running or interactive scripts. If a startup task must send an external message, call the message tool and immediately emit the exact silent token NOREPLY (or noreply) as the agent’s follow-up. That token is a contract: it tells the runtime that the message was a side-effect and must not become a user-facing reply. Failing to follow this pattern can leak operational chatter into channels.
A bootstrap file is different: treat it as a one-time, interactive discovery flow. Create the file to instruct the operator or a guided interactive agent run to discover identities, register provider credentials, or complete interactive pairing. Once the interactive flow completes and the workspace records the discovered identity, delete the bootstrap file. Do not leave bootstrap artifacts in the workspace; they can contain ephemeral secrets or procedural steps you do not want re-run automatically.
Heartbeats control periodic checks. Leaving the heartbeat file empty disables periodic API calls—this is the recommended safe default for most workspaces. Add only targeted, idempotent checks (calendar poll, unread-mail count, credential refresh probes) and keep tasks brief and well-scoped. Avoid heartbeat tasks that post messages into external channels unless they follow the NO_REPLY pattern described above.
Warning: Do not store long-lived secrets in startup, bootstrap, or heartbeat files. Use SecretRef or auth-profile mechanisms for credentials; keep workspace templates clipboard-safe.
The following canonical heartbeat template is a minimal instructional placeholder (text file):
# Keep this file empty (or with only comments) to skip heartbeat API calls.
## Add tasks below when you want the agent to check something periodically.When authoring these files:
Prefer idempotent operations.
Keep startup tasks short to reduce startup latency.
Delete bootstrap files after use to avoid accidental re-execution.
IDENTITY and SOUL: persona, avatar, and behavior constraints
An agent’s IDENTITY and SOUL are the human-facing declarations that tell OpenClaw and the people who interact with it who the agent is and how it should behave. Capture a clear name, short “vibe” or role, and a stable avatar in the IDENTITY entry so the agent is recognizable across UIs and sessions. Use a workspace-relative avatar path (for example: avatars/openclaw.png) rather than an absolute filesystem location. Relative paths keep the workspace portable, make the avatar easy to commit to the workspace repository, and avoid breakage when a workspace is moved between machines or restored from backup.
Keep these practical rules in mind for IDENTITY:
Include a concise display name and a one-line descriptor (role/vibe).
Prefer emoji only as an accent; do not rely on emoji for critical identification.
Use workspace-relative avatar paths (avatars/<file>) so the image travels with the workspace and works in replicated environments.
SOUL.md encodes the agent’s behavioral constraints and continuity expectations. Think of it as the character sheet plus safety rules the Gateway injects into system prompt assembly. SOUL.md should be short, explicit, and evolve as the agent’s goals or risk posture change. Write actionable, plain-language rules you want enforced during generation and tool usage.
Example guideline fragments you might include in SOUL.md (samples, not a format prescription):
Be genuinely helpful: prefer clear, complete answers over quick guesses. If uncertain, state uncertainty and offer next steps.
Be resourceful before asking: try safe, low-risk checks or clarifying questions rather than immediately invoking external actions.
Avoid half-baked replies to external channels: do not send tentative or placeholder responses to users; finalize wording and intent first.
Handle private data conservatively: never assemble or retain dossiers of sensitive user information; redact or refuse when appropriate.
External actions policy: require explicit confirmation for actions that modify external state, and prefer read-only probes where possible.
Repeat the privacy warning in both IDENTITY and SOUL.md if necessary: keep secrets out of workspace files and do not hard-code credentials. When the agent’s personality, risk tolerance, or remit changes, update SOUL.md so runtime behavior and audits reflect the new intent.
TOOLS.md: recording local environment details safely
Keep small, local facts about the runtime environment out of your shared skill content. A short plain-text “tools” document is the right place to record device names, host IPs, preferred voices, and other environment-specific mappings so teammates and your future self can understand how an agent should interact with local hardware or services without hardcoding those details into skills or source-controlled credentials.
Treat the file as human-readable reference, not machine configuration. Use a concise key → value style, one line per resource, and a brief purpose note where helpful. Typical entries you’ll want to document:
Cameras: logical name → physical location and capability (field-of-view, motion triggers). Helpful when skills reference “front-door” rather than a model-specific identifier.
SSH hosts: short name → address + local user. Record reachability notes (VPN/Tailscale required) but never paste private keys or passwords.
TTS mappings: preferred voice name and default output device per room or speaker group.
Other local devices: HomeKit/Chromecast names, printer queues, speaker groups.
Never commit secrets (passwords, private keys, API tokens) into this file. If an agent needs credentials, point to a SecretRef or to the host’s approvals mechanism and put only a non-sensitive locator in TOOLS.md. Add workspace-level.gitignore rules to keep any accidental local-only config out of repos.
An example TOOLS.md entry (illustrative plain text) looks like this:
### Cameras
- living-room → Main area, 180° wide angle
- front-door → Entrance, motion-triggered
#### SSH
- home-server → 192.168.1.100, user: admin
#### TTS
- Preferred voice: "Nova" (warm, slightly British)
- Default speaker: Kitchen HomePodWhen writing these lines, prefer stable logical names (living-room, front-door) over vendor-specific IDs. If a skill needs to reference a locator, have it read the logical name and resolve to a SecretRef or runtime lookup rather than embedding an IP or credential. That keeps workspaces portable and reduces the risk of leaking private infrastructure details.
USER template: capturing human context respectfully
Capture just enough about the human on the other end to make the agent helpful without hoarding personal detail. A small, structured USER template is a workspace-first document that lets agents and teammates reference short-lived, relevant human context: preferred contact snippets, timezone for scheduling, and a living Notes/Context block that records priorities, preferences, and small personality cues.
Keep the template minimal. Suggested fields:
name (display name or preferred form)
contact (email or short phone hint; avoid full credentials)
pronouns (optional) — record preferred pronouns when helpful for natural, respectful language.
timezone — canonical tz like "America/Los_Angeles" or an offset; use this for scheduling, phrasing (“this morning/tonight”), and avoiding time-based mistakes.
Notes/Context — a short, editable free-text area for what the person cares about, current projects, common annoyances, preferred tone, and any accessibility or scheduling constraints.
Notes/Context is a living record. Treat it as a single-paragraph updateable journal of practical cues rather than a biography. Keep each entry focused and dated if useful: Example Notes/Context entry:
2026-03-05: Prefers concise summaries; working on Q2 roadmap (PM lead); allergic to long meeting threads; prefers async updates by email; avoids calls after 18:00 local.
Update cadence: update Notes after a meaningful change (role, contact, major project shift) or at least quarterly for active collaborators. Small tweaks are fine; avoid large historical dumps.
Privacy rules — respect and limit collection. Only store facts that directly help the agent behave better. Do not store passwords, full payment data, or exhaustive life history. If you must record sensitive items (medical needs, legal constraints), restrict access to that workspace and annotate why the info is required and who may read it.
When in doubt, err on the side of relevance: collect to help, not to build a dossier.
Authoring checklist and common pitfalls
Start by treating a workspace as both the agent's identity and its operational contract: files you place here determine startup behavior, periodic work, persona text, and local-only notes. Follow the checklist below to create, initialize, and audit a workspace safely and predictably; each step explains why it matters and what to check if things misbehave.
Create the workspace directory (idempotent). This is a simple, safe operation that ensures the runtime can find your files:
mkdir -p ~/.openclaw/workspaceCopy the canonical templates into the workspace to seed the agent identity and tool notes. These files are the expected entry points the Gateway scans at startup:
cp docs/reference/templates/AGENTS.md ~/.openclaw/workspace/AGENTS.md
cp docs/reference/templates/SOUL.md ~/.openclaw/workspace/SOUL.md
cp docs/reference/templates/TOOLS.md ~/.openclaw/workspace/TOOLS.mdAuthoring checklist (follow in order)
Populate AGENTS.md with the agent id, bootstrap steps, and memory policy. This controls session startup and whether the agent restores persistent session files. Keep session-related file names stable for continuity.
Review SOUL.md (persona and constraints). Use clear, actionable behavior constraints and update this file whenever the persona changes; it’s injected into the system prompt.
Keep TOOLS.md strictly for local environment notes (camera names, SSH hosts, speaker/TTS prefs). Never place credentials or secret keys here; treat TOOLS.md as non-shareable local configuration.
HEARTBEAT.md: leave empty to disable periodic heartbeats. If you add tasks, list only lightweight, idempotent checks—heartbeat runs may execute often.
USER template: store respectful, minimal human context (name, timezone, preferences). Rotate or redact PII regularly; do not store secrets.
File placement and permissions: ensure workspace files are owned by the Gateway user and not world-writable (chmod 700 or 600 as appropriate).
Safety defaults (essential): do not dump directory listings or secrets into chat; never run destructive commands automatically; only final, user-approved replies should be sent to external channels.
Quick audits and troubleshooting
If templates aren’t taking effect, confirm they live in the configured workspace path and that the Gateway was reloaded. Check gateway logs for template parsing errors.
Use filesystem permissions to prevent accidental sharing. If behavior seems stale, restart or trigger a config reload to pick up file edits.